Quick Start — SGS 408
Installation
Step 1
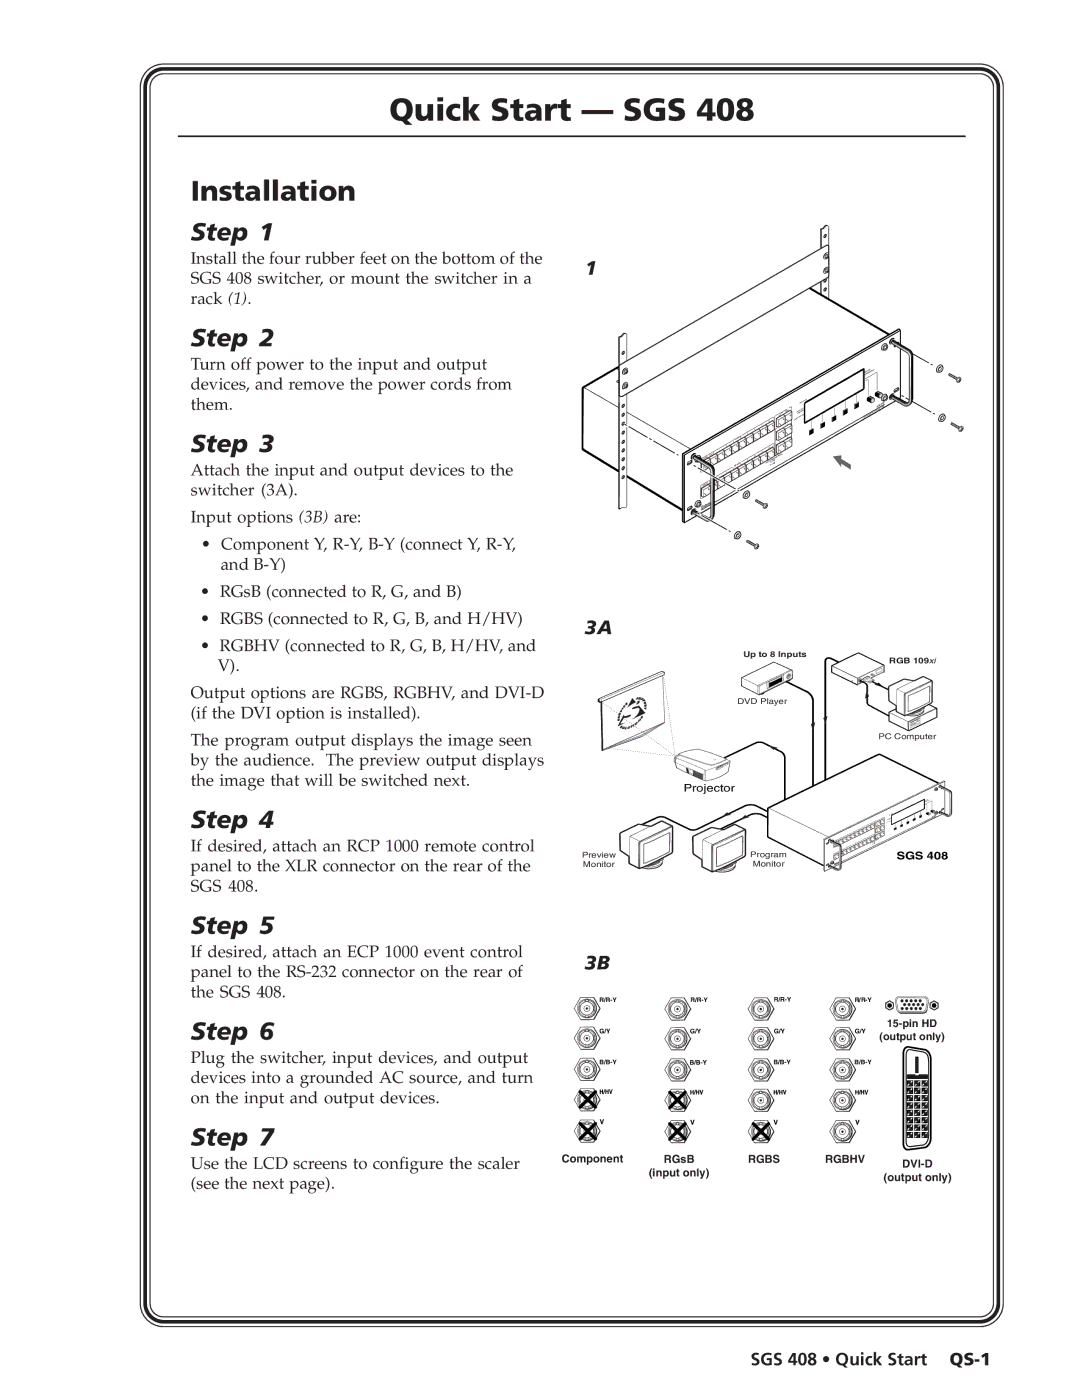
Install the four rubber feet on the bottom of the SGS 408 switcher, or mount the switcher in a rack (1).
Step 2
Turn off power to the input and output devices, and remove the power cords from them.
Step 3
Attach the input and output devices to the switcher (3A).
Input options (3B) are:
•Component Y,
•RGsB (connected to R, G, and B)
•RGBS (connected to R, G, B, and H/HV)
•RGBHV (connected to R, G, B, H/HV, and V).
Output options are RGBS, RGBHV, and
The program output displays the image seen by the audience. The preview output displays the image that will be switched next.
Step 4
If desired, attach an RCP 1000 remote control panel to the XLR connector on the rear of the SGS 408.
1
3A
Preview Monitor
EFFENCSTITION
TRA
SGS | 408 |
|
RAM |
|
PROG |
|
| N |
| ICATIO |
| MMUN |
IEW | P CO |
RC | |
PREV |
|
Up to 8 Inputs
RGB 109xi
DVD Player
PC Computer
Projector
Program | SGS 408 |
Monitor |
|
Step 5
If desired, attach an ECP 1000 event control panel to the
Step 6
Plug the switcher, input devices, and output devices into a grounded AC source, and turn on the input and output devices.
Step 7
Use the LCD screens to configure the scaler (see the next page).
3B
![]()
![]()
![]()
G/Y | G/Y | G/Y | G/Y | (output only) |
|
|
|
| |
|
Component | RGsB | RGBS | RGBHV |
|
|
|
|
|
|
| |
|
|
|
|
|
|
| |||||
|
|
|
|
|
|
| |||||
|
|
|
|
|
|
| |||||
|
|
|
|
|
|
| |||||
|
|
|
|
|
|
| |||||
|
|
|
|
|
|
| |||||
|
|
|
|
|
|
| |||||
|
|
|
|
|
|
| |||||
|
|
|
|
|
|
| |||||
| (input only) |
|
| ||||||||
|
|
| (output only) | ||||||||
|
|
|
| ||||||||
