
5HA-200 RX, 5HA-196 X, 5HA-200 LX specifications
Fagor America has established itself as a prominent player in the commercial kitchen equipment sector, and its models 5HA-200 LX, 5HA-196 X, and 5HA-200 RX are testaments to their commitment to innovation and quality. Each of these models comes equipped with a range of features designed to enhance efficiency, performance, and user experience in various culinary settings.The Fagor 5HA-200 LX is characterized by its robust construction and user-friendly design. One of its key features is the advanced digital control panel, which offers precise temperature regulation and a user-friendly interface for easy operation. Equipped with a powerful heating system, this model ensures rapid cooking times without compromising on food quality. The stainless steel exterior provides durability, while also being easy to clean and maintain. The unit's spacious capacity allows for cooking large quantities of food, making it ideal for restaurants and catering services.
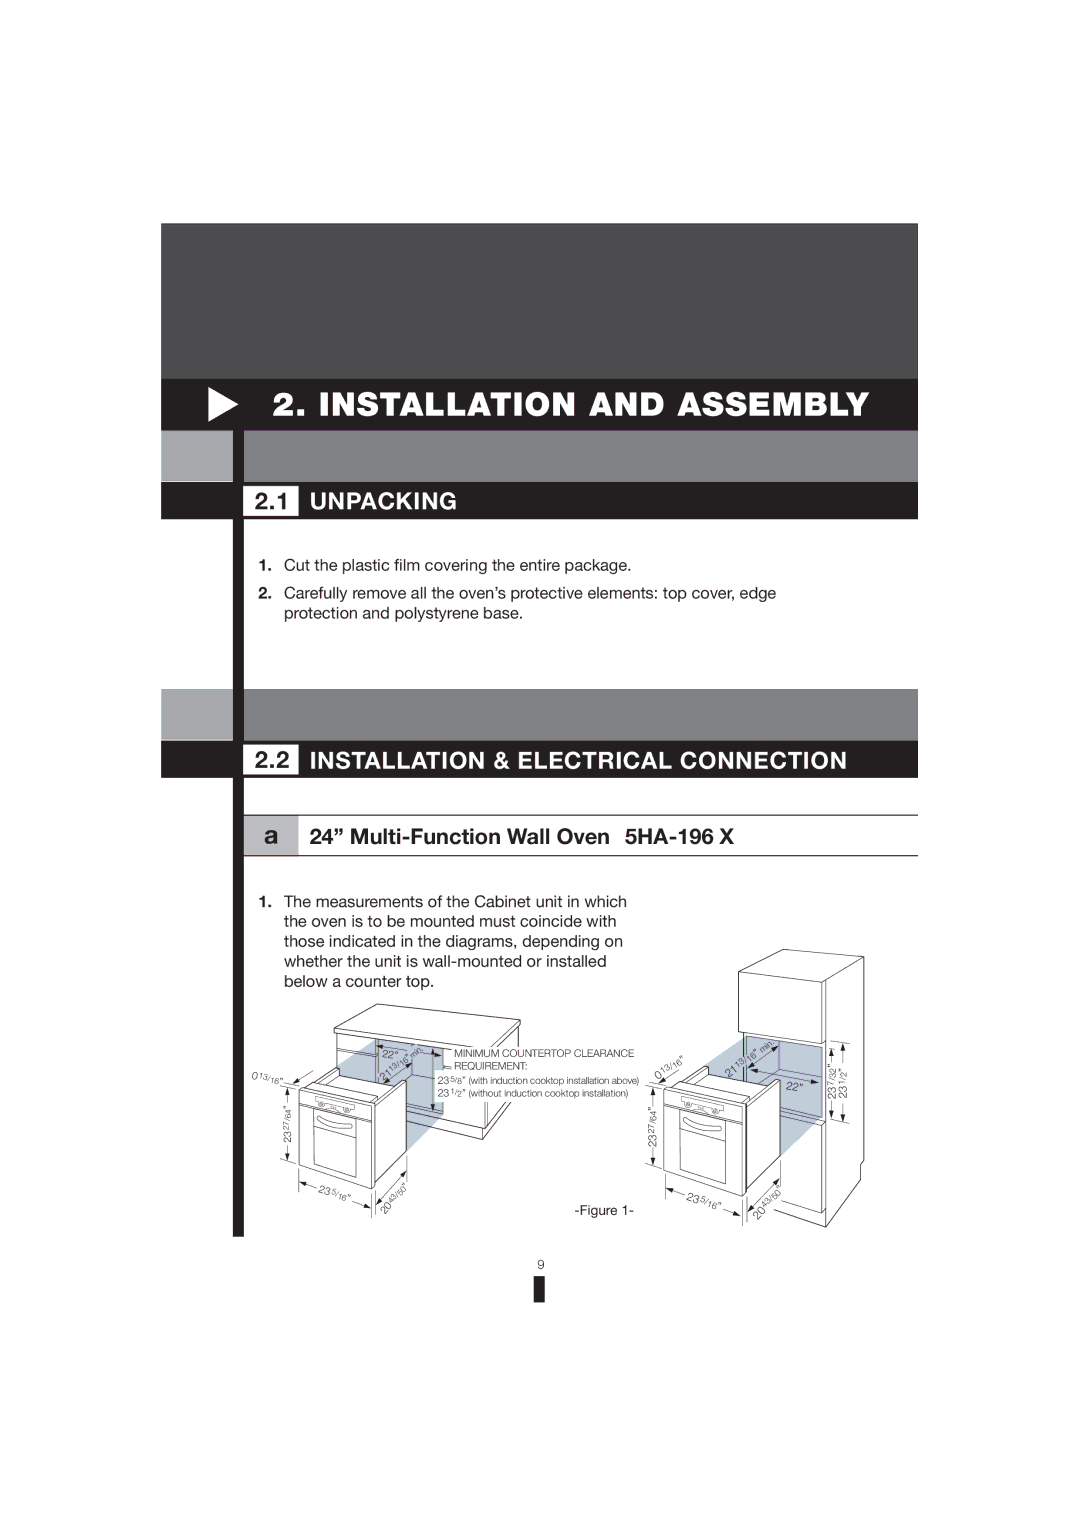
Next in line, the 5HA-196 X boasts similar strengths but is designed with a more compact form factor. This model is particularly well-suited for establishments with limited kitchen space. The touch-control interface allows for quick adjustments, making it efficient in fast-paced environments. Additionally, the 5HA-196 X is equipped with energy-saving technologies that optimize power usage without sacrificing performance. This is an attractive feature for businesses aiming to reduce energy costs while still delivering high-quality meals.
Lastly, the Fagor 5HA-200 RX offers a unique blend of versatility and efficiency. It includes advanced cooking technologies such as steam injection and programmable cooking cycles, allowing chefs to experiment with different cooking techniques and achieve precise results. The integrated self-cleaning feature minimizes downtime and ensures that the appliance remains in peak condition, ready for continuous use in a busy kitchen. The 5HA-200 RX also includes safety features, such as automatic shut-offs and overheating protection, providing peace of mind during operations.
In summary, the Fagor America 5HA-200 LX, 5HA-196 X, and 5HA-200 RX models stand out with their innovative features and robust designs. Whether it's the powerful heating of the LX, the compact efficiency of the X, or the technologically advanced capabilities of the RX, these units cater to the diverse needs of commercial kitchens. With a focus on performance, durability, and user-friendliness, Fagor America continues to set the standard in the kitchen equipment industry.