RUSKA 7350
Users Manual
2.Use the rotary knob located to the right of the display to move the highlight bar to the desired unit.
Note
The highlighted curser initially shows the current unit of measure. When the rotary knob is moved, the current unit remains highlighted in a gray color, and the new unit is highlighted in a light blue color.
3.When the unit desired is highlighted, press the ENTER key on the far right side of the front panel, under the numeric keypad. The display will return to the Main screen with the current units.
The second part of this tutorial uses the Calibrator to generate pressure. The pressure supply must be connected and the test port must be connected to a closed volume, in accordance with Chapter 3, Pneumatic Connections section.
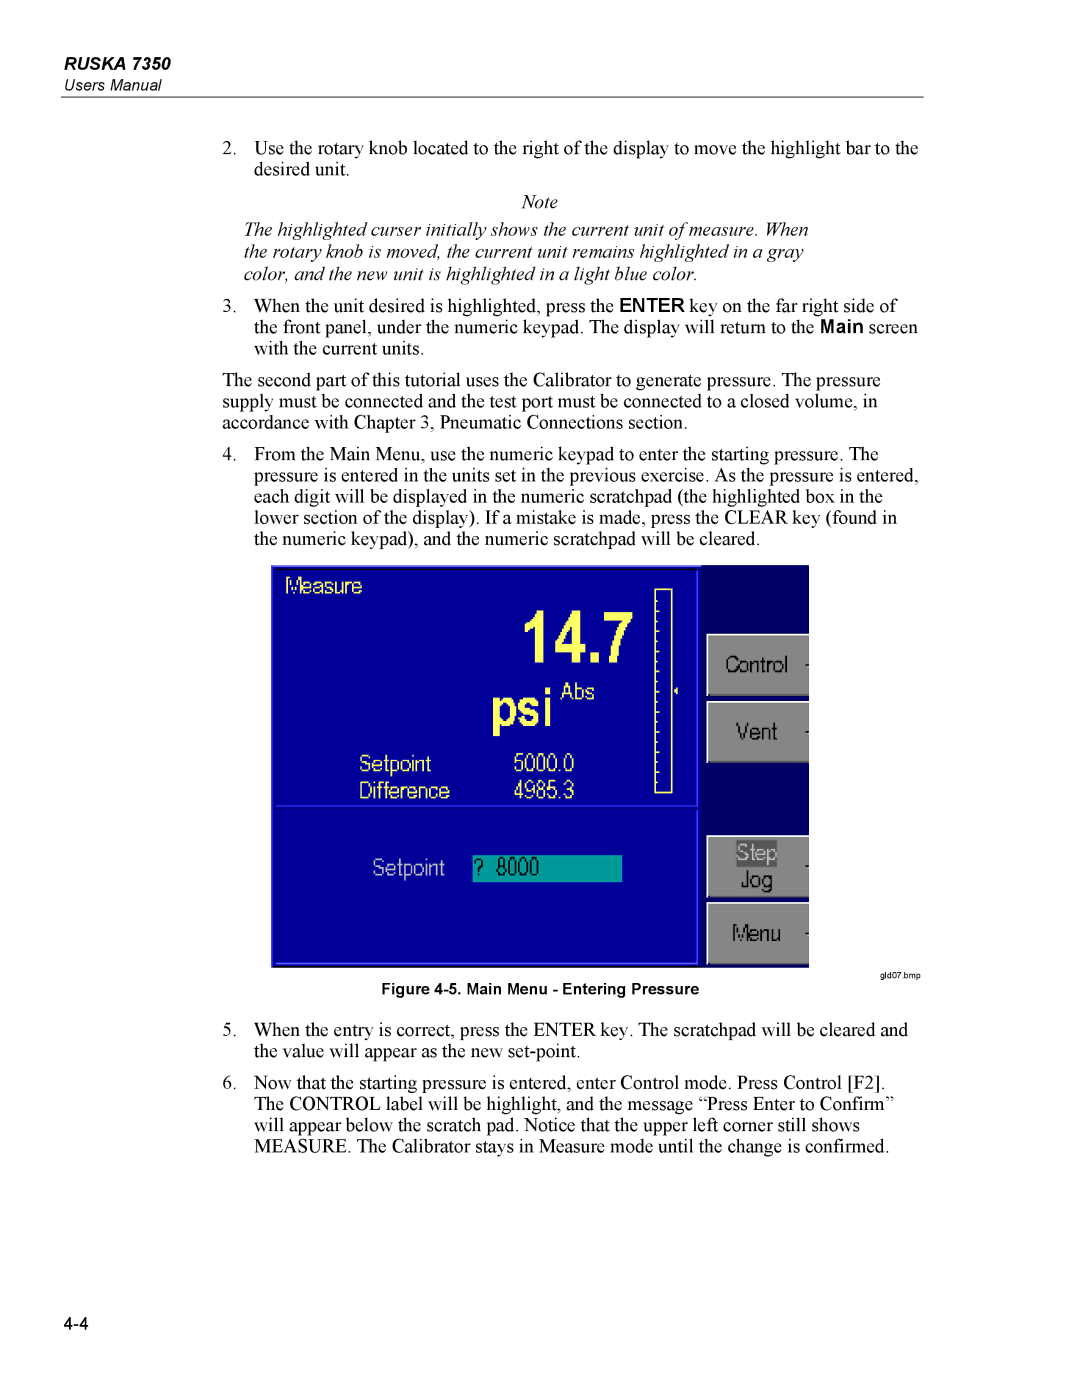
4.From the Main Menu, use the numeric keypad to enter the starting pressure. The pressure is entered in the units set in the previous exercise. As the pressure is entered, each digit will be displayed in the numeric scratchpad (the highlighted box in the lower section of the display). If a mistake is made, press the CLEAR key (found in the numeric keypad), and the numeric scratchpad will be cleared.
gld07.bmp
Figure 4-5. Main Menu - Entering Pressure
5.When the entry is correct, press the ENTER key. The scratchpad will be cleared and the value will appear as the new
6.Now that the starting pressure is entered, enter Control mode. Press Control [F2]. The CONTROL label will be highlight, and the message “Press Enter to Confirm” will appear below the scratch pad. Notice that the upper left corner still shows MEASURE. The Calibrator stays in Measure mode until the change is confirmed.