Manuals
/
Fujitsu
/
Computer Equipment
/
Switch
Fujitsu
MB88121 SERIES, MB91460 SERIES
manual
MB88121 Series MB91460 Series
Models:
MB88121 SERIES
MB91460 SERIES
1
1
73
73
Download
73 pages
7.7 Kb
1
2
3
4
5
6
7
8
Troubleshooting
Install
Can Connector Signals
Default Jumper Settings
Warranty
Power supply configurations
Date Issue
Reset Generation
Connectors
Jumper Settings
Page 1
Image 1
Fujitsu Microelectronics Europe
User Guide
FMEMCU-UG-910017-11
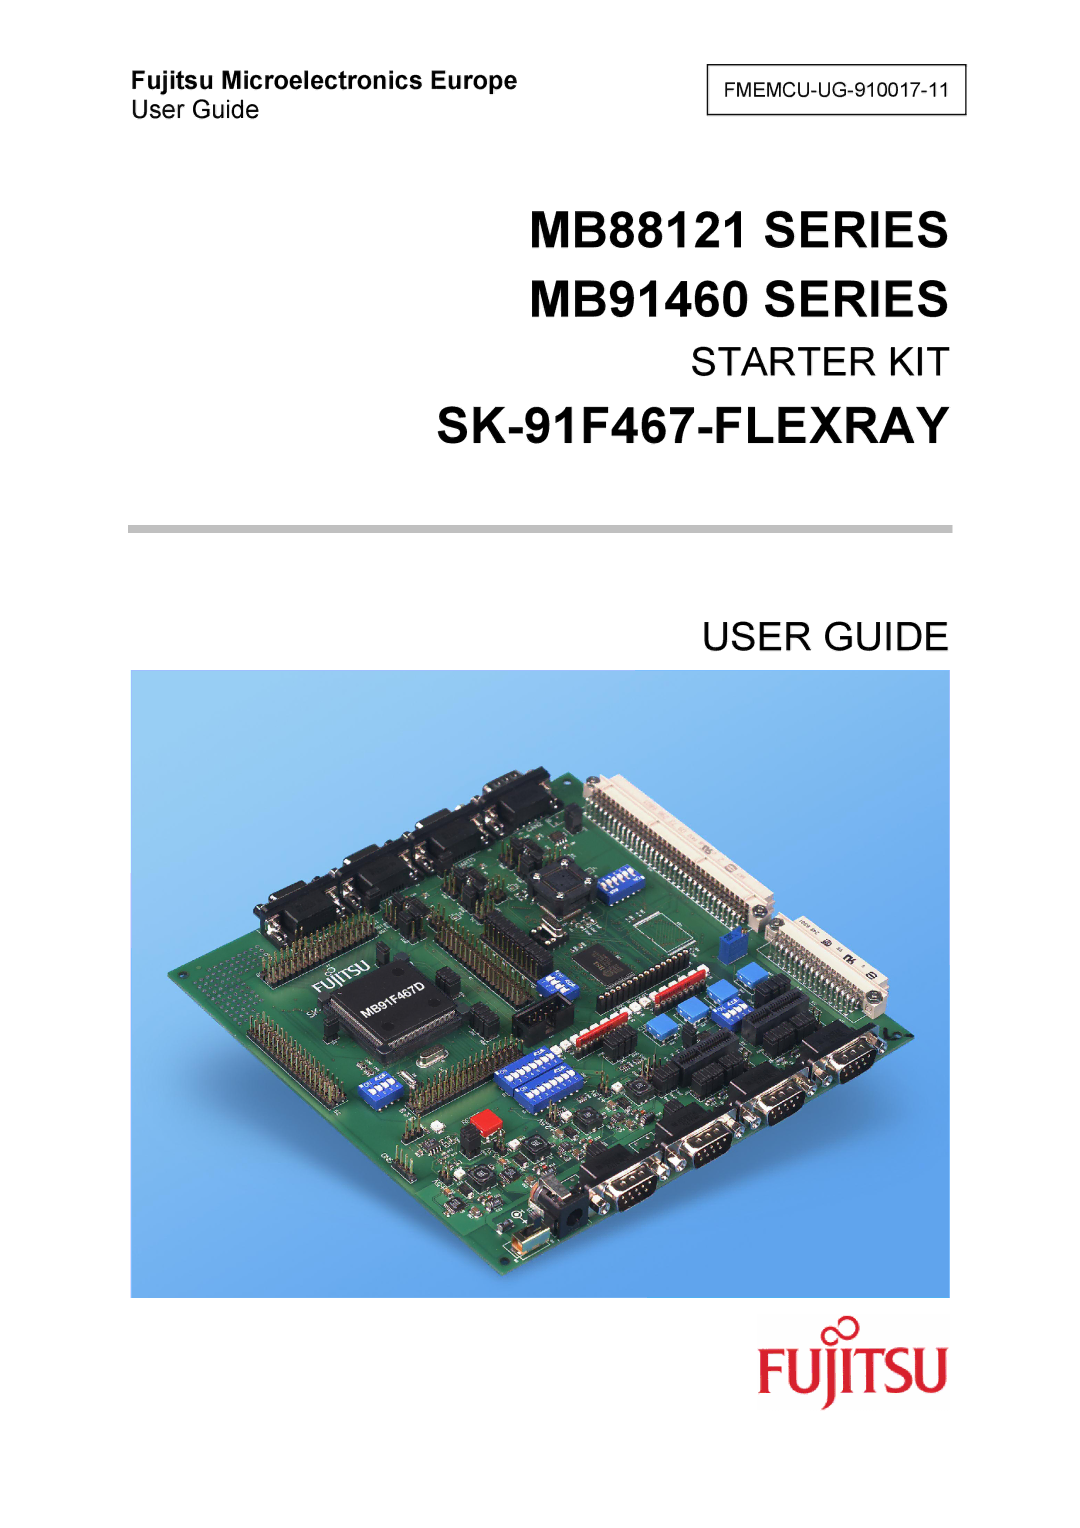
MB88121 SERIES MB91460 SERIES
STARTER KIT
SK-91F467-FLEXRAY
USER GUIDE
Page 1
Page 2
Page 1
Image 1
Page 1
Page 2
Contents
MB88121 Series MB91460 Series
Revision History
Date Issue
No Liability for Consequential Damages
Warranty and Disclaimer
Contents
Connectors
Trouble Shooting SILK-PLOT of the Board
Abstract
Introduction
Features
General Description
External Bus interface Connectors
MCU Operating Mode
On Board Memory
MCU Clocks
Power Supply
MCU Pins
User Buttons
User LEDs and optional LCD
AC plug adapter
Installation
Starter kit status after power on
Jumper Description / Function Type Default
Jumper Settings
UART4 RTS CTS
Jumper settings
Jumper Location
Default Jumper Settings
Softune Workbench start menu location
Software Installation Installation of Softune Workbench
Softune Workbench V6 IDE
DIP switch Setting Logical value
Jumpers and Switches
MCU Operating Mode
MCU Operating-Mode S5
FlexRay CC Operating-Mode S2
FlexRay CC Operating Mode
FlexRay CC SPI Settings
FlexRay CC SPI Settings S1
Power Switch
Switch Setting Description
Jumper Setting Description
Power supply configurations
Regulator Test point Voltage
Voltage Test Points
MCU Analogue Power Supply Voltage
MCU Power Supply Voltage
MCU Power Supply SK-91F467-FLEXRAY
MCU ADC Supply
FlexRay CC Power Supply Voltage at SK-91F467-FLEXRAY
FlexRay CC Supply
JP7
MCU-FlexRay CC Connection at SK-91F467-FLEXRAY
10 MCU-FlexRay CC Connection
Channel a
Channel B
11 FlexRay CH-A Configuration
12 FlexRay CH-B Configuration
13 FT1080 Control Settings
3 FT1080 Control Settings S6
14 FT1080 Connection to MCU
LIN / RS-232 Uart
CAN0 CAN2
15 CAN-MCU connection
Uart
16 UART2 Settings
Uart 4 Flash programming
17 UART4 Settings
18 UART5 Settings
DIP switch Setting Description
User DIP Switch 8 Bit S4
User Push Buttons INT0, INT1, INT2 and ICU0/TIN0
22 Reset Connections
Reset Generation
23 Supply Monitor Settings
By default the Uart reset is disabled
24 Reset Uart Selection
Power Connector
Connectors
Uart / LIN Connector X1, X4
Pin Number Pin Signal Description
FlexRay Connector X2
Can Connector X9, X10
Can Connector Signals
FlexRay Connector Signals
FlexRay Physical Layer Modules
FlexRay Physical Layer Module Connector X3
USER-LEDs and optional LC-Display D1-D16, J6
LED/LCD Signals
MCU Pin Connectors J1-J4
In-Circuit-Programming Connector
In-Circuit Programming Connector
Connector MCU Pins
VG96 X13 Signals
External Bus Connectors X13, X14 4.9.1 VG96ABC DIN 41612
VG48 X14 Signals
Distance between VG-Connectors
2 VG48ABC DIN 41612
Softune Workbench main window
Introduction to Softune Workbench
SK-91F467-FLEXRAY Getting Started
Create a New Project
Project Start-up
Enter the folder myapplication
Edit myapplication.prj
Open Softune Workbench workspace *.wsp
Select Active Configuration Mondebug
Use Active Configuration Mondebuginternal
Softune Workbench Linker Mapping
Start Softune Monitor Debugger via the Debug Command
Use Active configuration Standalone
General Description
Softune Workbench Monitor Debugger
User LEDs
U1, MCU MB91F467DA DIP switch S5, default all OFF
SWB debugging window
Basic Debugger Features
Use the button INT0 on the SK-91F467-xxx for Abort function
Advanced Monitor Debugger Features
Example
SK-91F467-FLEXRAY Getting Started
Memory Map of Softune Workbench Monitor debugger
Memory Configuration for User Applications
Memory Type Used for Areas Sections
0x0080.0000 0x009F.FFFF
Checklist for project configuration
Programming internal Flash of MB91F467DA series
Flash Programming
FMEMCU-UG-910017-11 Fujitsu Microelectronics Europe GmbH
FME Flash Programmer output message window
Trouble shooting
Trouble shooting
Top Side
Silk-Plot of the Board
Board Layout Bottom Side
Bottom Side
SK-91F467-FLEXRAY
PCB History
History PCB
Related Products
Appendix
Information on the WWW
Tables
Trouble shooting History PCB
Figures
Usart
Abbreviations
Top
Page
Image
Contents