1. INSTALLATION
1.4.2Installation using the transducer tank DS-660
8
7
6
1615
1312 11
| 5 |
|
|
| 2 |
|
|
Hull | 4 | 1 | 10 9 |
|
|
|
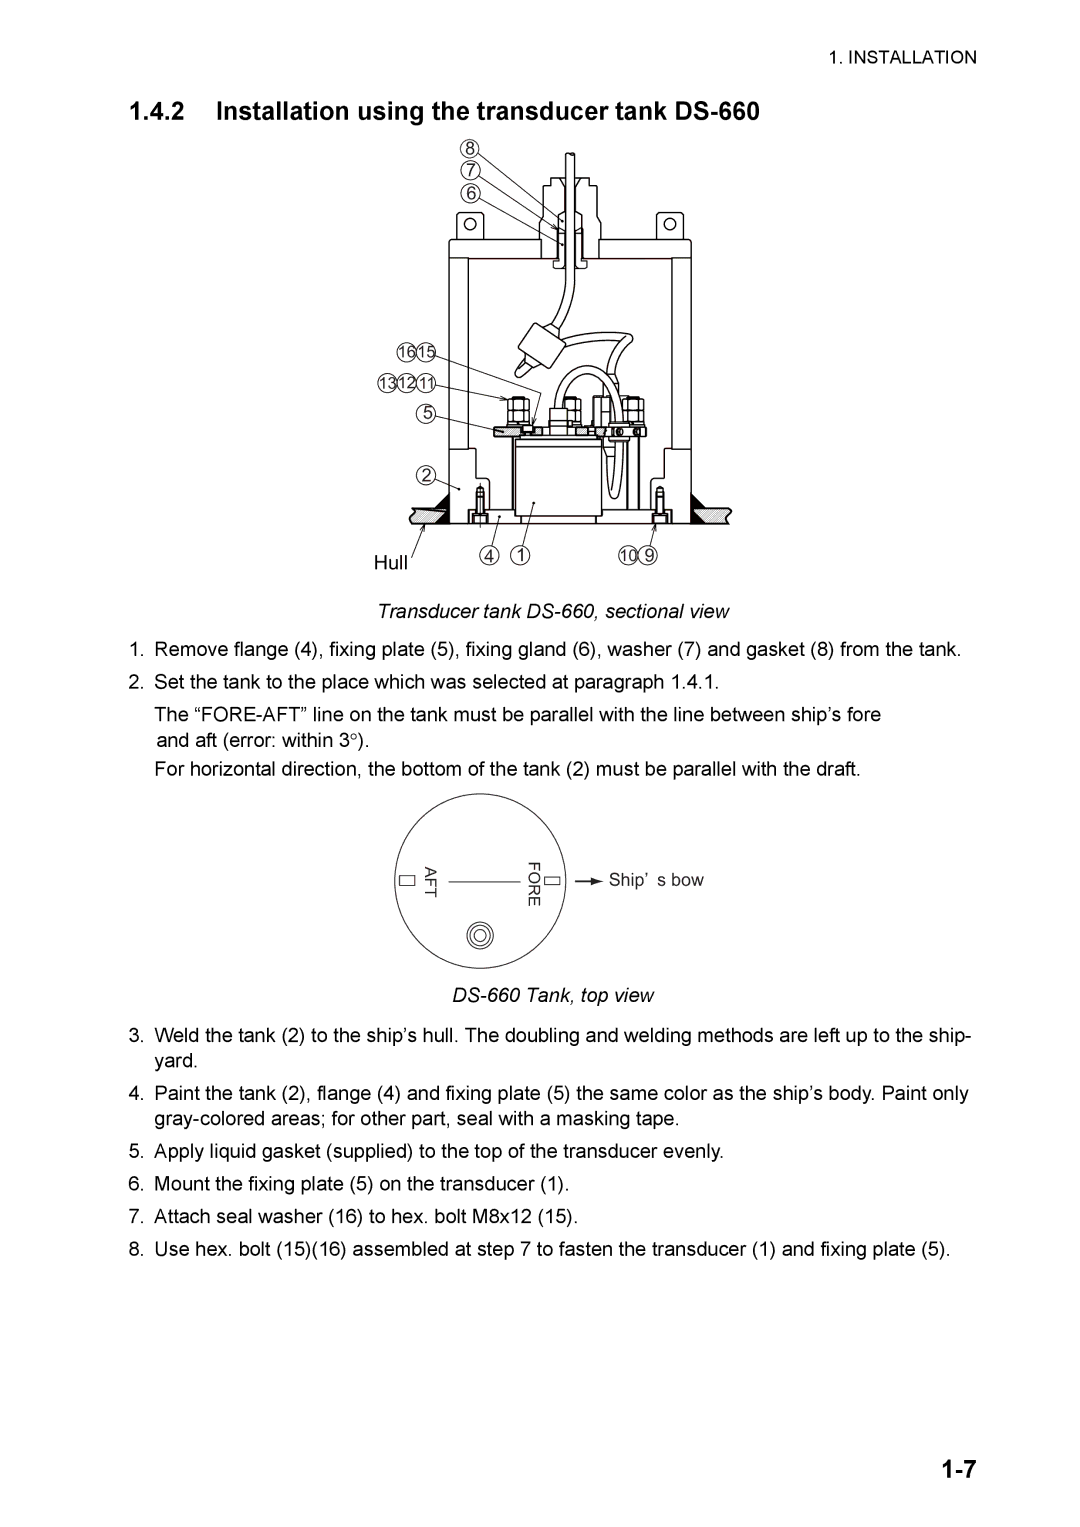
Transducer tank DS-660, sectional view
1.Remove flange (4), fixing plate (5), fixing gland (6), washer (7) and gasket (8) from the tank.
2.Set the tank to the place which was selected at paragraph 1.4.1.
The
For horizontal direction, the bottom of the tank (2) must be parallel with the draft.
AFT | FORE |
![]() Ship’ s bow
Ship’ s bow
DS-660 Tank, top view
3.Weld the tank (2) to the ship’s hull. The doubling and welding methods are left up to the ship- yard.
4.Paint the tank (2), flange (4) and fixing plate (5) the same color as the ship’s body. Paint only
5.Apply liquid gasket (supplied) to the top of the transducer evenly.
6.Mount the fixing plate (5) on the transducer (1).
7.Attach seal washer (16) to hex. bolt M8x12 (15).
8.Use hex. bolt (15)(16) assembled at step 7 to fasten the transducer (1) and fixing plate (5).