1. INSTALLATION
How to change orientation of the front cover of DS-605
The front cover of the
Note: Set the front cover so the FURUNO logo on the cover is right side up. The drain hole must be down.
1.Remove eight screws from two hinges.
2.Remove two screws from the latch.
3.Remove the hinges and the hidden lids for fixing hole of latch in consideration of the opening direction.The hidden lids for fixing hole of latch are taped on each side.
4.Orient the front cover as desired and fix the hinges and latch.
Hinge
Latch
Screws for hinge
![]() Hidden lids for fixing hole of latch (four sides)
Hidden lids for fixing hole of latch (four sides)
1.7Remote Controller RD-501/Dimmer Controller RD-502 (option)
The optional remote controller
Note: Before you fasten the display unit to the cutout, first connect the cables referring to chapter 2.
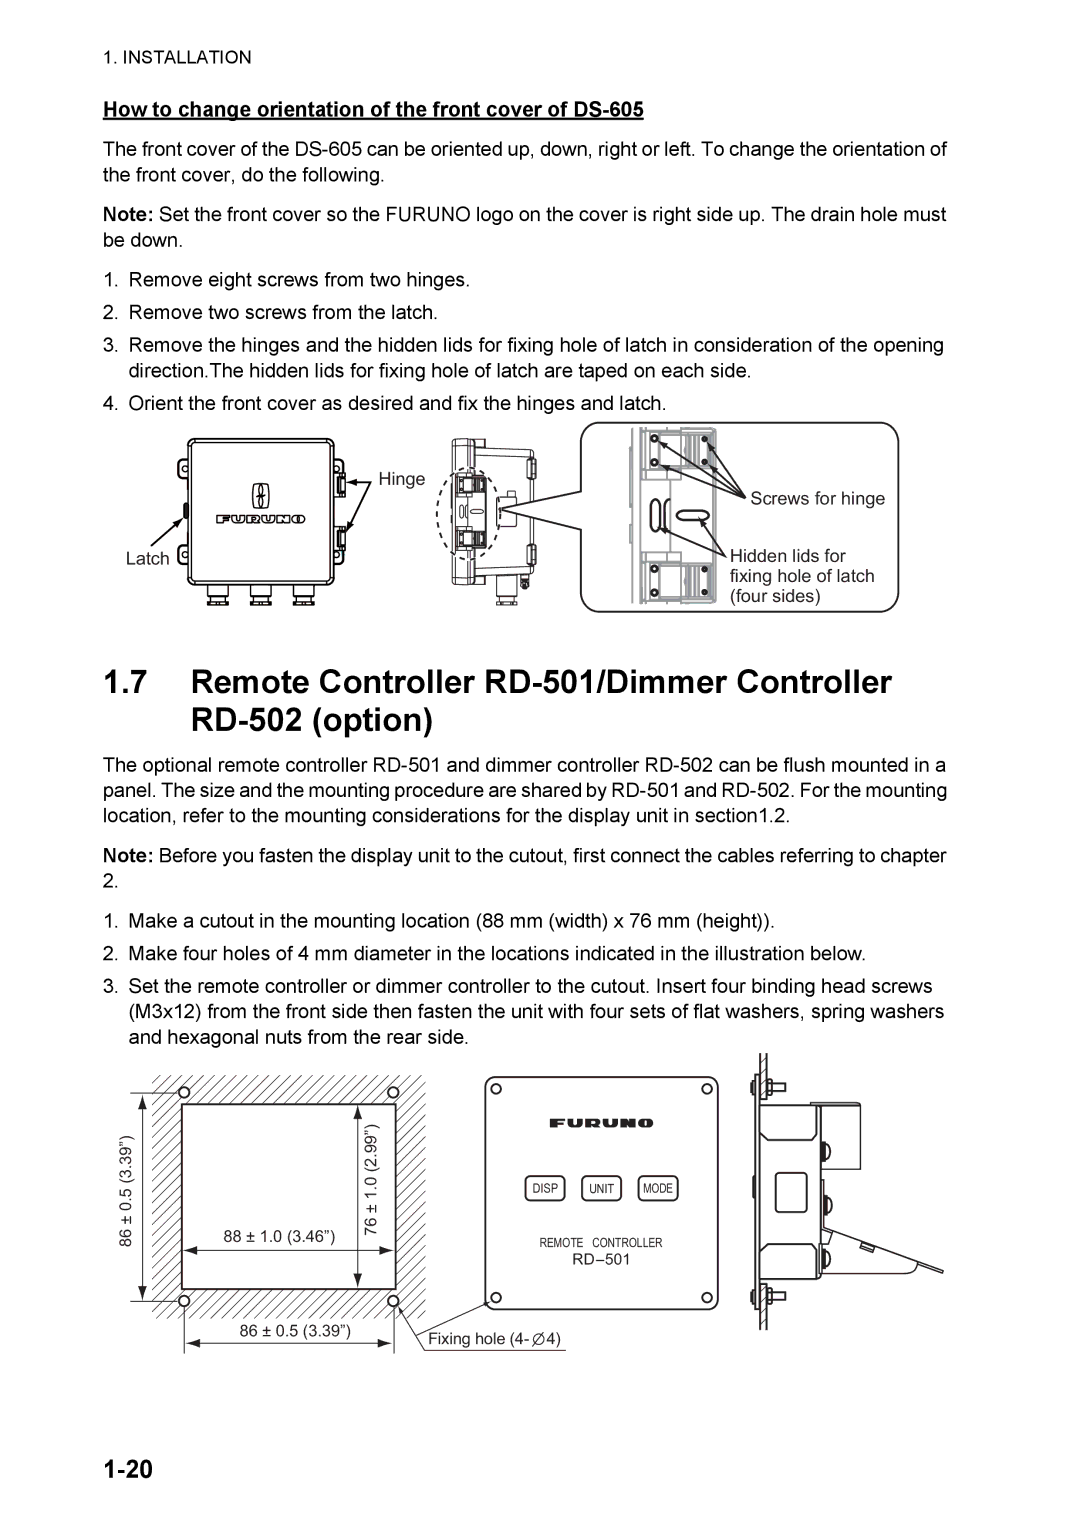
1.Make a cutout in the mounting location (88 mm (width) x 76 mm (height)).
2.Make four holes of 4 mm diameter in the locations indicated in the illustration below.
3.Set the remote controller or dimmer controller to the cutout. Insert four binding head screws (M3x12) from the front side then fasten the unit with four sets of flat washers, spring washers and hexagonal nuts from the rear side.
86 ± 0.5 (3.39”)
88 ± 1.0 (3.46”)
76 ± 1.0 (2.99”)
DISP UNIT MODE
REMOTE CONTROLLER
86 ± 0.5 (3.39”)
Fixing hole (4- ![]() 4)
4)