4. INSTALLATION
Flush mounting
The display unit can be installed flush mounted in a console or panel by using the optional flush mount kit.
(For |
|
|
|
|
Type: | Code No.: |
| Remarks | |
Name | Type | Code No. | Qty | |
Mounting metal | 1 |
| ||
5X20 | 6 |
| ||
Hex. bolt | M8x15 | 2 |
| |
Spring washer | M8 | 2 |
| |
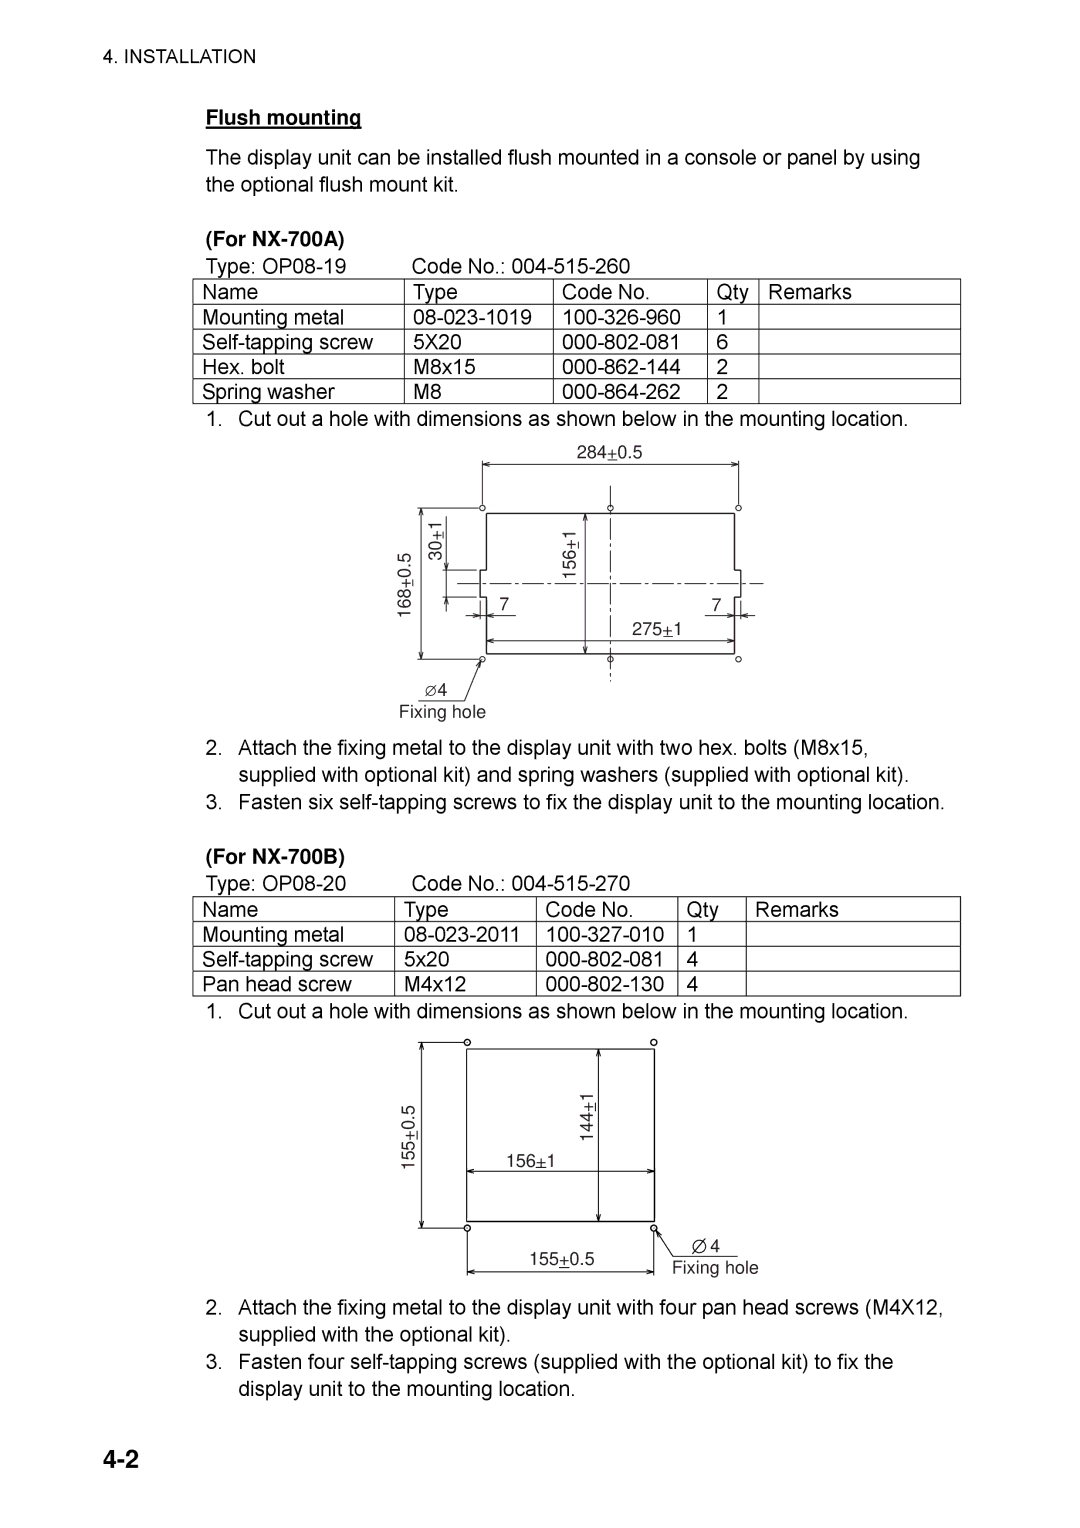
1. Cut out a hole with dimensions as shown below in the mounting location. 284+0.5
168+0.5 | 30+1 |
7
156+1![]()
![]()
275+1
7
![]() 4
4
Fixing hole
2.Attach the fixing metal to the display unit with two hex. bolts (M8x15, supplied with optional kit) and spring washers (supplied with optional kit).
3.Fasten six
(For |
|
|
|
|
Type: | Code No.: |
|
| |
Name | Type | Code No. | Qty | Remarks |
Mounting metal | 1 |
| ||
5x20 | 4 |
| ||
Pan head screw | M4x12 | 4 |
| |
1. Cut out a hole with dimensions as shown below in the mounting location.
155+0.5
144+1
156+1
155+0.5 | 4 | |
Fixing hole | ||
|
2.Attach the fixing metal to the display unit with four pan head screws (M4X12, supplied with the optional kit).
3.Fasten four
