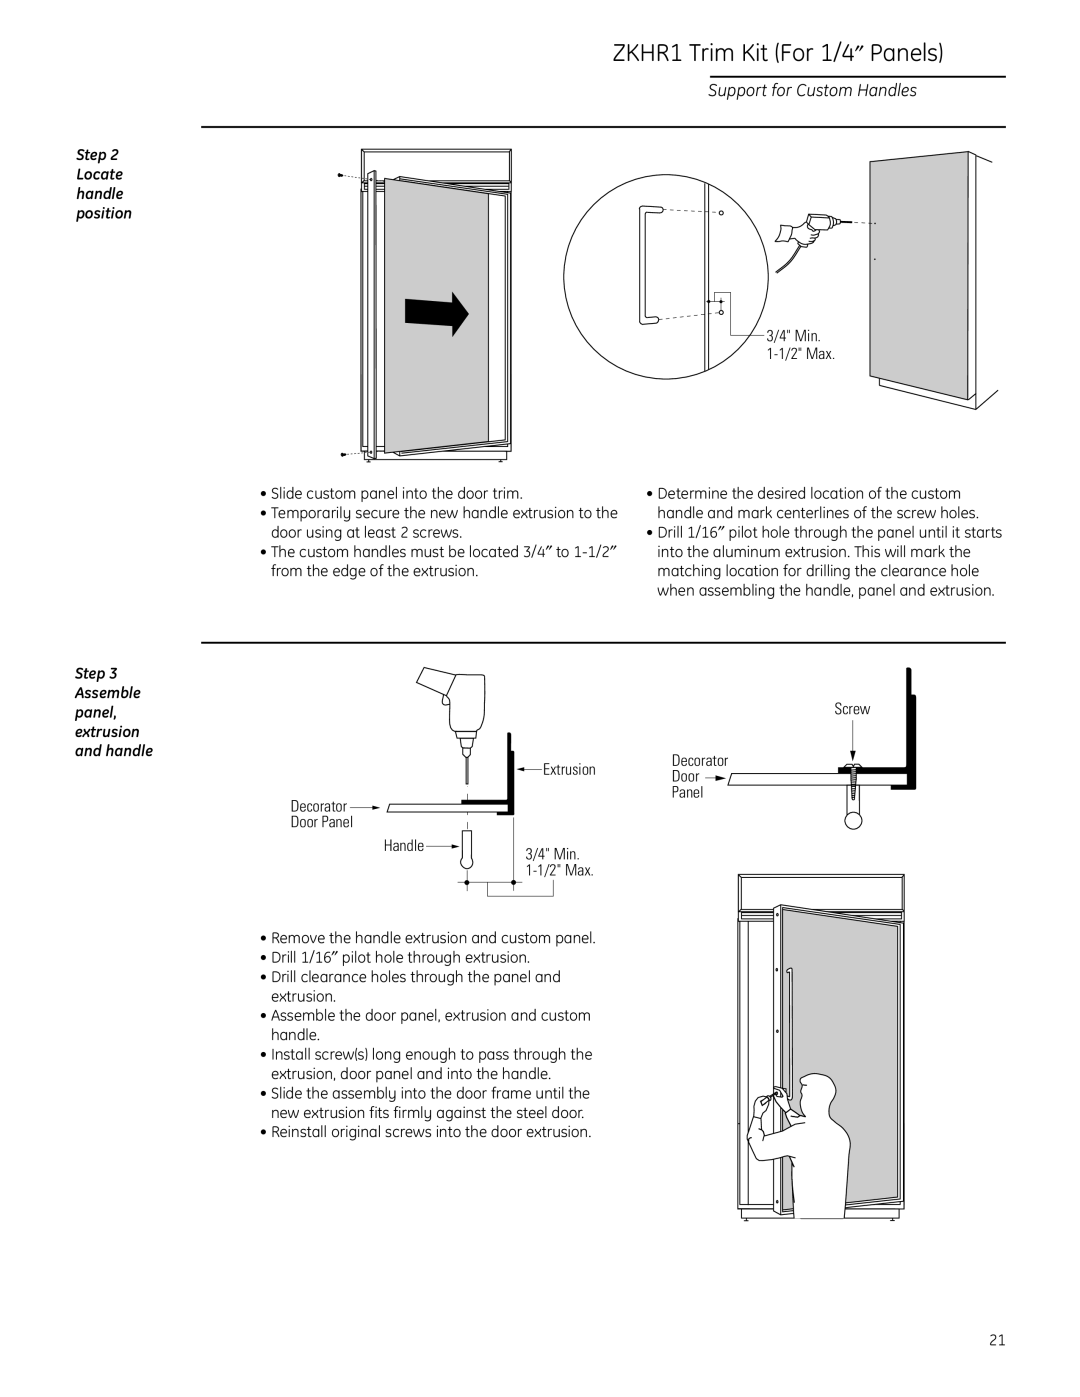
Step 2 Locate handle position
ZKHR1 Trim Kit (For 1/4″ Panels)
Support for Custom Handles
3/4" Min.
• Slide custom panel into the door trim. | • Determine the desired location of the custom |
• Temporarily secure the new handle extrusion to the | handle and mark centerlines of the screw holes. |
door using at least 2 screws. | • Drill 1/16″ pilot hole through the panel until it starts |
• The custom handles must be located 3/4″ to | into the aluminum extrusion. This will mark the |
from the edge of the extrusion. | matching location for drilling the clearance hole |
| when assembling the handle, panel and extrusion. |
Step 3 Assemble panel, extrusion and handle
Decorator ![]()
Door Panel
Handle ![]()
Screw
Decorator
![]() ExtrusionDoor
ExtrusionDoor
Panel
3/4" Min.
•Remove the handle extrusion and custom panel.
•Drill 1/16″ pilot hole through extrusion.
•Drill clearance holes through the panel and extrusion.
•Assemble the door panel, extrusion and custom handle.
•Install screw(s) long enough to pass through the extrusion, door panel and into the handle.
•Slide the assembly into the door frame until the new extrusion fits firmly against the steel door.
•Reinstall original screws into the door extrusion.
21