ZKTR36LH/ZKTR36RH Trim Kit
3/4″ Custom Panels
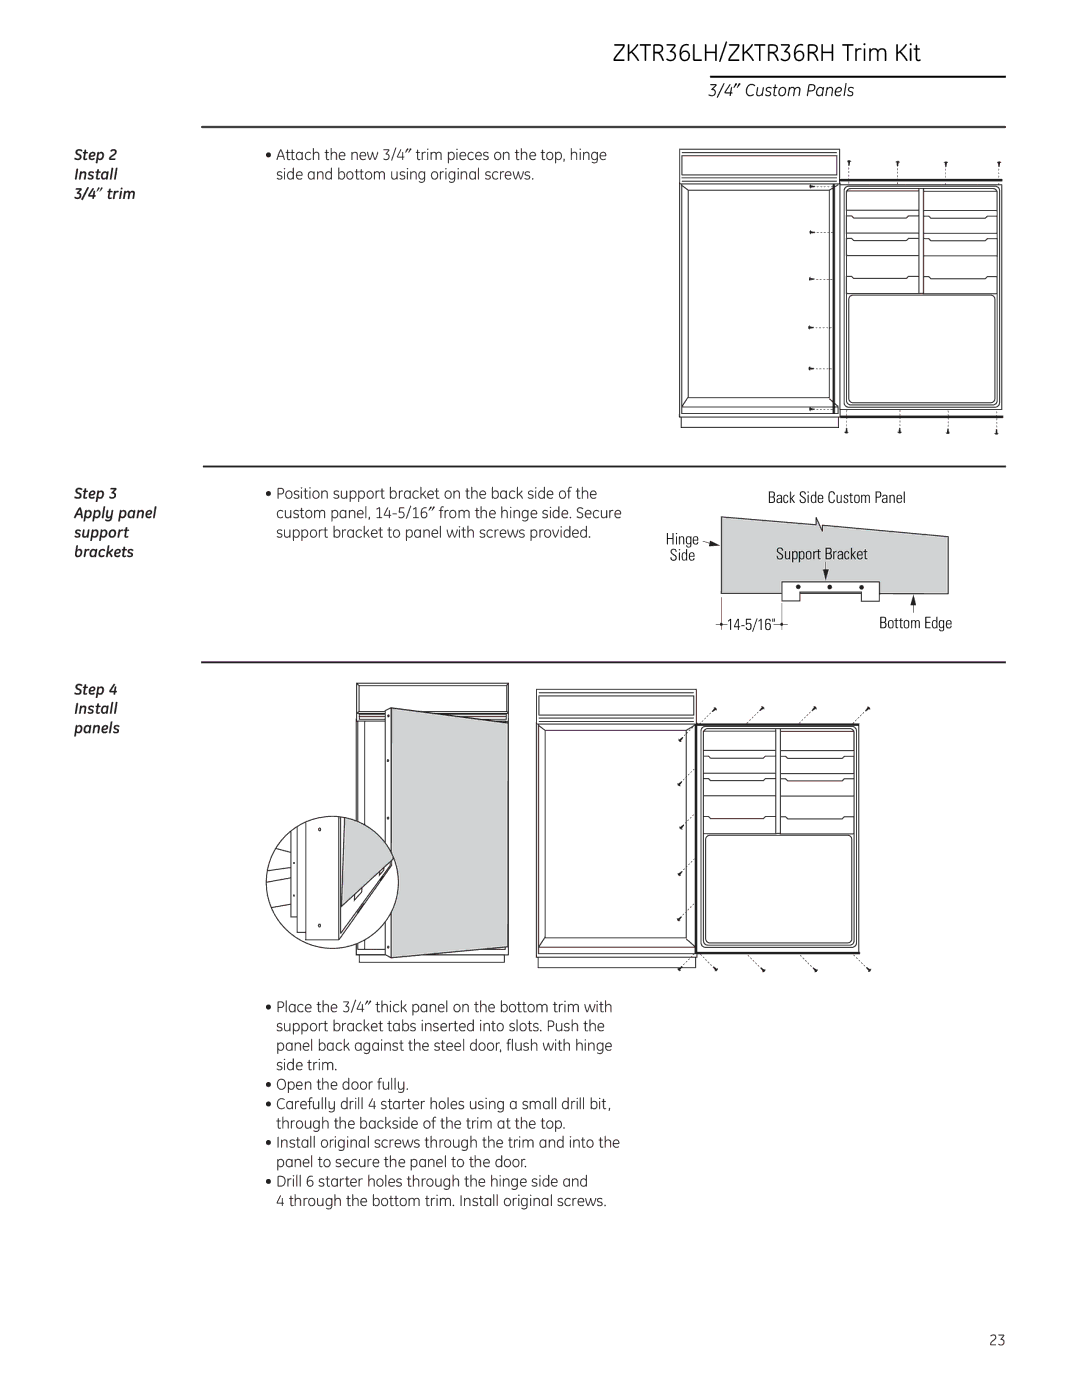
Step 2 | • Attach the new 3/4″ trim pieces on the top, hinge |
Install | side and bottom using original screws. |
3/4″ trim |
|
Step 3 | • Position support bracket on the back side of the |
Apply panel | custom panel, |
support | support bracket to panel with screws provided. |
brackets |
|
|
|
| Back Side Custom Panel | ||||||||||
Hinge |
|
| Support Bracket |
|
| ||||||||
Side |
|
|
|
| |||||||||
|
|
|
|
|
|
|
|
|
|
|
|
|
|
|
|
|
|
|
|
|
|
|
|
|
|
|
|
|
|
|
|
|
|
|
|
|
|
|
|
|
|
|
|
|
|
|
|
|
|
|
|
|
|
|
|
|
|
|
|
|
|
|
|
|
|
| Bottom Edge | ||
|
|
|
|
|
|
|
|
|
|
| |||
Step 4 Install panels
•Place the 3/4″ thick panel on the bottom trim with support bracket tabs inserted into slots. Push the panel back against the steel door, flush with hinge side trim.
•Open the door fully.
•Carefully drill 4 starter holes using a small drill bit, through the backside of the trim at the top.
•Install original screws through the trim and into the panel to secure the panel to the door.
•Drill 6 starter holes through the hinge side and
4 through the bottom trim. Install original screws.
23
