ZKHTRSS1 (For 3/4″ Panels)
Tubular Stainless Steel Handles
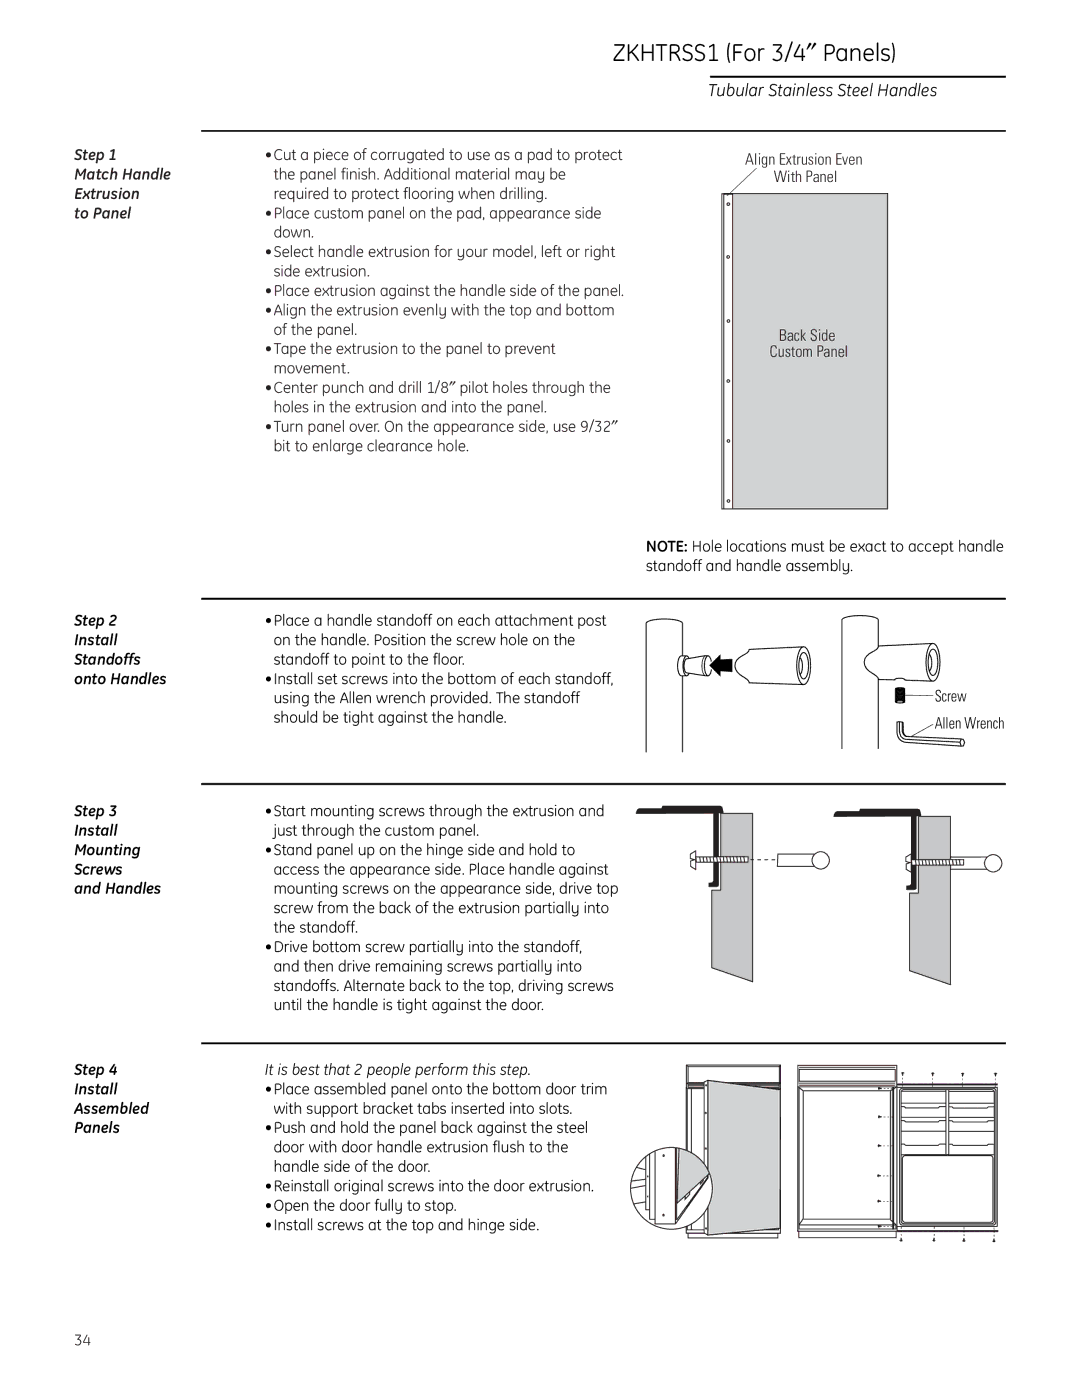
Step 1 | •Cut a piece of corrugated to use as a pad to protect |
Match Handle | the panel finish. Additional material may be |
Extrusion | required to protect flooring when drilling. |
to Panel | •Place custom panel on the pad, appearance side |
| down. |
| •Select handle extrusion for your model, left or right |
| side extrusion. |
| •Place extrusion against the handle side of the panel. |
| •Align the extrusion evenly with the top and bottom |
| of the panel. |
| •Tape the extrusion to the panel to prevent |
| movement. |
| •Center punch and drill 1/8″ pilot holes through the |
| holes in the extrusion and into the panel. |
| •Turn panel over. On the appearance side, use 9/32″ |
| bit to enlarge clearance hole. |
Align Extrusion Even
With Panel
Back Side
Custom Panel
NOTE: Hole locations must be exact to accept handle standoff and handle assembly.
Step 2 | •Place a handle standoff on each attachment post |
Install | on the handle. Position the screw hole on the |
Standoffs | standoff to point to the floor. |
onto Handles | •Install set screws into the bottom of each standoff, |
| using the Allen wrench provided. The standoff |
| should be tight against the handle. |
Step 3 | •Start mounting screws through the extrusion and |
Install | just through the custom panel. |
Mounting | •Stand panel up on the hinge side and hold to |
Screws | access the appearance side. Place handle against |
and Handles | mounting screws on the appearance side, drive top |
| screw from the back of the extrusion partially into |
| the standoff. |
| •Drive bottom screw partially into the standoff, |
| and then drive remaining screws partially into |
| standoffs. Alternate back to the top, driving screws |
| until the handle is tight against the door. |
![]() Screw
Screw
Allen Wrench
Step 4 | It is best that 2 people perform this step. |
Install | •Place assembled panel onto the bottom door trim |
Assembled | with support bracket tabs inserted into slots. |
Panels | •Push and hold the panel back against the steel |
| door with door handle extrusion flush to the |
| handle side of the door. |
| •Reinstall original screws into the door extrusion. |
| •Open the door fully to stop. |
| •Install screws at the top and hinge side. |
34
