ZUG75 Trim Kit
Unified 3/4″ Custom Grille Panel Kit
Step 2 Install
WARNING
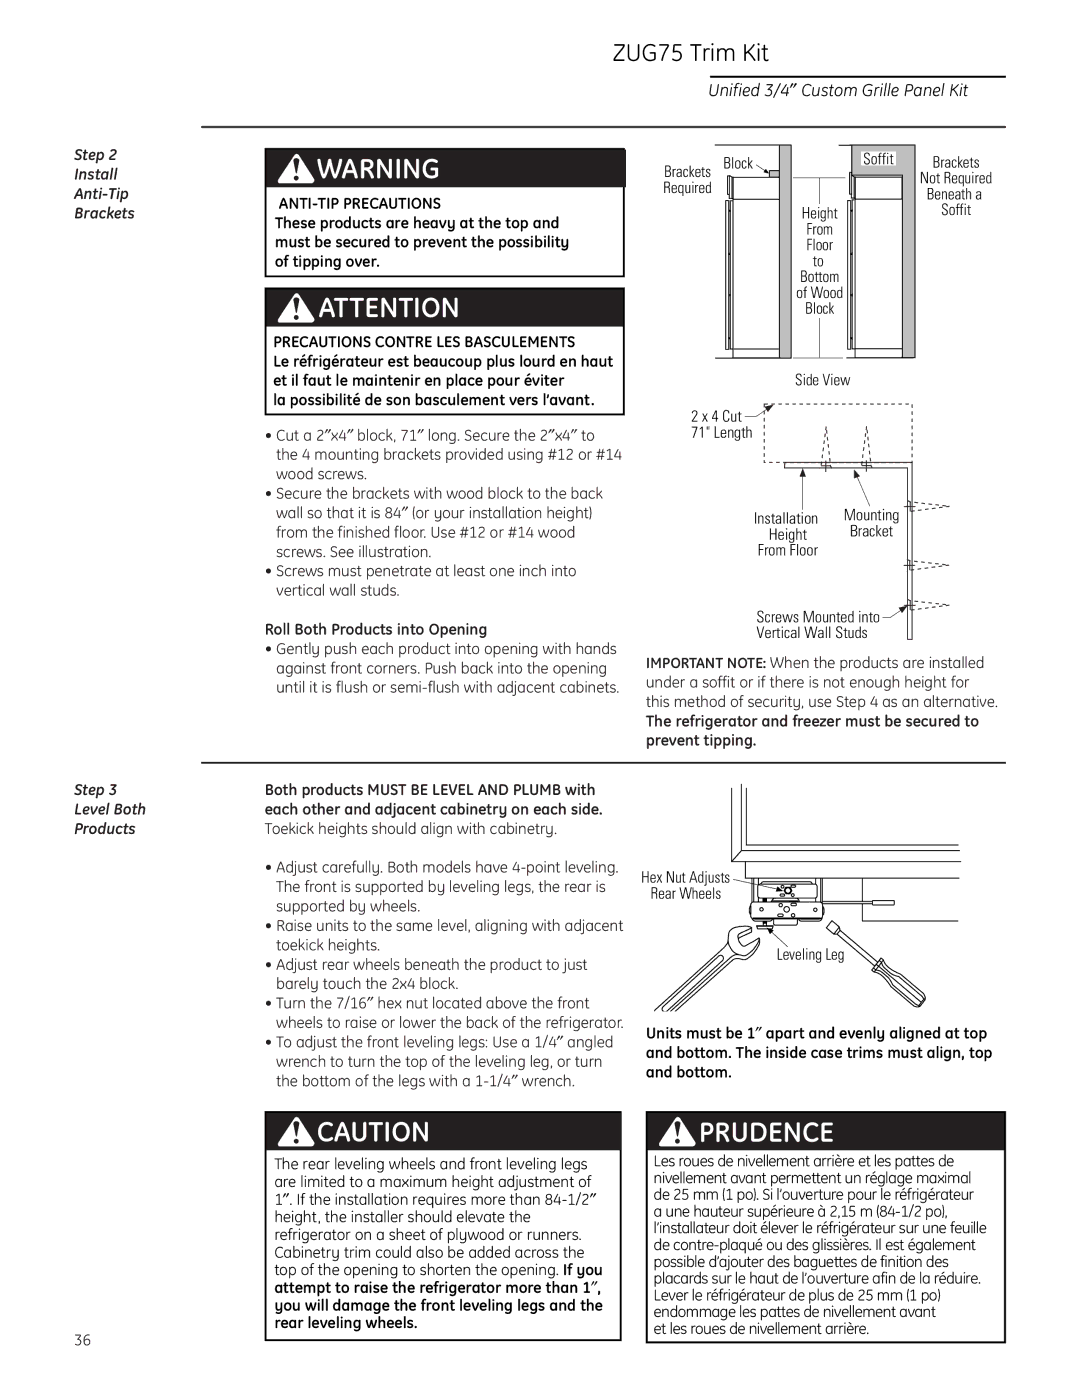
Brackets
Block
Soffit
Brackets
Not Required
ANTI-TIP PRECAUTIONS
These products are heavy at the top and must be secured to prevent the possibility of tipping over.
![]() ATTENTION
ATTENTION
PRECAUTIONS CONTRE LES BASCULEMENTS
Le réfrigérateur est beaucoup plus lourd en haut et il faut le maintenir en place pour éviter
la possibilité de son basculement vers l’avant.
• Cut a 2″x4″ block, 71″ long. Secure the 2″x4″ to |
the 4 mounting brackets provided using #12 or #14 |
wood screws. |
• Secure the brackets with wood block to the back |
Required
2 x 4 Cut ![]() 71" Length
71" Length
Height
From
Floor
to
Bottom
of Wood
Block
Side View
Beneath a
Soffit
wall so that it is 84″ (or your installation height) |
from the finished floor. Use #12 or #14 wood |
screws. See illustration. |
• Screws must penetrate at least one inch into |
vertical wall studs. |
Installation Mounting
Height Bracket
From Floor
Roll Both Products into Opening
•Gently push each product into opening with hands against front corners. Push back into the opening until it is flush or
Screws Mounted into 
Vertical Wall Studs
IMPORTANT NOTE: When the products are installed under a soffit or if there is not enough height for this method of security, use Step 4 as an alternative.
The refrigerator and freezer must be secured to prevent tipping.
Step 3
Level Both
Products
Both products MUST BE LEVEL AND PLUMB with each other and adjacent cabinetry on each side.
Toekick heights should align with cabinetry.
•Adjust carefully. Both models have
•Raise units to the same level, aligning with adjacent toekick heights.
•Adjust rear wheels beneath the product to just barely touch the 2x4 block.
•Turn the 7/16″ hex nut located above the front wheels to raise or lower the back of the refrigerator.
•To adjust the front leveling legs: Use a 1/4″ angled
wrench to turn the top of the leveling leg, or turn the bottom of the legs with a
Hex Nut Adjusts
Rear Wheels
Leveling Leg
Units must be 1″ apart and evenly aligned at top and bottom. The inside case trims must align, top and bottom.
36
![]() CAUTION
CAUTION
The rear leveling wheels and front leveling legs are limited to a maximum height adjustment of
1″. If the installation requires more than
 PRUDENCE
Les roues de nivellement arrière et les pattes de nivellement avant permettent un réglage maximal de 25 mm (1 po). Si l’ouverture pour le réfrigérateur a une hauteur supérieure à 2,15 m
et les roues de nivellement arrière.