Step 3
Install standoffs onto handles
ZKHRSS1 Trim Kit (For 1/4″ Panels)
Tubular Stainless Steel Handles
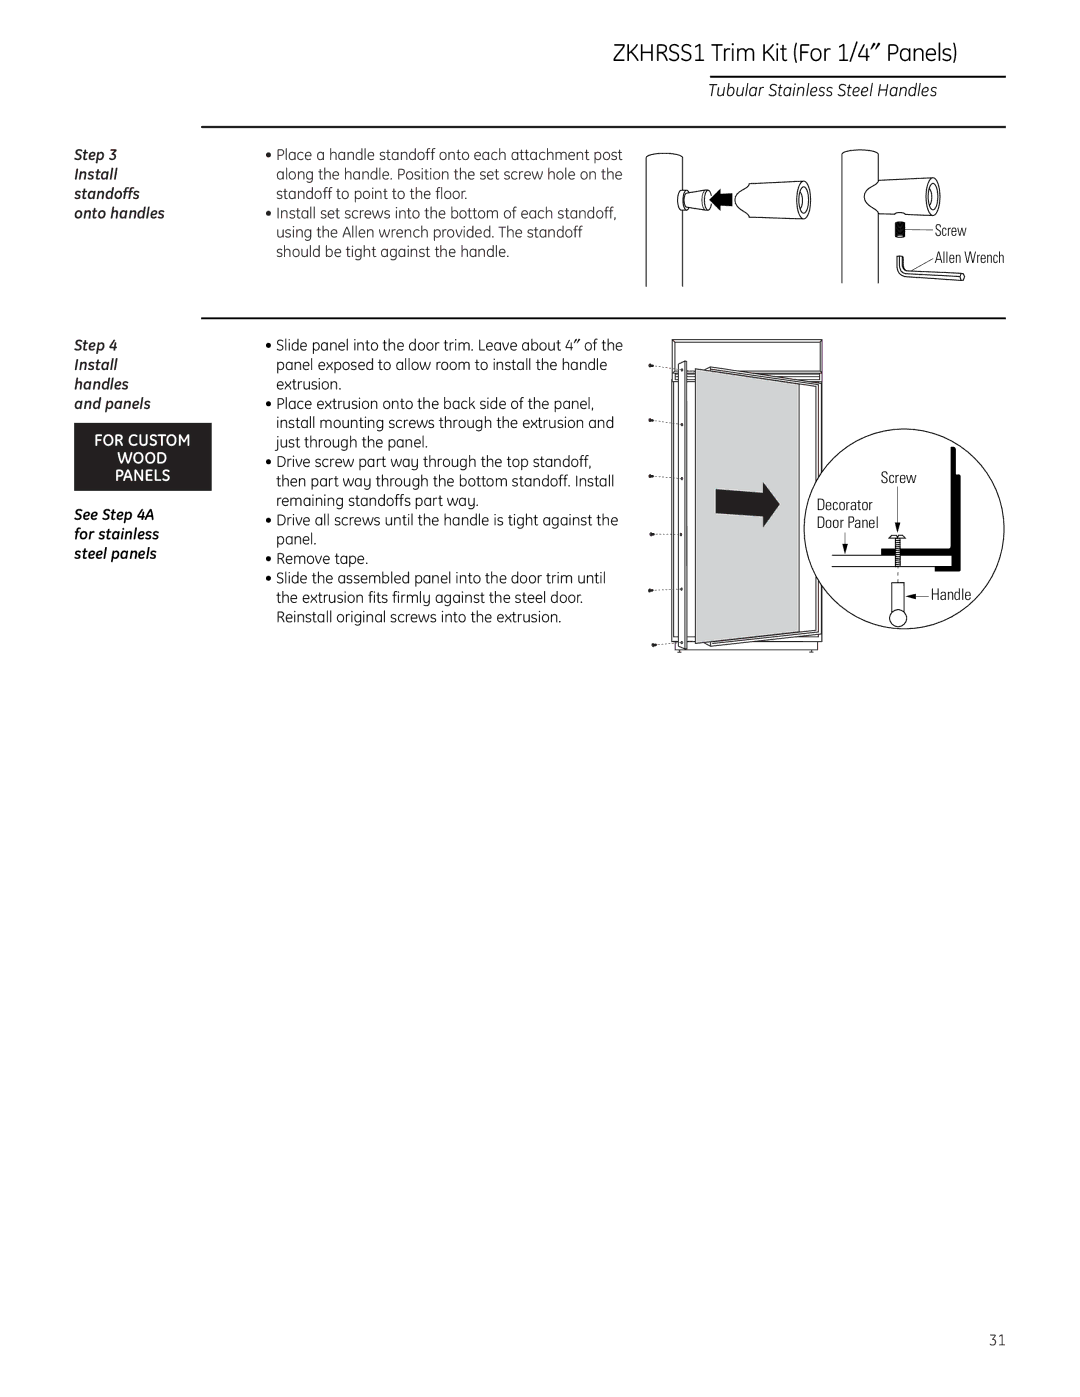
•Place a handle standoff onto each attachment post along the handle. Position the set screw hole on the
standoff to point to the floor. |
|
• Install set screws into the bottom of each standoff, | Screw |
using the Allen wrench provided. The standoff | |
should be tight against the handle. | Allen Wrench |
|
Step 4
Install handles and panels
FOR CUSTOM
WOOD
PANELS
See Step 4A for stainless steel panels
•Slide panel into the door trim. Leave about 4″ of the panel exposed to allow room to install the handle extrusion.
•Place extrusion onto the back side of the panel, install mounting screws through the extrusion and just through the panel.
•Drive screw part way through the top standoff, then part way through the bottom standoff. Install remaining standoffs part way.
•Drive all screws until the handle is tight against the panel.
•Remove tape.
•Slide the assembled panel into the door trim until the extrusion fits firmly against the steel door. Reinstall original screws into the extrusion.
Screw |
Decorator |
Door Panel |
Handle |
31