Follow these steps to establish a connection for the first time after configuring the settings:
1.Select Launch ActiveSync in the DetectoidPC window.
2.Start ActiveSync on the Dolphin terminal.
Once parameters are configured and saved, you do not need to run DetectoidPC again unless you need to change the ActiveSync settings or
Configuring the Modem
If your Dolphin 7400 hand held computer is equipped with a modem, follow these configuration instructions. Use the Dolphin 7400 mouse utility to navigate through the configuration process if your terminal does not have a touch screen. For more information about the mouse utility, see Navigating the Keyboard in Chapter 4.
1.From the Start menu, select Programs>Communication>Remote Networking.
2.Select Make New Connection. Type in the name for the connection. Select
3.Select the modem from the
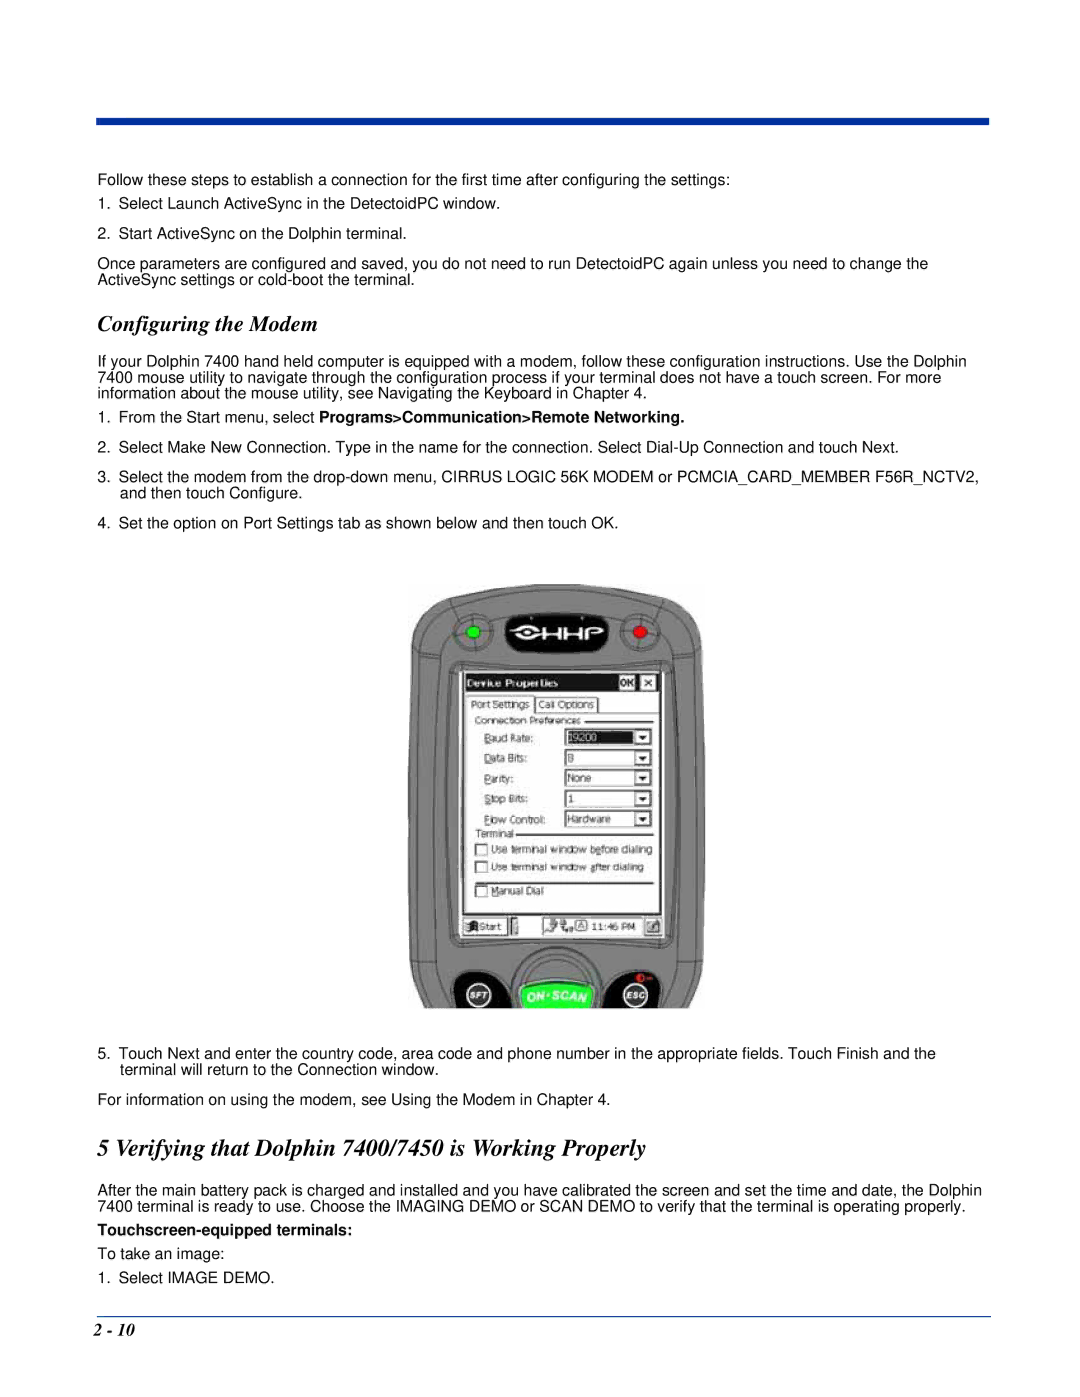
4.Set the option on Port Settings tab as shown below and then touch OK.
5.Touch Next and enter the country code, area code and phone number in the appropriate fields. Touch Finish and the terminal will return to the Connection window.
For information on using the modem, see Using the Modem in Chapter 4.
5 Verifying that Dolphin 7400/7450 is Working Properly
After the main battery pack is charged and installed and you have calibrated the screen and set the time and date, the Dolphin 7400 terminal is ready to use. Choose the IMAGING DEMO or SCAN DEMO to verify that the terminal is operating properly.
Touchscreen-equipped terminals:
To take an image:
1. Select IMAGE DEMO.
2 - 10
