To Replace the IT5800 Interface Cable:
1.Turn the power to the host system OFF.
2.Disconnect the imager’s cable from the terminal or computer.
3.Use a screwdriver to unscrew the cord lock from the base of the imager if in use.
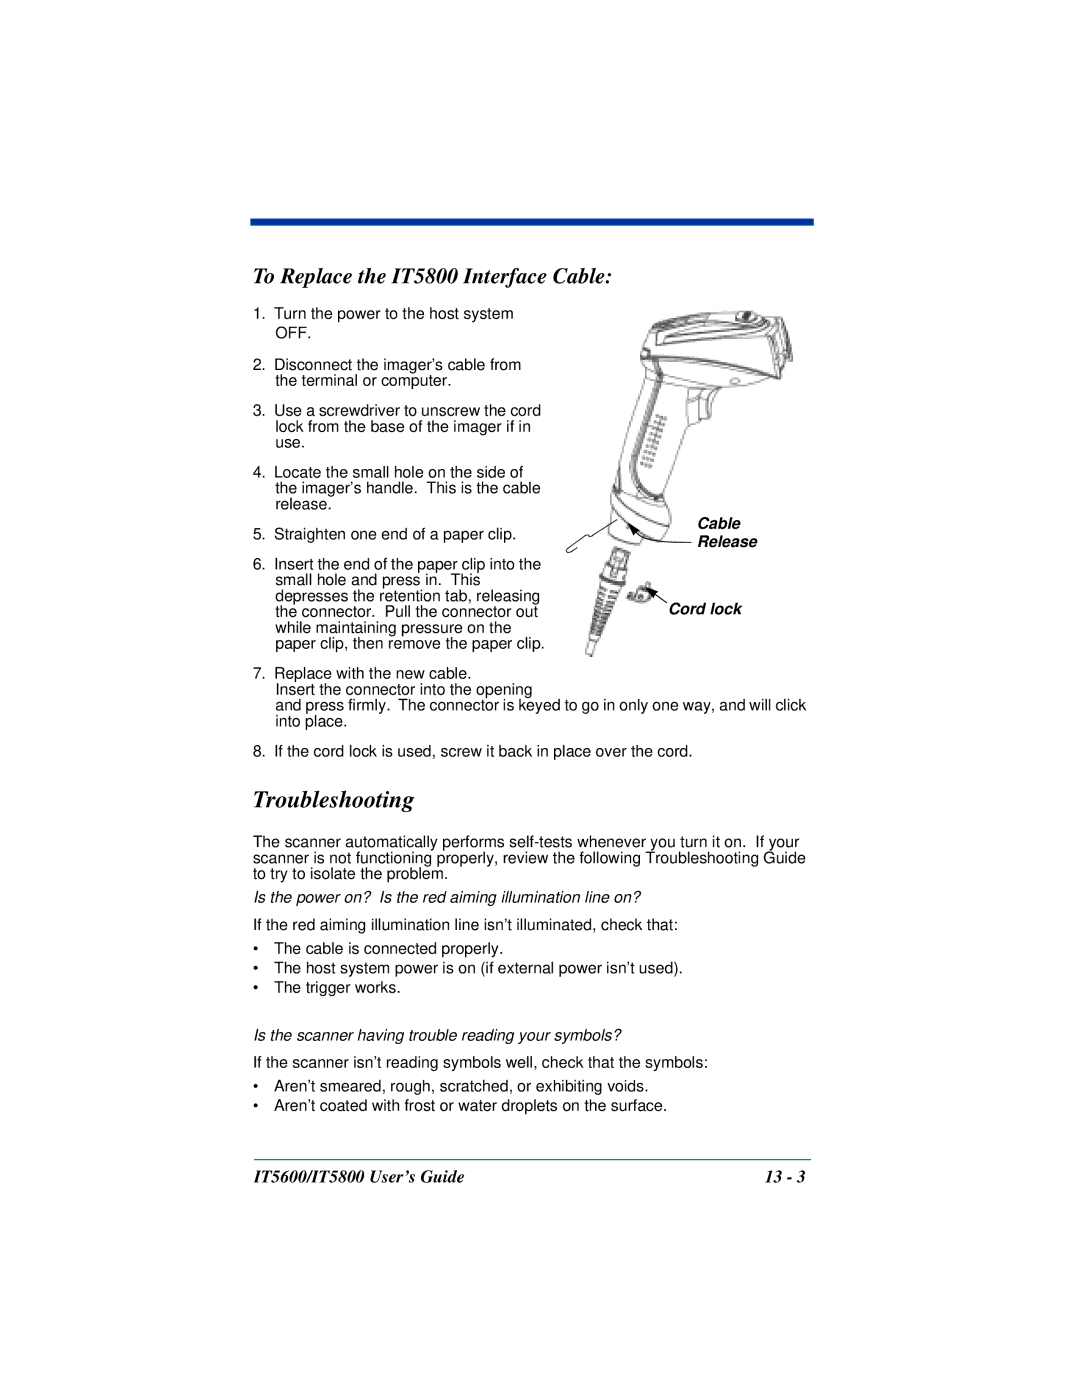
4.Locate the small hole on the side of the imager’s handle. This is the cable release.
5.Straighten one end of a paper clip.
6.Insert the end of the paper clip into the small hole and press in. This depresses the retention tab, releasing the connector. Pull the connector out while maintaining pressure on the paper clip, then remove the paper clip.
Cable
 Release
Cord lock
7.Replace with the new cable.
Insert the connector into the opening
and press firmly. The connector is keyed to go in only one way, and will click into place.
8.If the cord lock is used, screw it back in place over the cord.
Troubleshooting
The scanner automatically performs
Is the power on? Is the red aiming illumination line on?
If the red aiming illumination line isn’t illuminated, check that:
•The cable is connected properly.
•The host system power is on (if external power isn’t used).
•The trigger works.
Is the scanner having trouble reading your symbols?
If the scanner isn’t reading symbols well, check that the symbols:
•Aren’t smeared, rough, scratched, or exhibiting voids.
•Aren’t coated with frost or water droplets on the surface.
IT5600/IT5800 User’s Guide | 13 - 3 |