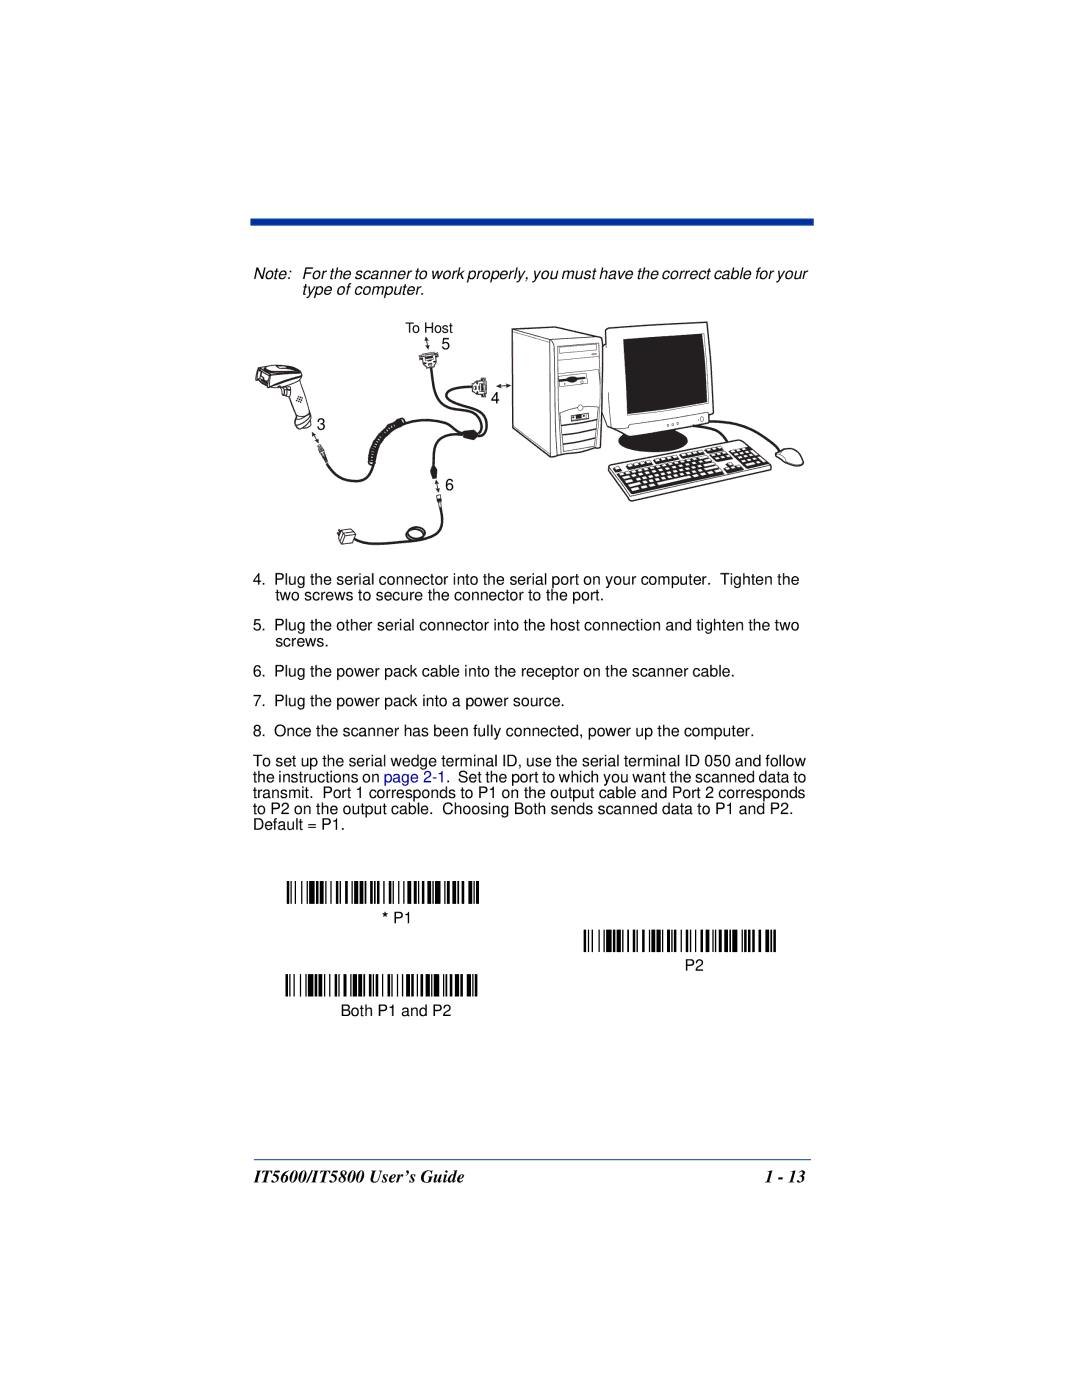
Note: For the scanner to work properly, you must have the correct cable for your type of computer.
To Host
5
4
3
![]() 6
6
4.Plug the serial connector into the serial port on your computer. Tighten the two screws to secure the connector to the port.
5.Plug the other serial connector into the host connection and tighten the two screws.
6.Plug the power pack cable into the receptor on the scanner cable.
7.Plug the power pack into a power source.
8.Once the scanner has been fully connected, power up the computer.
To set up the serial wedge terminal ID, use the serial terminal ID 050 and follow the instructions on page
Default = P1.
*P1
P2
Both P1 and P2
IT5600/IT5800 User’s Guide | 1 - 13 |
