Main
Disclaimer
Statement of Agency Compliance
FCC Class B Compliance Statement
Canadian Notice
UL and cUL Statement
LED Safety Statement
Aimer Beam Safety Statement (IT5800 Option only)
TV Statement
C-Tick Statement
Page
Page
Table of Contents
Chapter 1 - Getting Started
Chapter 2 - Terminal Interfaces
Chapter 3 - Output
Chapter 4 - Data Editing
Chapter 5 - Data Formatting
Chapter 6 - Secondary Interface
Chapter 7 - Symbologies
Page
Chapter 8 - Interface Keys
Chapter 9 - Utilities
Chapter 10 - Visual Menu 2003
Chapter 11 - Serial Programming Commands
Chapter 12 - Product Specifications
Chapter 13 - Maintenance
Chapter 14 - Customer Support
Page
IT5600/IT5800 Users Guide 1 - 1
Getting Started
IT5600/5800
About This Manual
Unpacking the Scanner
1 - 2 IT5600/IT5800 Users Guide
IT5600 Models
IT5800 Models
IT5600/IT5800 Users Guide 1 - 3
IT5600/5800 Scanner Identification
Page
IT5600/IT5800 Users Guide 1 - 5
Connecting the Scanner When Powered by Host (Keyboard Wedge)
1 - 6 IT5600/IT5800 Users Guide
Reading Techniques
Plug and Play
IT5600/IT5800 Users Guide 1 - 7
Keyboard Wedge Connection
Note: The following bar code also programs a carriage return (CR) suffix.
Laptop Direct Connect
RS-232
1 - 8 IT5600/IT5800 Users Guide
Wand Emulation Plug & Play
only
Wand Emulation Plug & Play Same Code Format
Wand Emulation Plug & Play Code 39 Format
IBM 4683 Ports 5B, 9B, and 17 Interface
IT5600/IT5800 Users Guide 1 - 9
1 - 10 IT5600/IT5800 Users Guide
Connecting the Scanner with USB
IBM SurePos
IT5600/IT5800 Users Guide 1 - 11
Note: After scanning one of these codes, you must power cycle the cash register.
USB PC or Macintosh Keyboard
USB HID
1 - 12 IT5600/IT5800 Users Guide
USB Com Port Emulation
Note: No extra configuration (e.g., baud rate) is necessary.
Connecting the Scanner with Serial Wedge
IT5600/IT5800 Users Guide 1 - 13
Note: For the scanner to work properly, you must have the correct cable for your type of computer.
Page
IT5600/IT5800 Users Guide 2 - 1
Terminal Interfaces
Terminal ID
Note: After scanning one of these codes, you must power cycle your computer.
2 - 2 IT5600/IT5800 Users Guide
Supported Terminals
IT5600/IT5800 Users Guide 2 - 3
Supported Terminals (Continued)
2 - 4 IT5600/IT5800 Users Guide
Keyboard Country
IT5600/IT5800 Users Guide 2 - 5
Keyboard Style
2 - 6 IT5600/IT5800 Users Guide
Keyboard Modifiers
Page
2 - 8 IT5600/IT5800 Users Guide
Connecting the Scanner with RS-232 Serial Port
Note: These instructions are for use with the RS-232 power stealer cable.
IT5600/IT5800 Users Guide 2 - 9
RS-232 Baud Rate
Default = 115,200
2 - 10 IT5600/IT5800 Users Guide
RS-232 Word Length: Data Bits, Stop Bits, and Parity
IT5600/IT5800 Users Guide 2 - 11
RS-232 Handshaking
Code 39 Format
only
Default = RTS/CTS, XON/XOFF and ACK/ NAKOff
Wand Emulation Connection
Wand Emulation Transmission Rate
Default = Black High.
Default = 25 inches/second.
Wand Emulation Polarity
IT5600/IT5800 Users Guide 2 - 13
Wand Emulation
Data Block Size
2 - 14 IT5600/IT5800 Users Guide
Delay Between Blocks
Overall Checksum
IT5600/IT5800 Users Guide 3 - 1
Output
Default = Medium.
Good Read Indicators
Beeper Good Read
Beeper Volume Good Read
Beeper Duration Good Read
Default = One.
Default = Normal.
LED Good Read
Number of Beeps Good Read
Good Read Delay
Save
Default = No Delay.
User-Specified Good Read Delay
Trigger Modes
Automatic Trigger
IT5600/IT5800 Users Guide 3 - 5
Presentation Mode
Hands Free Time-Out
Reread Delay
3 - 6 IT5600/IT5800 Users Guide
User-Specified Reread Delay
Save
IT5600/IT5800 Users Guide 3 - 7
Aimer Beam Delay (Aimer Beam option only)
User-Specified Aimer Beam Delay
Aimer Mode (Aimer Beam option only)
3 - 8 IT5600/IT5800 Users Guide
Aimer Beam Time-Out (Aimer Beam option only)
Default = 0 (no time-out)
Centering Window
IT5600/IT5800 Users Guide 3 - 9
3 - 10 IT5600/IT5800 Users Guide
Output Sequence Overview
IT5600/IT5800 Users Guide 3 - 11
Output Sequence Editor Require Output Sequence
Output Sequence Example
3 - 12 IT5600/IT5800 Users Guide
Note: Code 93 must be enabled to use this example.
IT5600/IT5800 Users Guide 3 - 13
Multiple Symbols
On
Note: This feature does not work when the scanner is in Low Power mode.
No Read
3 - 14 IT5600/IT5800 Users Guide
Video Reverse
IT5600/IT5800 Users Guide 4 - 1
Data Editing
Prefix/Suffix Overview
Points to Keep In Mind
Default prefix = None. Default suffix = None
4 - 2 IT5600/IT5800 Users Guide
To Add a Prefix or Suffix:
Example: Add a Suffix to a specific symbology
IT5600/IT5800 Users Guide 4 - 3
To Clear One or All Prefixes or Suffixes:
To Add a Carriage Return Suffix to all Symbologies
Prefix Selections
4 - 4 IT5600/IT5800 Users Guide
Suffix Selections
Intercharacter, Interfunction, and Intermessage Delays
IT5600/IT5800 Users Guide 4 - 5
Intercharacter Delay
Note: Intercharacter delays are not supported in USB serial emulation.
User Specified Intercharacter Delay
4 - 6 IT5600/IT5800 Users Guide
Interfunction Delay
Intermessage Delay
IT5600/IT5800 Users Guide 5 - 1
Data Formatting
Data Format Editor Introduction
Default Data Format setting = None.
To Add a Data Format
5 - 2 IT5600/IT5800 Users Guide
Other Programming Selections
Data Format Editor Commands
Send Commands
IT5600/IT5800 Users Guide 5 - 3
Syntax = F3ssxx
Move Commands
Syntax = F7.
Syntax = EA
Search Commands
Miscellaneous Commands
Data Format Editor
IT5600/IT5800 Users Guide 5 - 5
Data Formatter
Default = Data Formatter On.
Alternate Data Formats
Page
IT5600/IT5800 Users Guide 6 - 1
Secondary Interface
IT5600 Models
IT5800 Models
Enabling the Secondary Interface
6 - 2 IT5600/IT5800 Users Guide
Secondary RS-232 Connection
Secondary Code 39 Wand Emulation
Same Code Format
IT5600/IT5800 Users Guide 6 - 3
Secondary Laser Emulation
Default = 36 scans/second.
Laser Emulation Transmission Rate
6 - 4 IT5600/IT5800 Users Guide
Laser Emulation Polarity
Laser Emulation Idle
Secondary Trigger Mode
IT5600/IT5800 Users Guide 6 - 5
Hands Free Time-Out
Page
IT5600/IT5800 Users Guide 7 - 1
Symbolo gies
All Symbologies On
Introduction
All Symbologies
7 - 2 IT5600/IT5800 Users Guide
Message Length
IT5600/IT5800 Users Guide 7 - 3
Codabar
Validate and Transmit
Default = Dont Transmit
<Default All Codabar Settings>
Codabar
Codabar Start/Stop Characters
Codabar Check Character
Default = No Check Character. No Check Character
7 - 4 IT5600/IT5800 Users Guide
Codabar Concatenation
Default = On.
IT5600/IT5800 Users Guide 7 - 5
Codabar Message Length
Default =
Code 39
< Default All Code 39 Settings >
Code 39
Code 39 Start/Stop Characters
Dont Transmit.
7 - 6 IT5600/IT5800 Users Guide
Code 39, continued
Code 39 Check Character
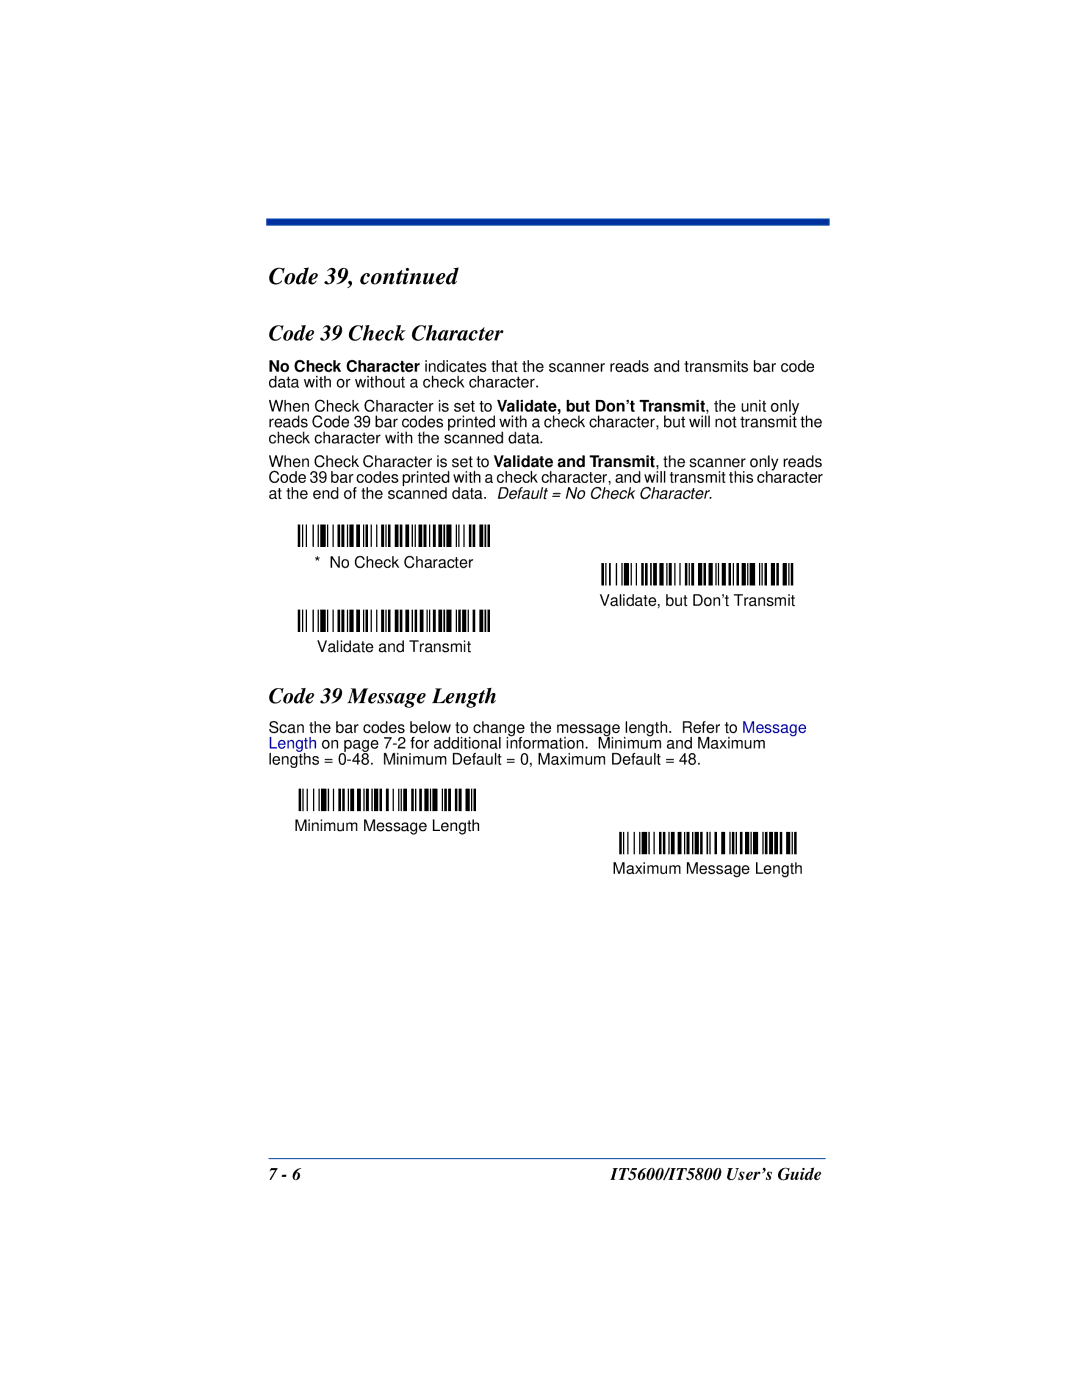
Default = No Check Character.
Code 39 Message Length
IT5600/IT5800 Users Guide 7 - 7
Code 39, continued
Code 39 Append
Default = Off.
Code 32 Pharmaceutical (PARAF)
7 - 8 IT5600/IT5800 Users Guide
Full ASCII
IT5600/IT5800 Users Guide 7 - 9
Code 39 Code Page
Interleaved 2 of 5
< Default All Interleaved 2 of 5 Settings >
Interleaved 2 of 5
Check Digit
7 - 10 IT5600/IT5800 Users Guide
Default = No Check Digit.
Interleaved 2 of 5 Message Length
IT5600/IT5800 Users Guide 7 - 11
Code 93
< Default All Code 93 Settings >
Code 93
Code 93 Message Length
Code 93 Code Page
Page
Page
7 - 14 IT5600/IT5800 Users Guide
Matrix 2 of 5 Message Length
Default = Two Check Digits.
Code 11
<Default All Code 11 Settings>
Code 11
Check Digits Required
Page
7 - 16 IT5600/IT5800 Users Guide
Code 128, continued
ISBT 128 Concatenation
Default =Off.
Code 128 Message Length
Code 128 Code Page
Telepen
<Default All Telepen Settings>
Telepen
Telepen Output
UPC A
Page
7 - 20 IT5600/IT5800 Users Guide
UPC A, continued
UPC A Addenda
UPC A Addenda Required
Default = Not Required.
UPC A Addenda Separator
Page
UPC E, continued
IT5600/IT5800 Users Guide 7 - 23
UPC E, continued
UPC E0 Check Digit
UPC E0 Number System
UPC E0 Addenda
7 - 24 IT5600/IT5800 Users Guide
EAN/JAN 13
<Default All EAN/JAN Settings>
EAN/JAN 13
EAN/JAN 13 Check Digit
EAN/JAN 13 Addenda
IT5600/IT5800 Users Guide 7 - 25
EAN/JAN 13, continued
EAN/JAN 13 Addenda Required
EAN/JAN 13 Addenda Separator
ISBN Translate
7 - 26 IT5600/IT5800 Users Guide
EAN/JAN 8
<Default All EAN/JAN 8 Settings>
EAN/JAN 8
EAN/JAN 8 Check Digit
EAN/JAN 8 Addenda
Page
7 - 28 IT5600/IT5800 Users Guide
MSI, continued
Validate, but Dont Transmit
Validate and Transmit
MSI Check Character
Default = Validate Type 10, but Dont Transmit.
Page
Page
IT5600/IT5800 Users Guide 7 - 31
RSS Expanded, continued RSS Expanded
Default = EANUCC Emulation Off
RSS Expanded Message Length
EANUCC Emulation
Page
Page
7 - 34 IT5600/IT5800 Users Guide
PosiCode
<Default All PosiCode Settings>
PosiCode A and B
PosiCode Message Length
Page
Page
IT5600/IT5800 Users Guide 7 - 37
Code 49
Code 49 Message Length
Page
IT5600/IT5800 Users Guide 8 - 1
Interface Keys
Keyboard Function Relationships
8 - 2 IT5600/IT5800 Users Guide
IT5600/IT5800 Users Guide 8 - 3
8 - 4 IT5600/IT5800 Users Guide
IT5600/IT5800 Users Guide 8 - 5
8 - 6 IT5600/IT5800 Users Guide
IT5600/IT5800 Users Guide 9 - 1
Utilities
To Add a Test Code I.D. Prefix to All Symbologies
Show Software Revision
Show Data Format
9 - 2 IT5600/IT5800 Users Guide
Temporary Visual Menu 2003 Configuration
IT5600/IT5800 Users Guide 10 - 1
Visual Menu 2003
Visual Menu 2003 Introduction
Visual Menu 2003 Operations
Installing Visual Menu 2003 from the Web
Page
IT5600/IT5800 Users Guide 11 - 1
Serial Programming Commands
option
parameter
Conventions
Menu Command Syntax
Query Commands
entire
^ ? *
Concatenation of Multiple Commands
Responses
Examples of Query Commands
11 - 4 IT5600/IT5800 Users Guide
Trigger Commands
IT5600/IT5800 Users Guide 11 - 5
Menu Commands
Terminal Interfaces
11 - 6 IT5600/IT5800 Users Guide
IT5600/IT5800 Users Guide 11 - 7
Output Selections
11 - 8 IT5600/IT5800 Users Guide
IT5600/IT5800 Users Guide 11 - 9
Prefix/Suffix Selections
11 - 10 IT5600/IT5800 Users Guide
Data Formatter Selections
Secondary Interface Selections
IT5600/IT5800 Users Guide 11 - 11
Symbologies
11 - 12 IT5600/IT5800 Users Guide
IT5600/IT5800 Users Guide 11 - 13
11 - 14 IT5600/IT5800 Users Guide
IT5600/IT5800 Users Guide 11 - 15
11 - 16 IT5600/IT5800 Users Guide
IT5600/IT5800 Users Guide 11 - 17
Page
IT5600/IT5800 Users Guide 12 - 1
Product Specifications
IT5600 Product Specifications
Parameter Specification
IT5600 Depth of Field
IT5600/IT5800 Users Guide 12 - 3
IT5800 Product Specifications
Parameter Specification
IT5800 Depth of Field
IT5600/IT5800 Users Guide 12 - 5
Laser Output Only (Laser Compatible Bar Image)
Pins 4 and 9 are populated depending on power supply voltage option.
Conventional laser data format is provided at the modular connector in the scanner handle. The
interface cable is terminated with a 10 pin modular plug, and a 9 pin Type D (squeeze to release)
connector that is compatible with all Hand Held Products terminals.
Keyboard Wedge
IT5600/IT5800 Users Guide 12 - 7
Wand Emulation
12 - 8 IT5600/IT5800 Users Guide
Serial Output
IT5600/IT5800 Users Guide 12 - 9
USB
Page
Maintenance
Repairs
Maintenance
Cleaning the Scanners Window
!
13 - 2 IT5600/IT5800 Users Guide
Replacing the Interface Cable
To Replace the IT5600 Interface Cable:
Cable Release
IT5600/IT5800 Users Guide 13 - 3
To Replace the IT5800 Interface Cable:
Troubleshooting
Is the power on? Is the red aiming illumination line on?
Is the scanner having trouble reading your symbols?
Cable Release Cord lock
13 - 4 IT5600/IT5800 Users Guide
Is the bar code displayed but not entered?
Does the scanner read the bar code incorrectly?
The scanner wont read your bar code at all.
IT5600/IT5800 Users Guide 14 - 1
Customer Support
E-mail: apservice@handheld.com
Product Service and Repair
E-mail: naservice@handheld.com
E-mail: laservice@handheld.com
Technical Assistance
E-mail: natechsupport@handheld.com
E-mail: eutechsupport@handheld.com
E-mail: aptechsupport@handheld.com
E-mail: latechsupport@handheld.com
IT5600/IT5800 Users Guide 14 - 3
Page
IT5600/IT5800 Users Guide A - 1
Appendix A
Symbology Chart
A - 2 IT5600/IT5800 Users Guide
ASCII Conversion Chart (Code Page 1252
Dec Hex Char Dec Hex Char Dec Hex Char Dec Hex Char
IT5600/IT5800 Users Guide A - 3
Dec Hex Char Dec Hex Char Dec Hex Char Dec Hex Char
A - 4 IT5600/IT5800 Users Guide
Code Page Mapping of Printed Bar Codes
Note: The Code Page option is available for Code 39, Code 93, and Code 128.
Page
Page
Page
Sample Symbols
Programming Chart