PDX Series
PDX SERVICE PROCEDURE IV
Blower Testing and Replacement
Blower removal
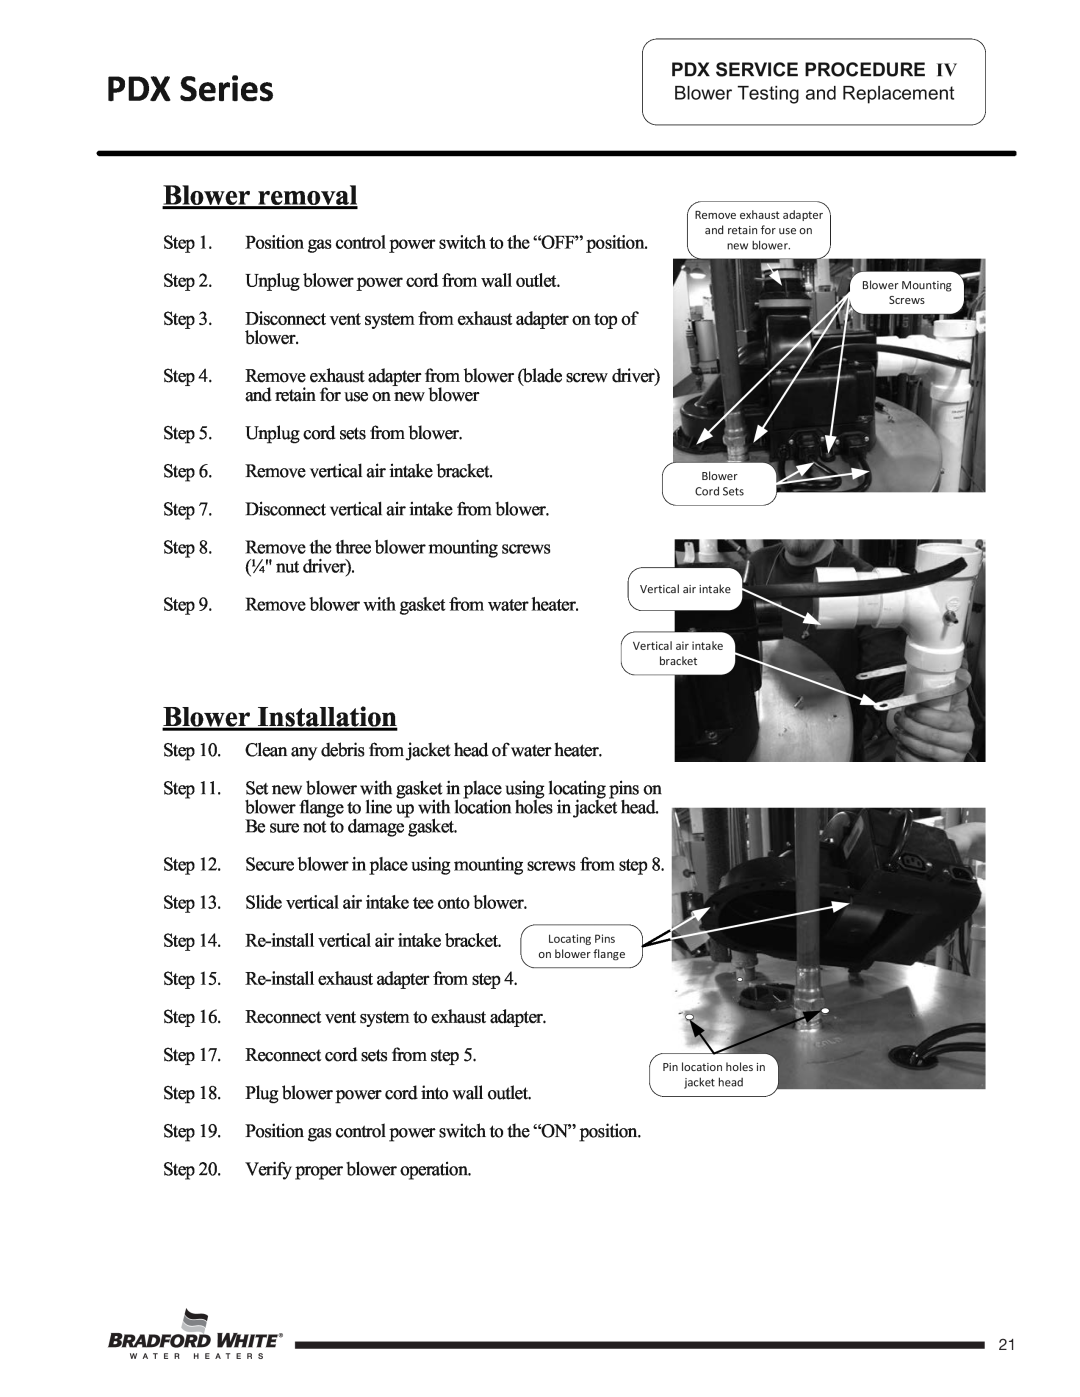
Step 1. Position gas control power switch to the “OFF” position. Step 2. Unplug blower power cord from wall outlet.
Step 3. Disconnect vent system from exhaust adapter on top of blower.
Step 4. Remove exhaust adapter from blower (blade screw driver) and retain for use on new blower
Step 5. Unplug cord sets from blower.
Step 6. Remove vertical air intake bracket.
Step 7. Disconnect vertical air intake from blower.
Step 8. Remove the three blower mounting screws (¼" nut driver).
Step 9. Remove blower with gasket from water heater.
Blower Installation
Remove exhaust adapter
and retain for use on
new blower.
Blower
Cord Sets
Blower Mounting
Screws
Step 10. Clean any debris from jacket head of water heater.
Step 11. Set new blower with gasket in place using locating pins on blower flange to line up with location holes in jacket head. Be sure not to damage gasket.
Step 12. Secure blower in place using mounting screws from step 8. Step 13. Slide vertical air intake tee onto blower.
Step 14.
Step 15.
Step 16. Reconnect vent system to exhaust adapter.
Step 17. Reconnect cord sets from step 5.
Pin location holes in
Step 18. Plug blower power cord into wall outlet.
jacket head
Step 19. Position gas control power switch to the “ON” position.
Step 20. Verify proper blower operation.
Page 21
21