| |
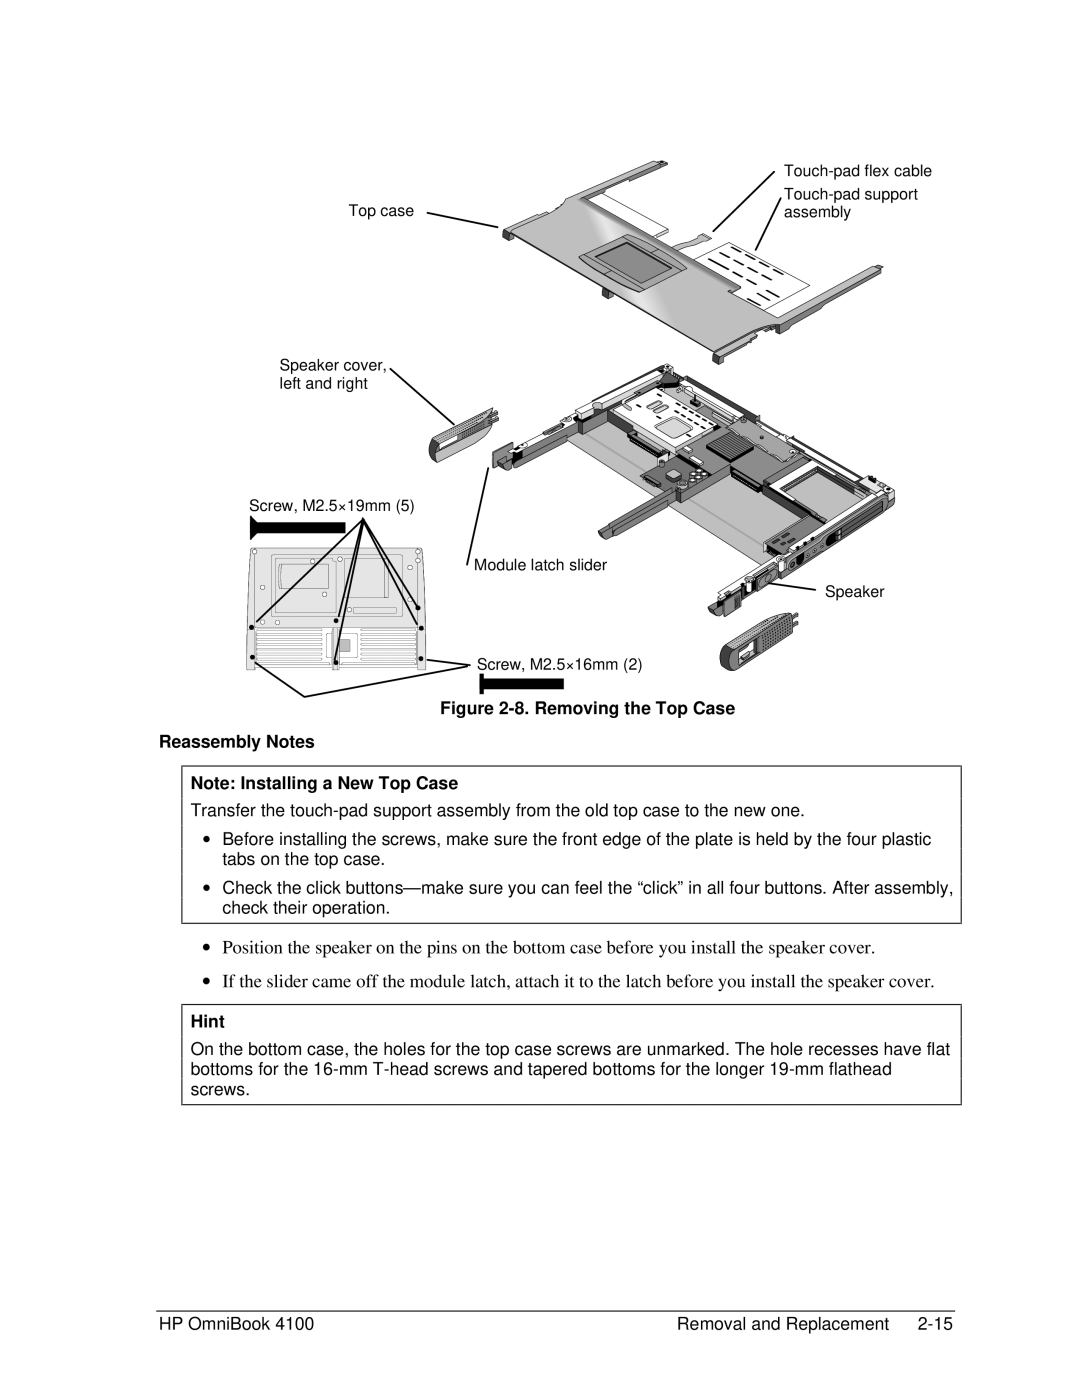
Top case | |
assembly |
Speaker cover, left and right
Screw, M2.5×19mm (5)
Module latch slider
Speaker
Screw, M2.5×16mm (2)
Figure 2-8. Removing the Top Case
Reassembly Notes
Note: Installing a New Top Case
Transfer the
∙Before installing the screws, make sure the front edge of the plate is held by the four plastic tabs on the top case.
∙Check the click
∙Position the speaker on the pins on the bottom case before you install the speaker cover.
∙If the slider came off the module latch, attach it to the latch before you install the speaker cover.
Hint
On the bottom case, the holes for the top case screws are unmarked. The hole recesses have flat bottoms for the
HP OmniBook 4100 | Removal and Replacement |