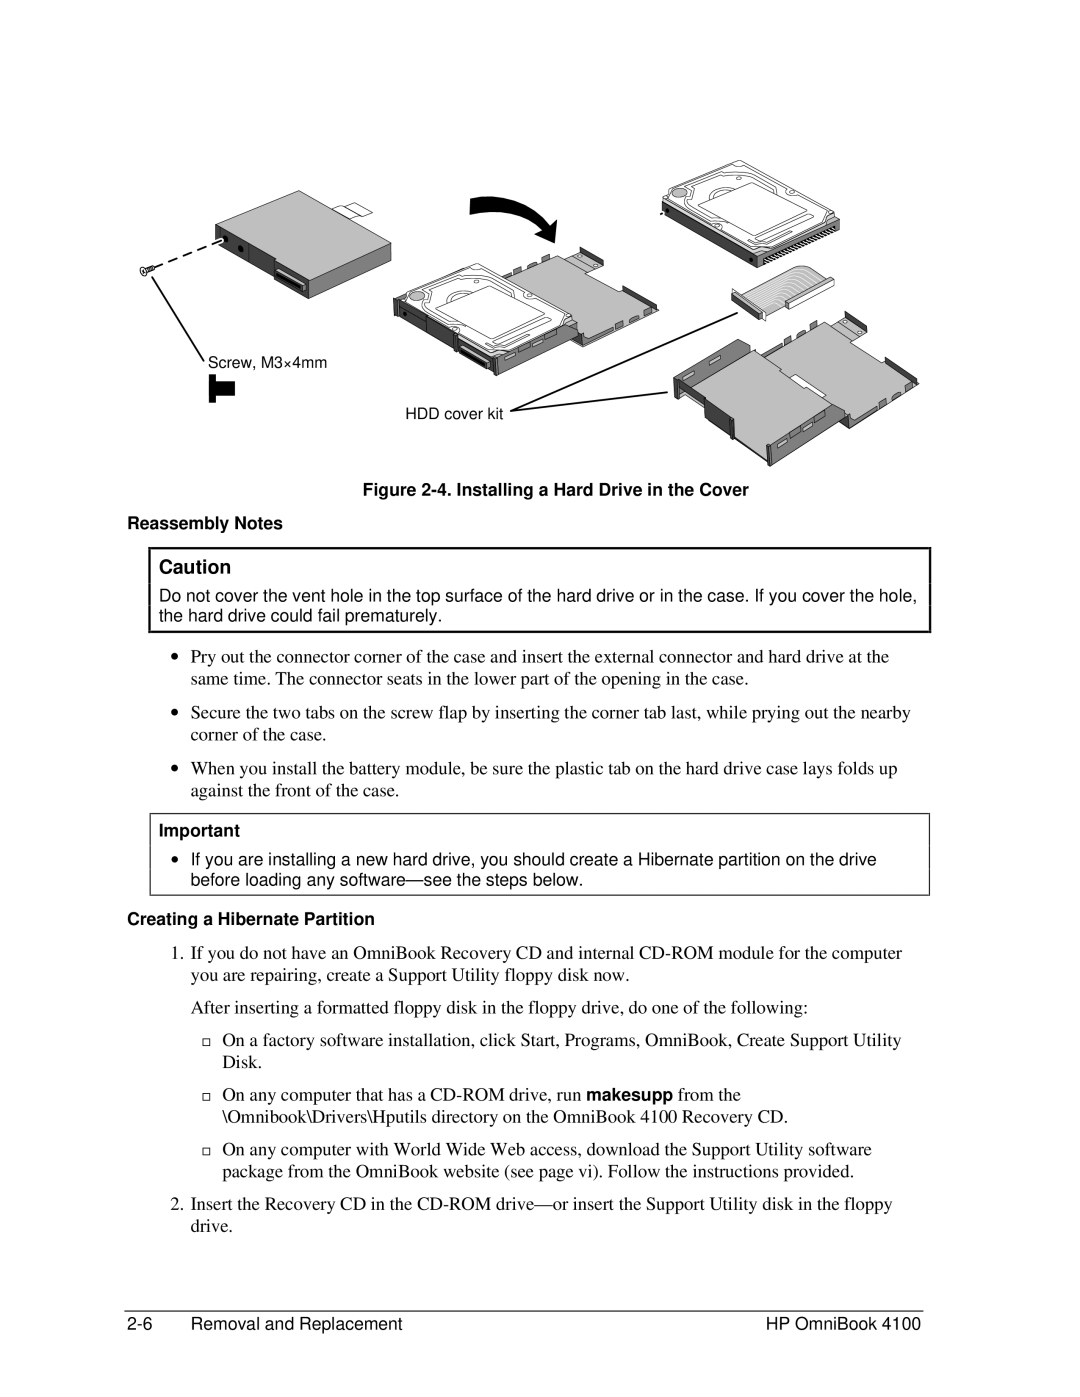
Screw, M3×4mm
HDD cover kit
Figure 2-4. Installing a Hard Drive in the Cover
Reassembly Notes
Caution
Do not cover the vent hole in the top surface of the hard drive or in the case. If you cover the hole, the hard drive could fail prematurely.
∙Pry out the connector corner of the case and insert the external connector and hard drive at the same time. The connector seats in the lower part of the opening in the case.
∙Secure the two tabs on the screw flap by inserting the corner tab last, while prying out the nearby corner of the case.
∙When you install the battery module, be sure the plastic tab on the hard drive case lays folds up against the front of the case.
Important
∙If you are installing a new hard drive, you should create a Hibernate partition on the drive before loading any
Creating a Hibernate Partition
1.If you do not have an OmniBook Recovery CD and internal
After inserting a formatted floppy disk in the floppy drive, do one of the following:
On a factory software installation, click Start, Programs, OmniBook, Create Support Utility Disk.
On any computer that has a
®\Omnibook\Drivers\Hputils directory on the OmniBook 4100 Recovery CD.
On any computer with World Wide Web access, download the Support Utility software package from the OmniBook website (see page vi). Follow the instructions provided.
2.Insert the Recovery CD in the
Removal and Replacement | HP OmniBook 4100 |