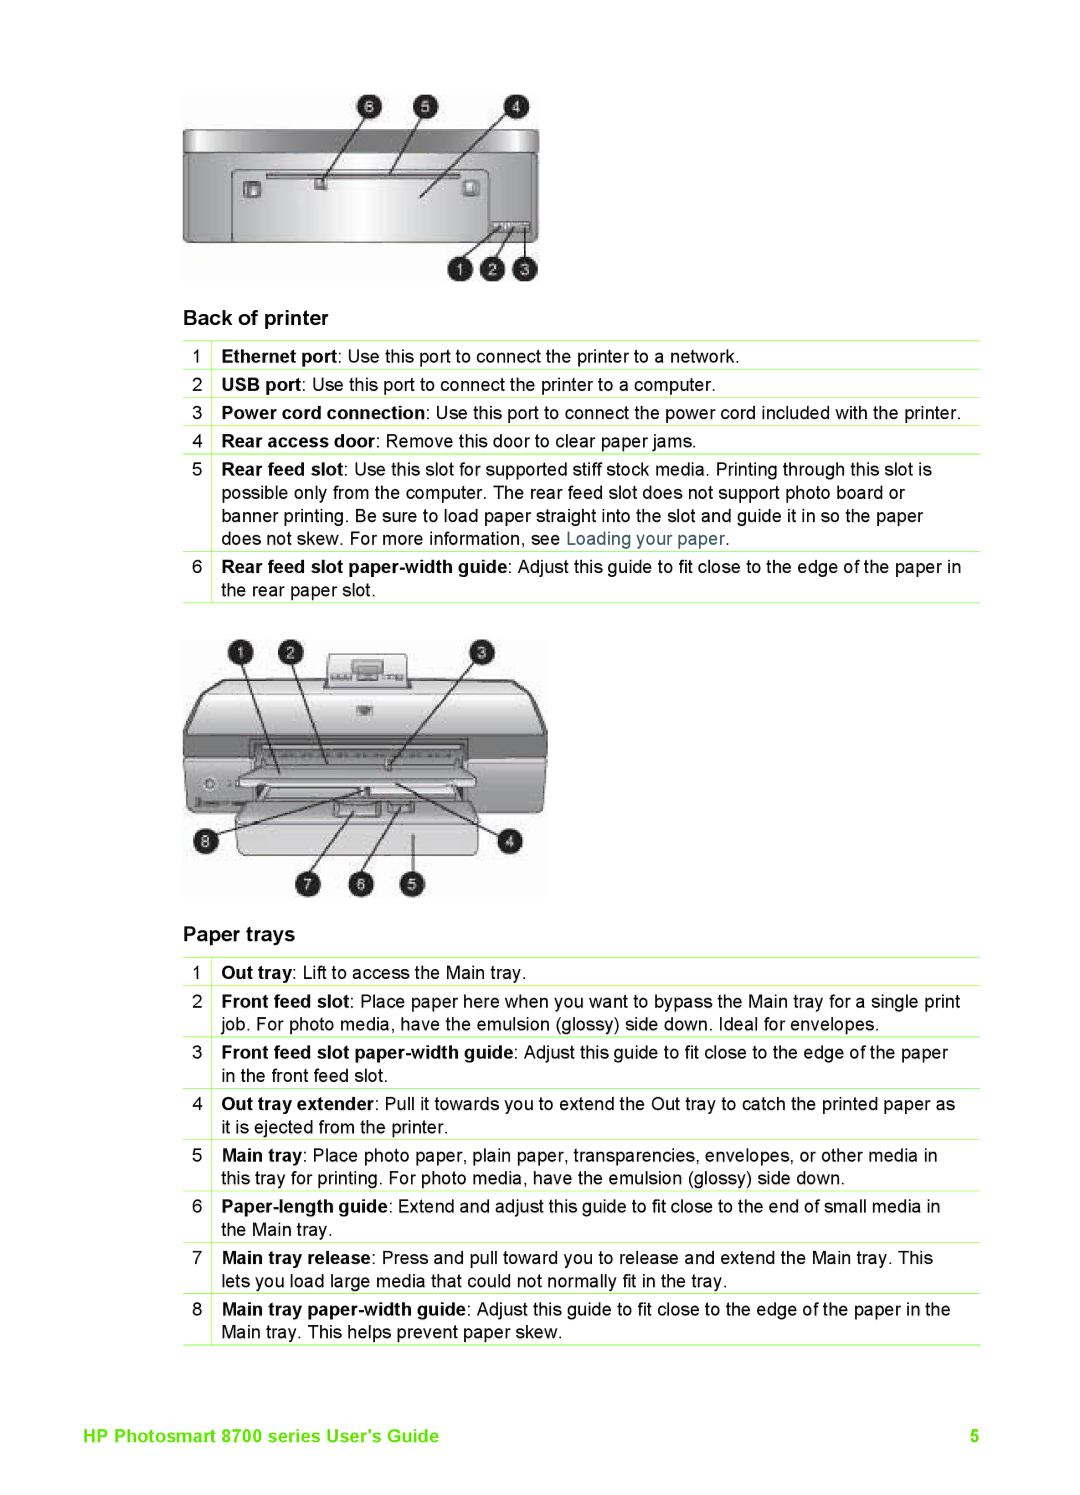
Back of printer
1![]() Ethernet port: Use this port to connect the printer to a network.
Ethernet port: Use this port to connect the printer to a network.
2![]() USB port: Use this port to connect the printer to a computer.
USB port: Use this port to connect the printer to a computer.
3![]() Power cord connection: Use this port to connect the power cord included with the printer.
Power cord connection: Use this port to connect the power cord included with the printer.
4![]() Rear access door: Remove this door to clear paper jams.
Rear access door: Remove this door to clear paper jams.
5Rear feed slot: Use this slot for supported stiff stock media. Printing through this slot is possible only from the computer. The rear feed slot does not support photo board or banner printing. Be sure to load paper straight into the slot and guide it in so the paper does not skew. For more information, see Loading your paper.
6Rear feed slot
Paper trays
1![]() Out tray: Lift to access the Main tray.
Out tray: Lift to access the Main tray.
2Front feed slot: Place paper here when you want to bypass the Main tray for a single print job. For photo media, have the emulsion (glossy) side down. Ideal for envelopes.
3Front feed slot
4Out tray extender: Pull it towards you to extend the Out tray to catch the printed paper as it is ejected from the printer.
5Main tray: Place photo paper, plain paper, transparencies, envelopes, or other media in this tray for printing. For photo media, have the emulsion (glossy) side down.
6
7Main tray release: Press and pull toward you to release and extend the Main tray. This lets you load large media that could not normally fit in the tray.
8Main tray
HP Photosmart 8700 series User's Guide | 5 |