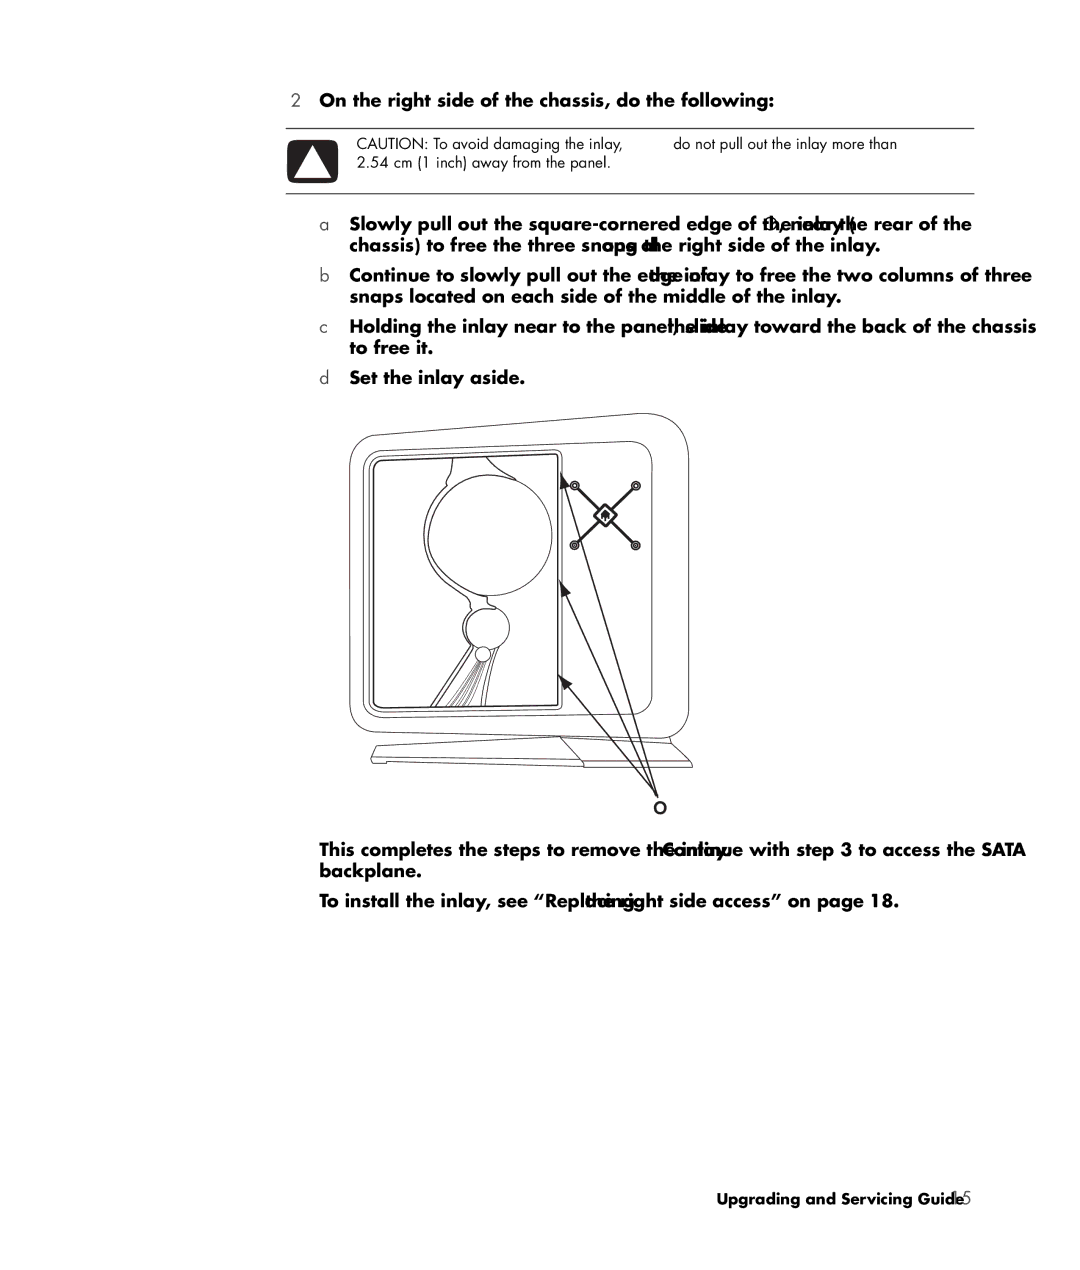
2On the right side of the chassis, do the following:
CAUTION: To avoid damaging the inlay, do not pull out the inlay more than 2.54 cm (1 inch) away from the panel.
aSlowly pull out the
bContinue to slowly pull out the edge of the inlay to free the two columns of three snaps located on each side of the middle of the inlay.
cHolding the inlay near to the panel, slide the inlay toward the back of the chassis to free it.
dSet the inlay aside.
O
This completes the steps to remove the inlay. Continue with step 3 to access the SATA backplane.
To install the inlay, see “Replacing the right side access” on page 18.
