J12V2 (CPU), turquoise connector
K12V5
6Replace the power supply baffle and the thermal divider, replace and close the PCI door, close the left access door and close the computer. See “Opening and Closing the Computer” on page 1.
Removing and Replacing the SATA Backplane
The replacement instructions include setting the LED switch on the SATA backplane.
Removing the SATA backplane
1Prepare the computer to be opened, and then open the left access door, open the PCI door, remove the thermal divider, and access the chassis through the right side (also, opening the right access panel). See “Opening and Closing the Computer” on page 1.
2On the left side of the computer, remove all the hard disk drives or the drive drawers from the chassis. See “Removing the hard disk drive” on page 33.
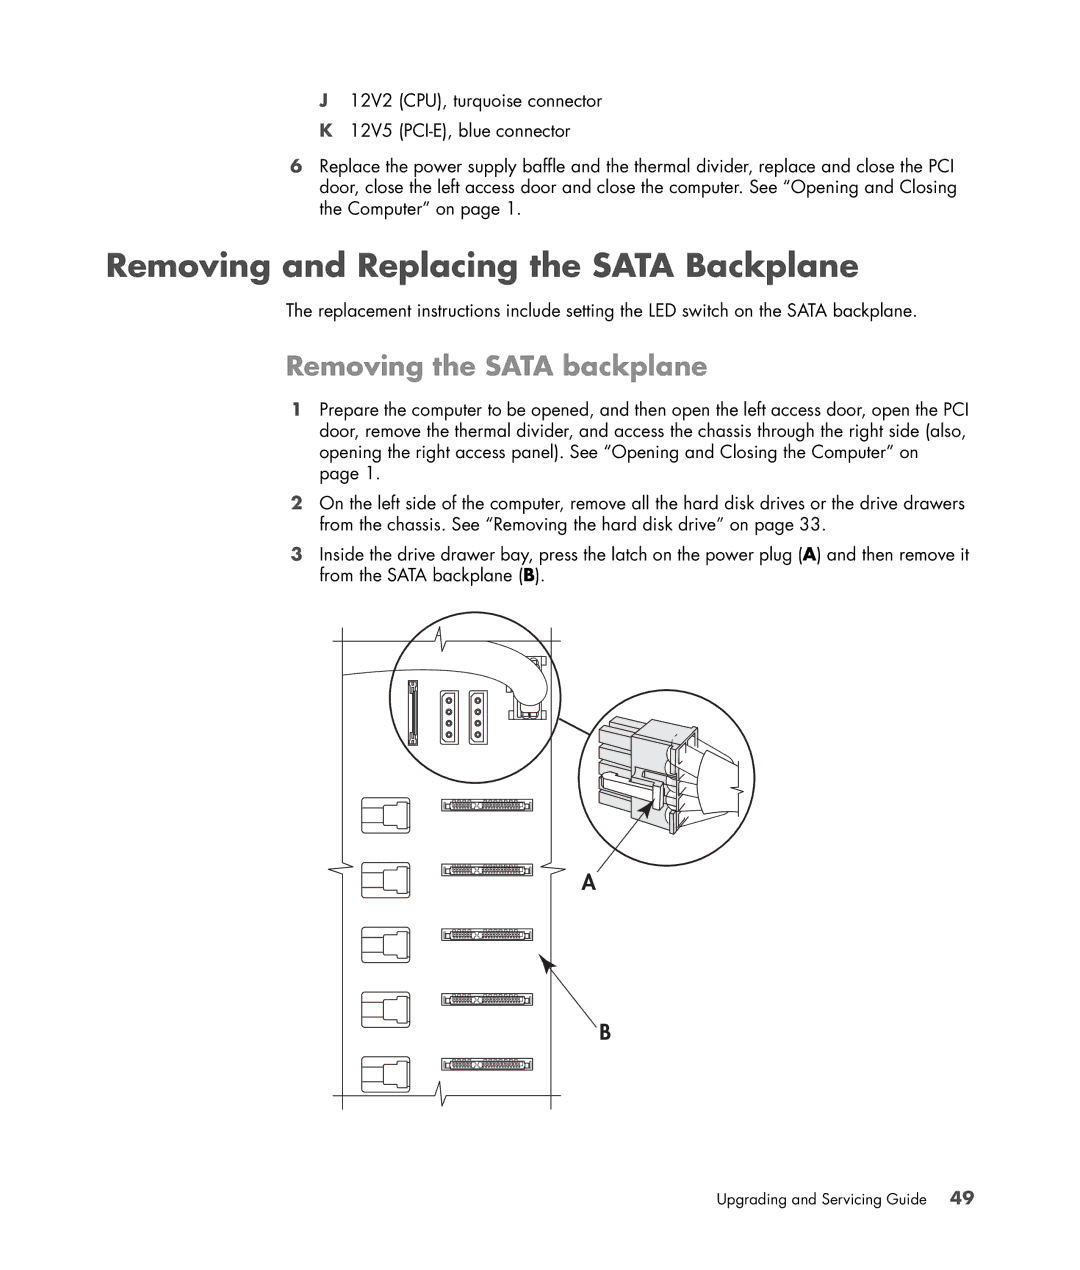
3Inside the drive drawer bay, press the latch on the power plug (A) and then remove it from the SATA backplane (B).
A
B