•Use the enclosure
•Allow enclosure settings to be shared between enclosures, which simplifies deployment of multiple enclosures.
NOTE: The enclosure link ports are designed only to support
NOTE: If more
NOTE: The HP BladeSystem
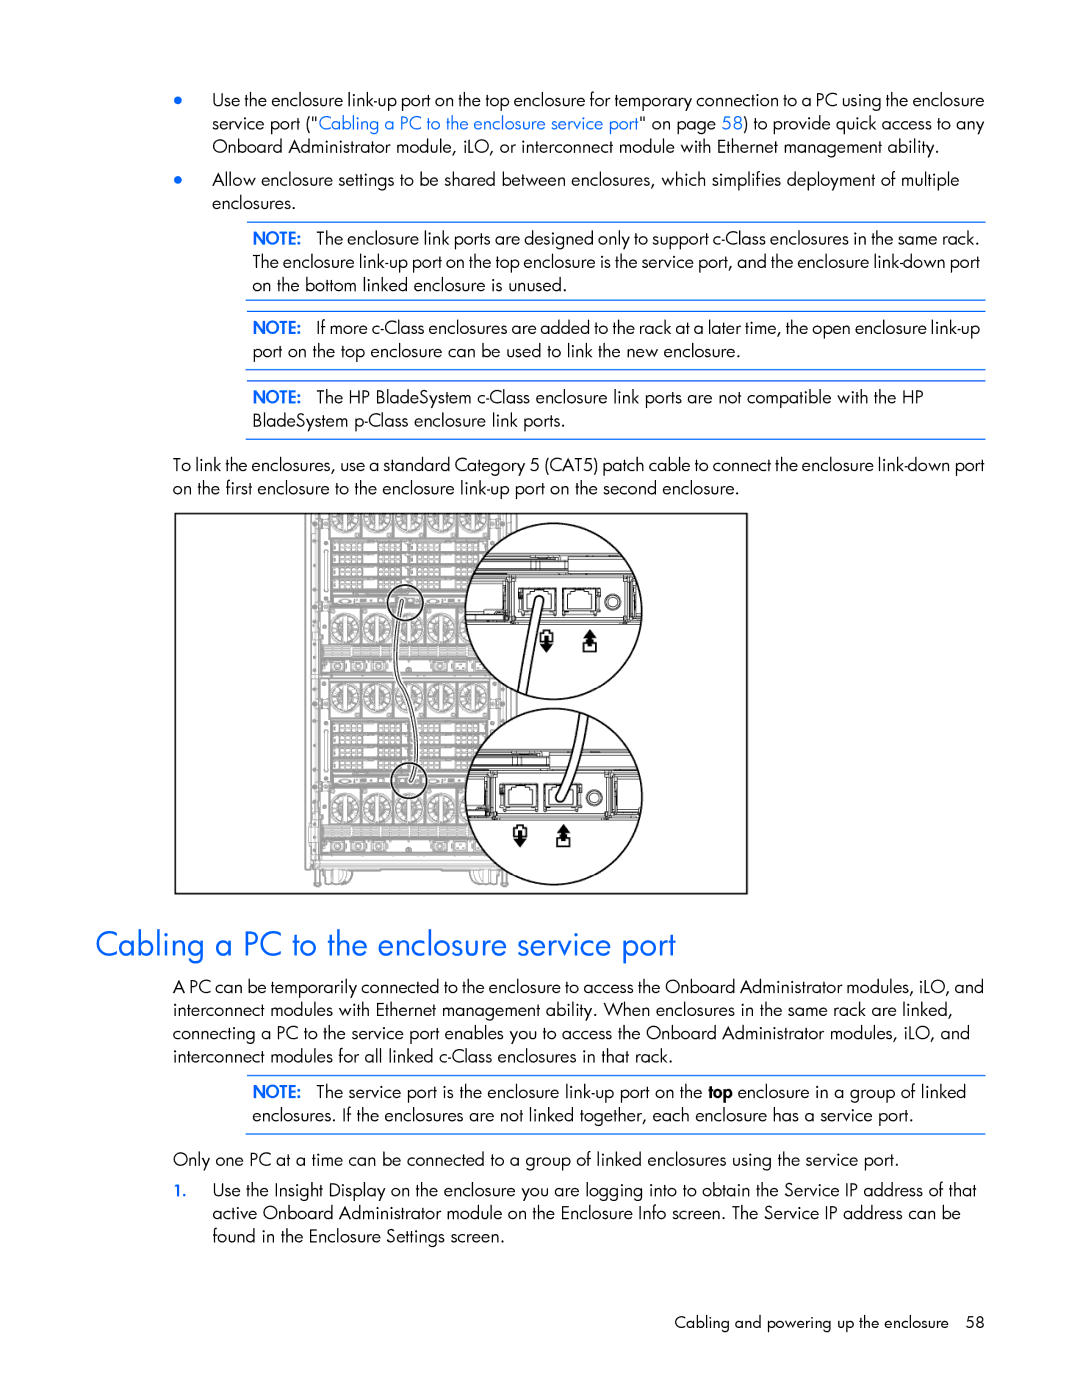
To link the enclosures, use a standard Category 5 (CAT5) patch cable to connect the enclosure
Cabling a PC to the enclosure service port
A PC can be temporarily connected to the enclosure to access the Onboard Administrator modules, iLO, and interconnect modules with Ethernet management ability. When enclosures in the same rack are linked, connecting a PC to the service port enables you to access the Onboard Administrator modules, iLO, and interconnect modules for all linked
NOTE: The service port is the enclosure
Only one PC at a time can be connected to a group of linked enclosures using the service port.
1.Use the Insight Display on the enclosure you are logging into to obtain the Service IP address of that active Onboard Administrator module on the Enclosure Info screen. The Service IP address can be found in the Enclosure Settings screen.
Cabling and powering up the enclosure 58