Removing a 3.5-inch Drive from a Drive Bay

CAUTION: All removable media should be taken out of a drive before removing the drive from the computer.

The 3.5-inch drive is located underneath the 5.25-inch drive. You must remove the 5.25-inch drive before removing the 3.5-inch drive.

1.Follow the procedure in Removing a 5.25-inch Drive from a Drive Bay on page 110 to remove the 5.25-inch drive and access the 3.5-inch drive.

CAUTION: Ensure that the computer is turned off and that the power cord is disconnected from the electrical outlet before proceeding.

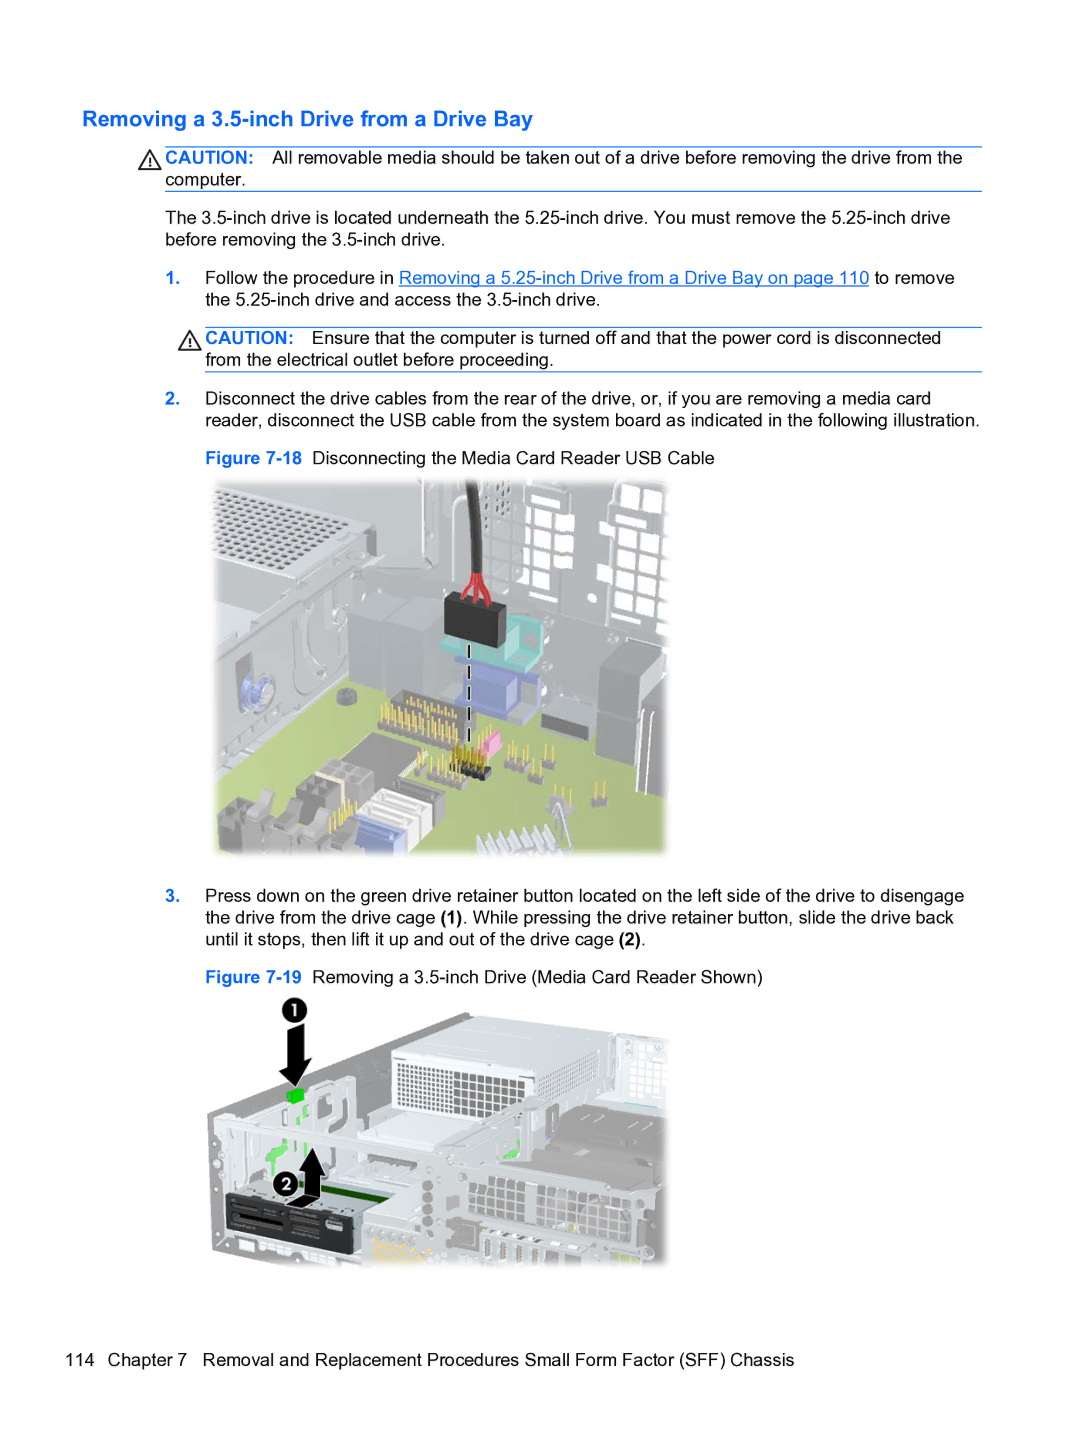
2.Disconnect the drive cables from the rear of the drive, or, if you are removing a media card reader, disconnect the USB cable from the system board as indicated in the following illustration.

Figure 7-18Disconnecting the Media Card Reader USB Cable

3.Press down on the green drive retainer button located on the left side of the drive to disengage the drive from the drive cage (1). While pressing the drive retainer button, slide the drive back until it stops, then lift it up and out of the drive cage (2).

Figure 7-19Removing a 3.5-inch Drive (Media Card Reader Shown)

114 Chapter 7 Removal and Replacement Procedures Small Form Factor (SFF) Chassis

Page 123
Image 123
HP Pro QV985AV manual Removing a 3.5-inch Drive from a Drive Bay