Getting Started
Unpacking
After unpacking, check to be sure that you have all the following items.
The numbers in the parentheses indicate the quantity of the pieces supplied.
•AM loop antenna (1)
•FM antenna (1)
•Remote control (1)
•Batteries (2)
•Speaker cord (2)
If any item is missing, consult your dealer immediately.
Connecting Antennas
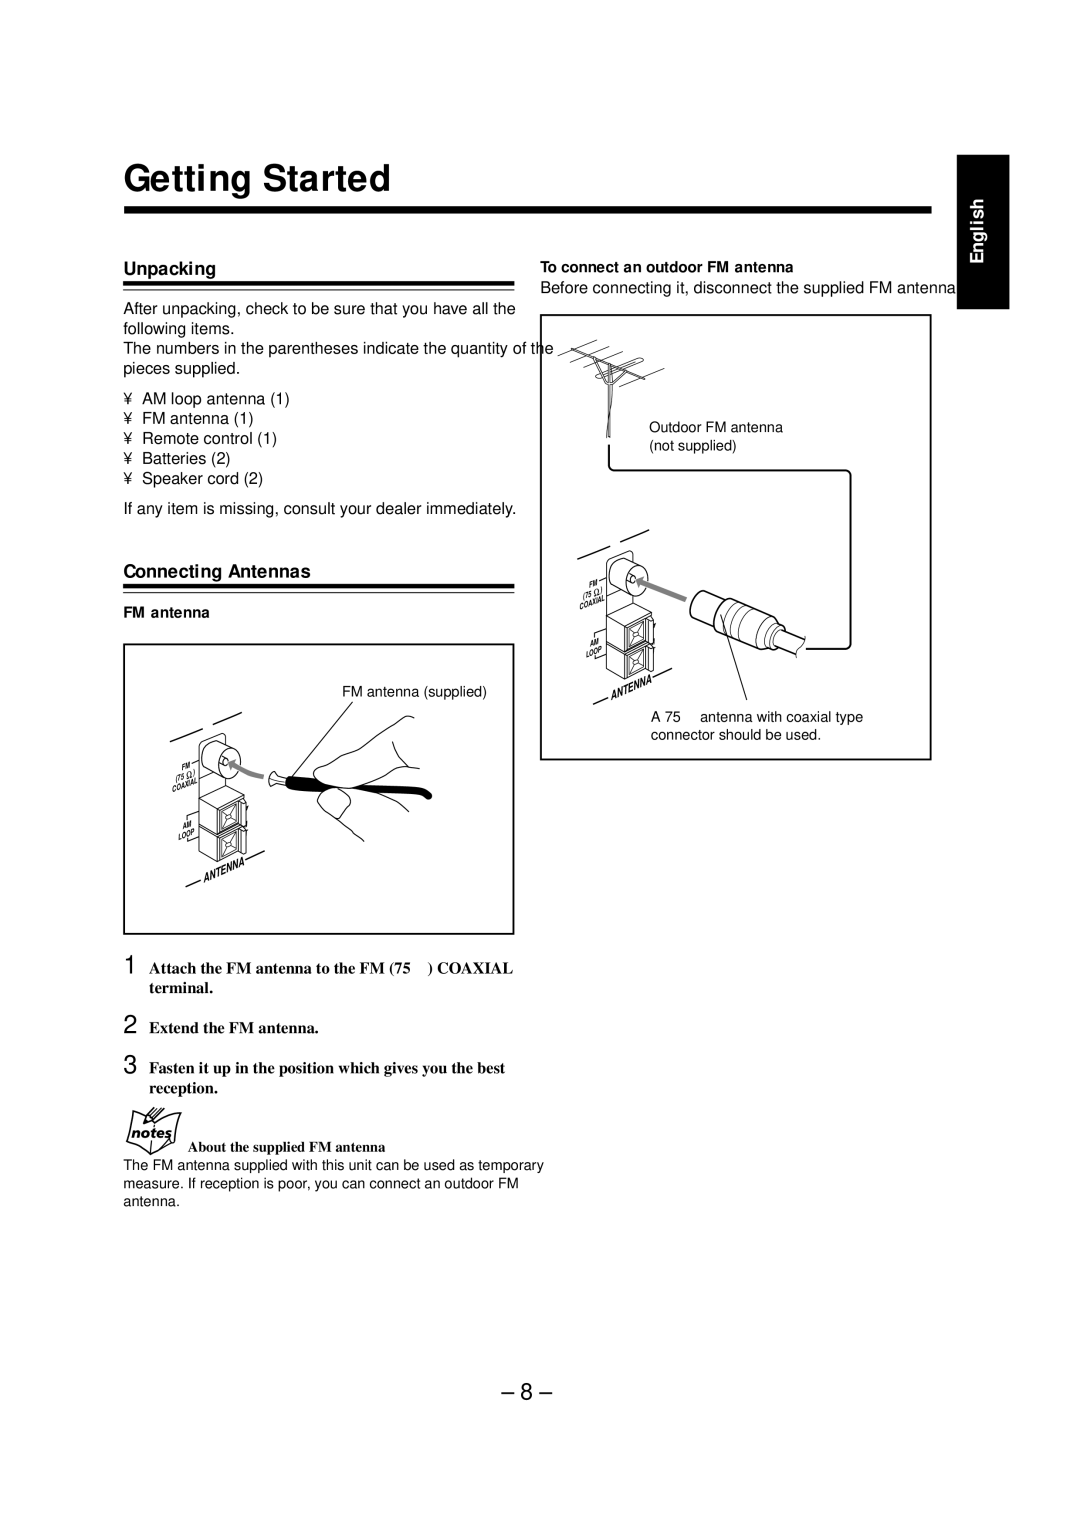
FM antenna
FM antenna (supplied)
FM | ) | |
(75 | ||
| ||
COAXIAL | ||
AM |
| |
LOOP | ||
ANTENNA
To connect an outdoor FM antenna
Before connecting it, disconnect the supplied FM antenna.
Outdoor FM antenna
(not supplied)
FM | ) | |
(75 | ||
| ||
COAXIAL | ||
AM |
| |
LOOP | ||
ANTENNA
A 75 Ω antenna with coaxial type connector should be used.
English
1 Attach the FM antenna to the FM (75 Ω ) COAXIAL terminal.
2 Extend the FM antenna.
3 Fasten it up in the position which gives you the best reception.
About the supplied FM antenna
The FM antenna supplied with this unit can be used as temporary measure. If reception is poor, you can connect an outdoor FM antenna.
– 8 –