Connection and Startup
The following section is specifically intended for the specialist dealer. You only need to read this section if you are carrying out the installation yourself.
You will find sample configurations in the section "Connection examples".
First carry out all installation work before connecting the receiver to the mains power supply.
Refer to the information provided in the section on "Safety".
To connect the receiver
Sat-IF connection
Connect the
Use a coaxial cable with a standard F connector for this purpose.
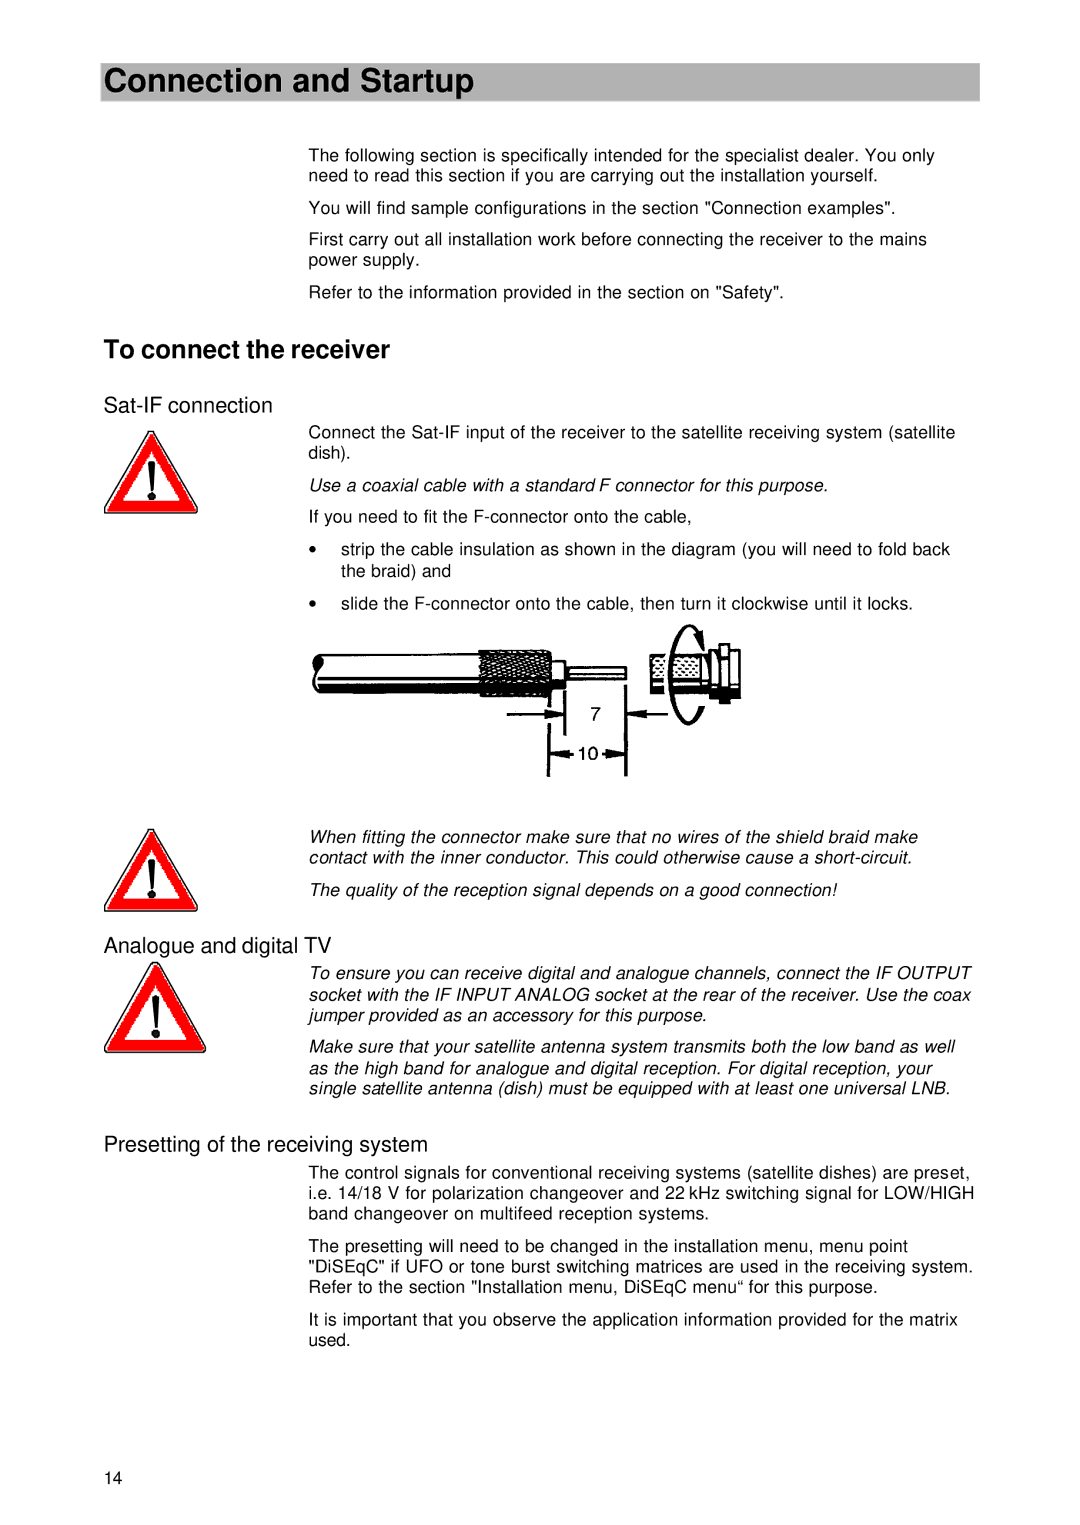
If you need to fit the
∙strip the cable insulation as shown in the diagram (you will need to fold back the braid) and
∙slide the
When fitting the connector make sure that no wires of the shield braid make contact with the inner conductor. This could otherwise cause a
The quality of the reception signal depends on a good connection!
Analogue and digital TV
To ensure you can receive digital and analogue channels, connect the IF OUTPUT socket with the IF INPUT ANALOG socket at the rear of the receiver. Use the coax jumper provided as an accessory for this purpose.
Make sure that your satellite antenna system transmits both the low band as well as the high band for analogue and digital reception. For digital reception, your single satellite antenna (dish) must be equipped with at least one universal LNB.
Presetting of the receiving system
The control signals for conventional receiving systems (satellite dishes) are preset, i.e. 14/18 V for polarization changeover and 22 kHz switching signal for LOW/HIGH band changeover on multifeed reception systems.
The presetting will need to be changed in the installation menu, menu point "DiSEqC" if UFO or tone burst switching matrices are used in the receiving system. Refer to the section "Installation menu, DiSEqC menu“ for this purpose.
It is important that you observe the application information provided for the matrix used.
14
