DiMAGE_Z20_English_B412.qxd 04.12.27 16:52 Page 46

SELF-TIMER

Used for self-portraits, the self-timer will delay the release of the shutter for approximately ten seconds or two seconds after the shutter-release button is pressed. The self-timer is set in section 1 of the recording menus (p. 44). The length of the self-timer delay is set in section 4 of the setup menu (p. 96).

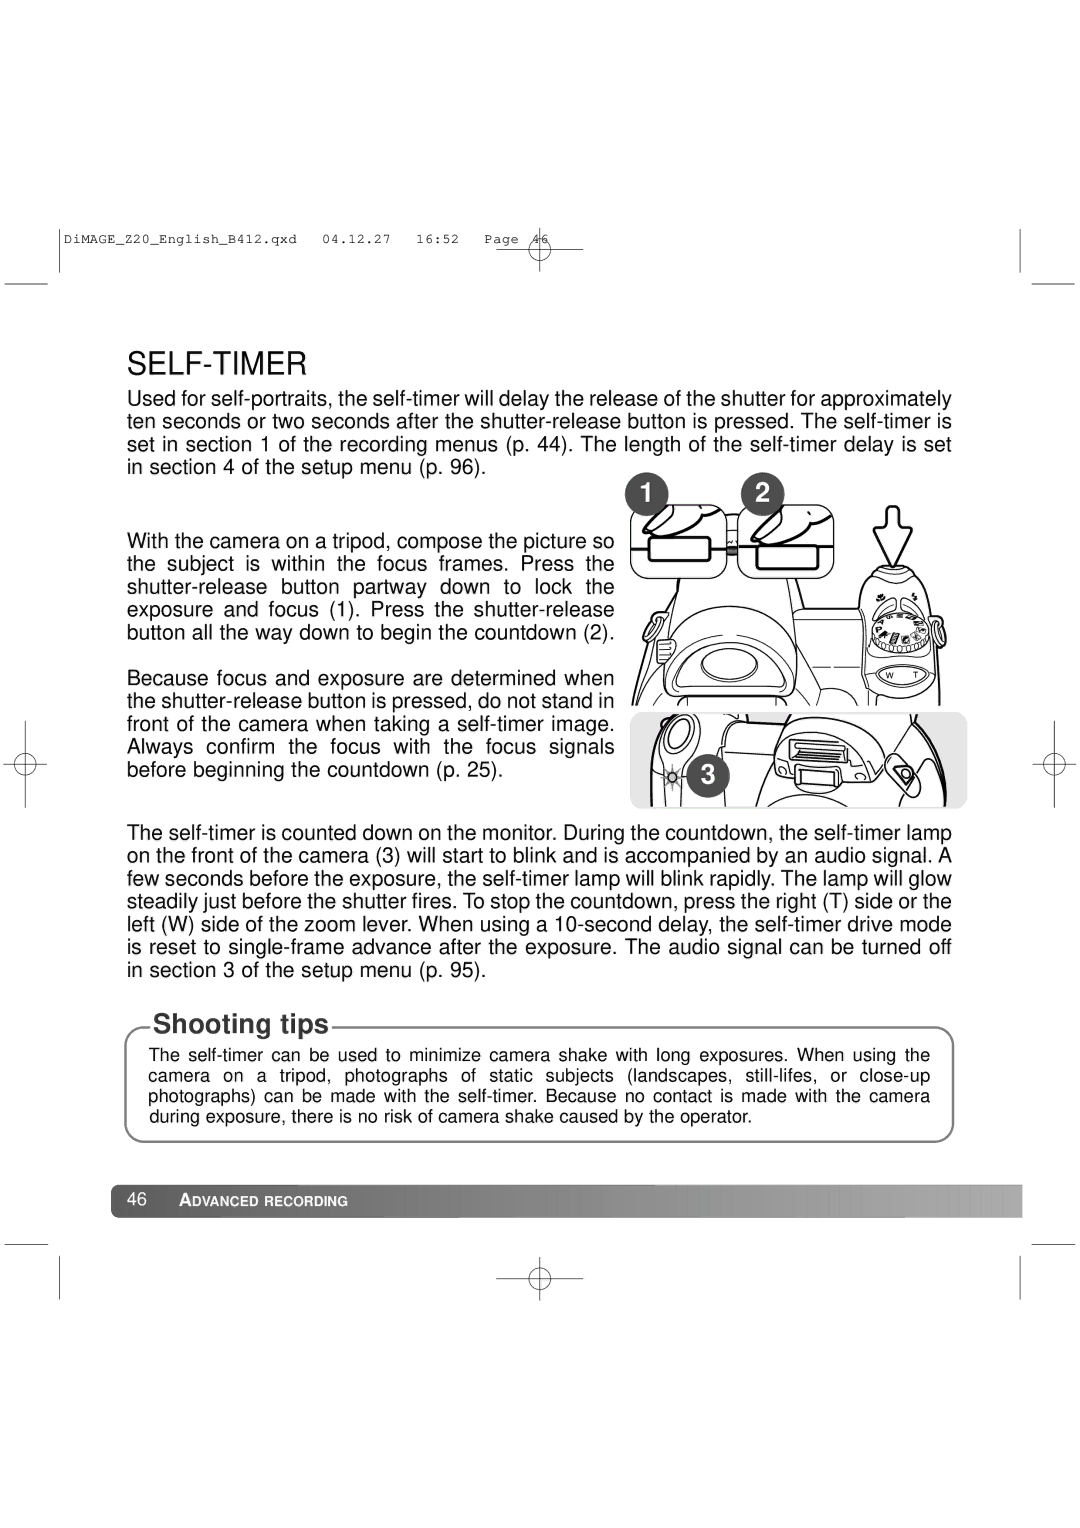
With the camera on a tripod, compose the picture so the subject is within the focus frames. Press the shutter-release button partway down to lock the exposure and focus (1). Press the shutter-release button all the way down to begin the countdown (2).

Because focus and exposure are determined when the shutter-release button is pressed, do not stand in front of the camera when taking a self-timer image. Always confirm the focus with the focus signals before beginning the countdown (p. 25).

1 2

3

The self-timer is counted down on the monitor. During the countdown, the self-timer lamp on the front of the camera (3) will start to blink and is accompanied by an audio signal. A few seconds before the exposure, the self-timer lamp will blink rapidly. The lamp will glow steadily just before the shutter fires. To stop the countdown, press the right (T) side or the left (W) side of the zoom lever. When using a 10-second delay, the self-timer drive mode is reset to single-frame advance after the exposure. The audio signal can be turned off in section 3 of the setup menu (p. 95).

Shooting tips

The self-timer can be used to minimize camera shake with long exposures. When using the camera on a tripod, photographs of static subjects (landscapes, still-lifes, or close-up photographs) can be made with the self-timer. Because no contact is made with the camera during exposure, there is no risk of camera shake caused by the operator.

46ADVANCED RECORDING

Page 46
Image 46
Konica Minolta Z20 instruction manual Self-Timer