7.2Operating via the LCD Display
You can control the
•Front panel OSD buttons: MENU, ENTER,
•Infrared remote control transmitter (see Section 7.3) keys: MENU, and the navigation keys
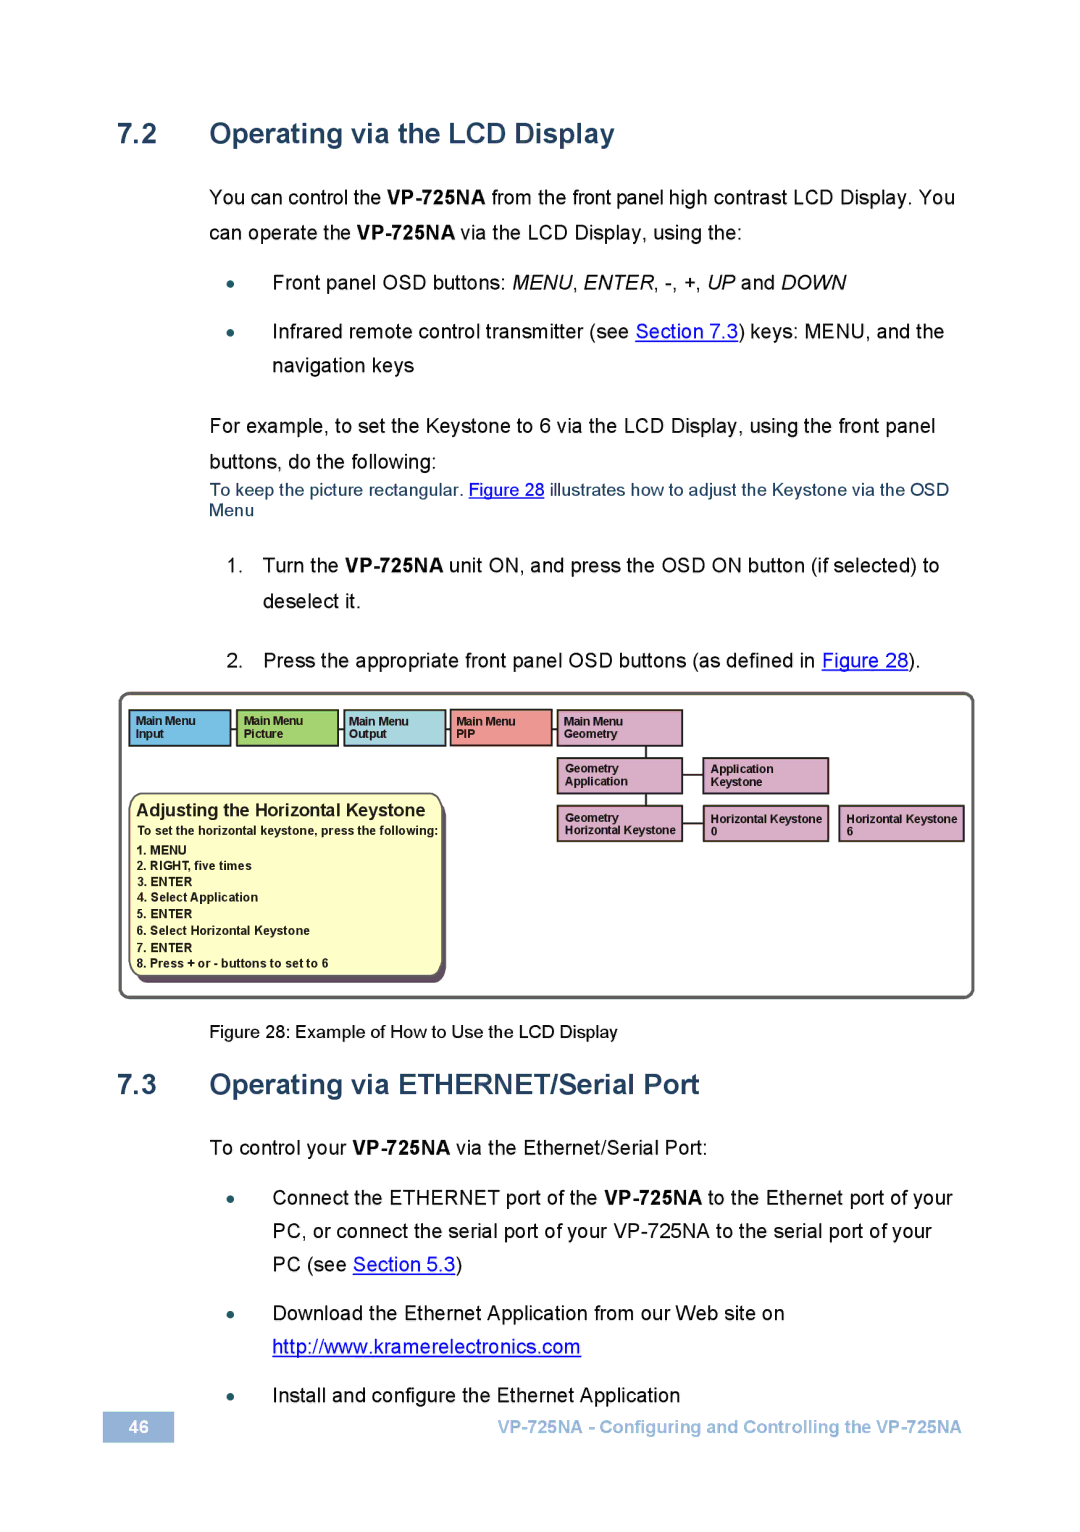
For example, to set the Keystone to 6 via the LCD Display, using the front panel buttons, do the following:
To keep the picture rectangular. Figure 28 illustrates how to adjust the Keystone via the OSD Menu
1.Turn the
2.Press the appropriate front panel OSD buttons (as defined in Figure 28).
Main Menu |
| Main Menu |
| Main Menu | Main Menu |
Input |
| Picture |
| Output | PIP |
Adjusting the Horizontal Keystone
To set the horizontal keystone, press the following:
1.MENU
2.RIGHT, five times
3.ENTER
4.Select Application
5.ENTER
6.Select Horizontal Keystone
7.ENTER
8.Press + or - buttons to set to 6
Main Menu
Geometry
Geometry
Application
Geometry Horizontal Keystone
Application
Keystone
| Horizontal Keystone |
| Horizontal Keystone |
| 0 |
| 6 |
Figure 28: Example of How to Use the LCD Display
7.3Operating via ETHERNET/Serial Port
To control your
•Connect the ETHERNET port of the
•Download the Ethernet Application from our Web site on http://www.kramerelectronics.com
•Install and configure the Ethernet Application
46 |