Setting up Your Network Parameters
Before using IMAGE SCANNER IS100e, please setup IMAGE SCANNER IS100e properly on your network to perform
To set up the network parameters via the control panel,
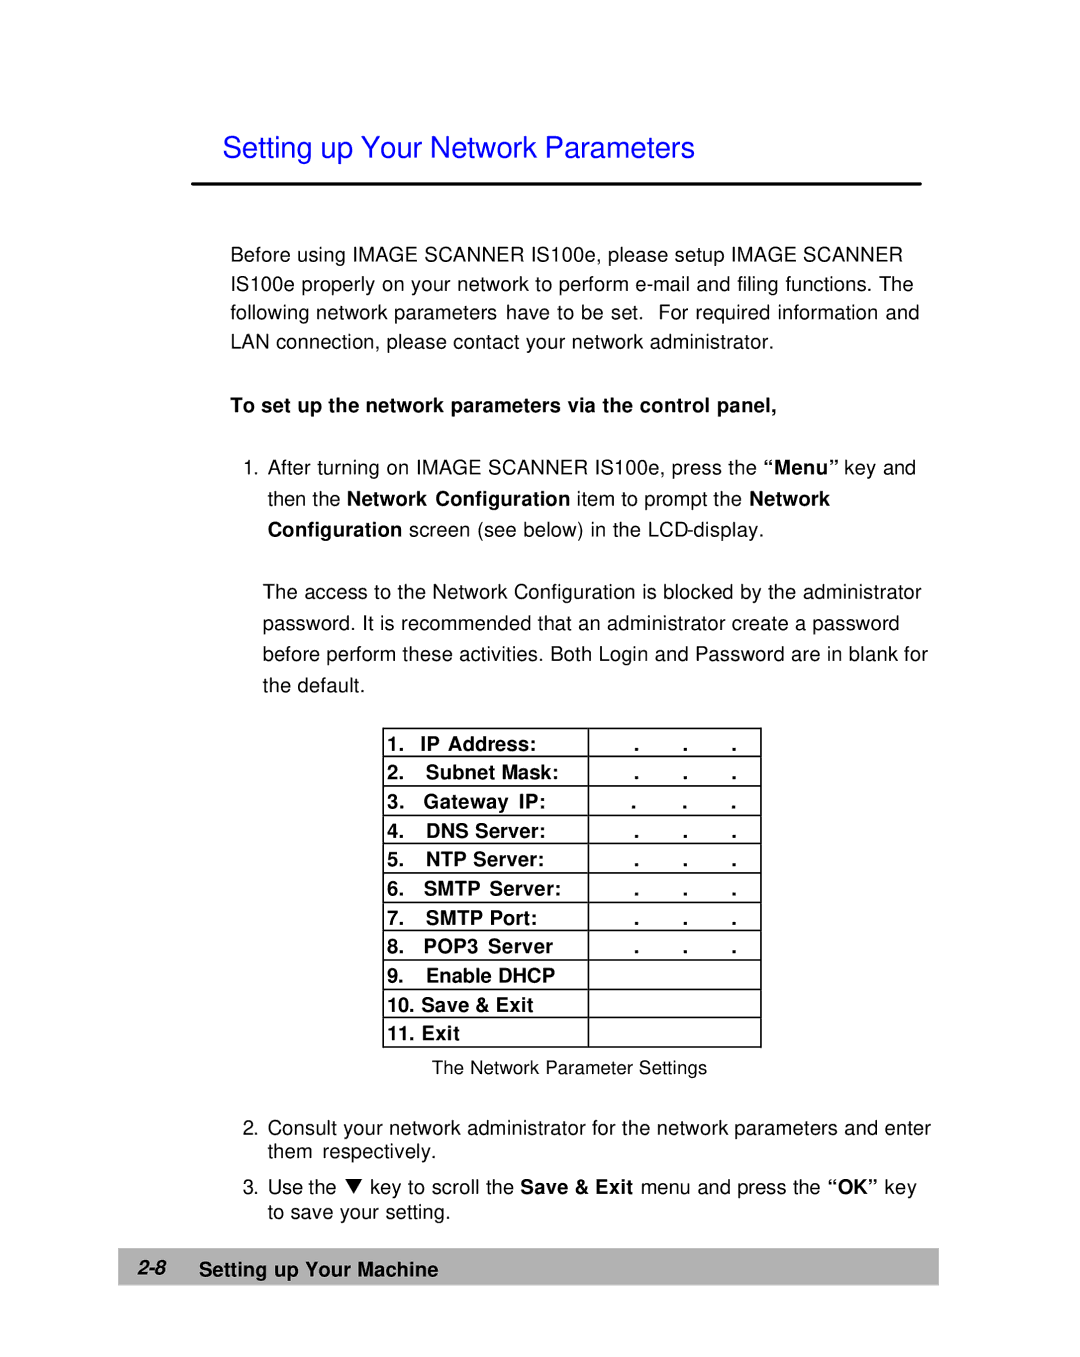
1.After turning on IMAGE SCANNER IS100e, press the “Menu” key and then the Network Configuration item to prompt the Network Configuration screen (see below) in the
The access to the Network Configuration is blocked by the administrator password. It is recommended that an administrator create a password before perform these activities. Both Login and Password are in blank for the default.
1. | IP Address: | . | . | . |
2. | Subnet Mask: | . | . | . |
3. | Gateway IP: | . | . | . |
4. | DNS Server: | . | . | . |
5. | NTP Server: | . | . | . |
6. | SMTP Server: | . | . | . |
7. | SMTP Port: | . | . | . |
8. | POP3 Server | . | . | . |
9. | Enable DHCP |
|
|
|
10. Save & Exit |
|
|
| |
11. Exit |
|
|
| |
| The Network Parameter Settings |
| ||
2.Consult your network administrator for the network parameters and enter them respectively.
3.Use the q key to scroll the Save & Exit menu and press the “OK” key to save your setting.