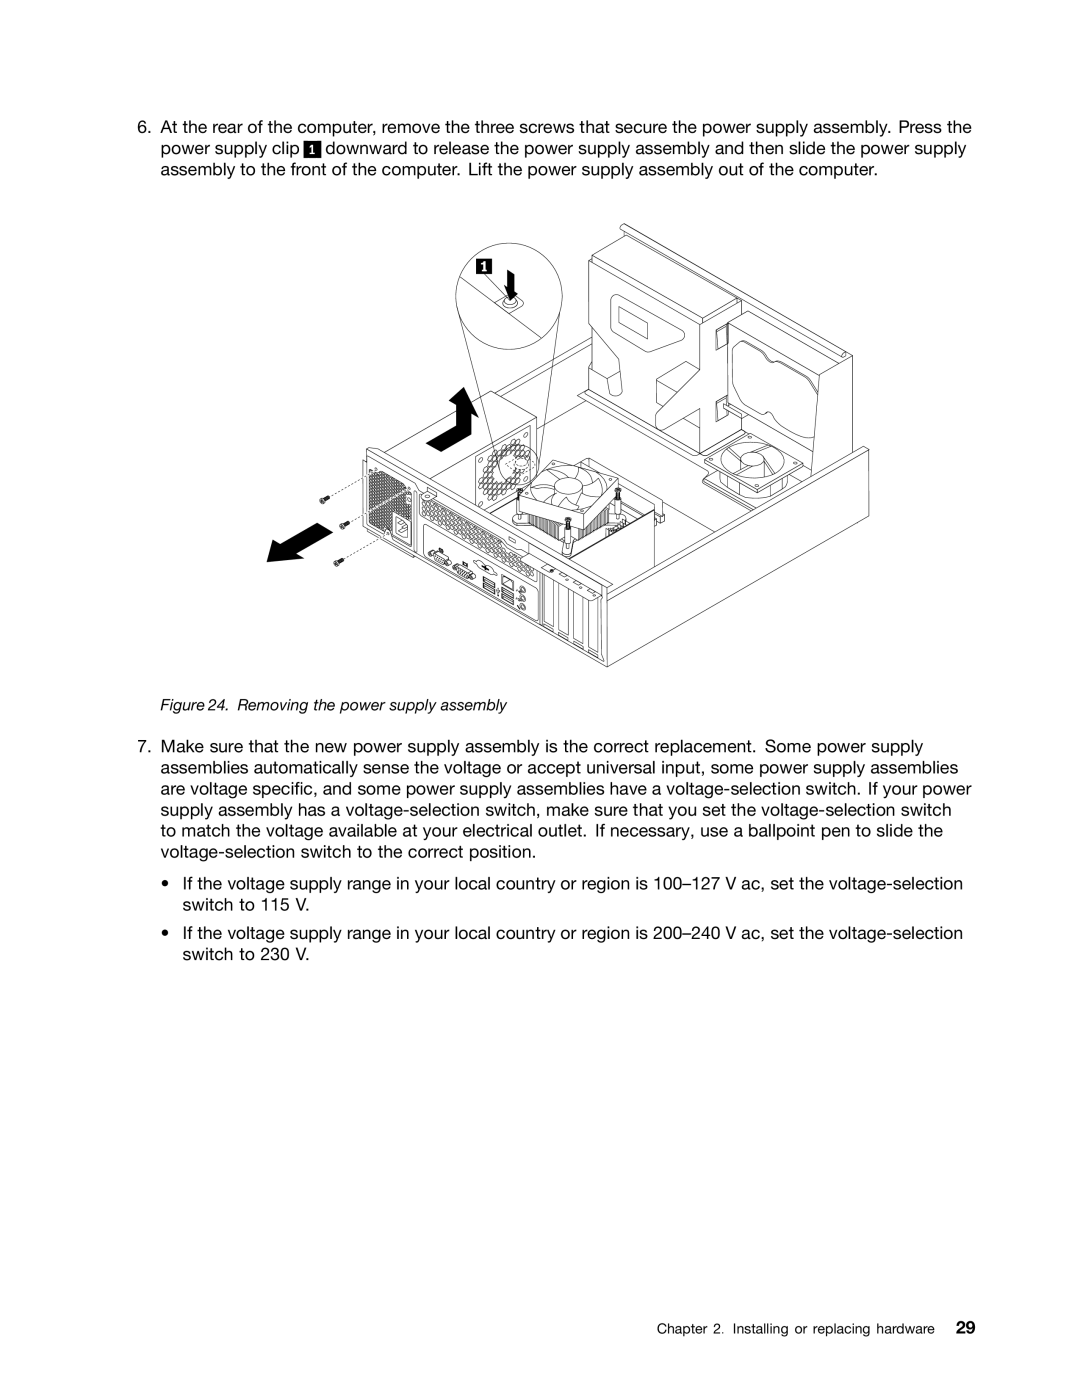
6.At the rear of the computer, remove the three screws that secure the power supply assembly. Press the power supply clip 1 downward to release the power supply assembly and then slide the power supply assembly to the front of the computer. Lift the power supply assembly out of the computer.
Figure 24. Removing the power supply assembly
7.Make sure that the new power supply assembly is the correct replacement. Some power supply assemblies automatically sense the voltage or accept universal input, some power supply assemblies are voltage specific, and some power supply assemblies have a
•If the voltage supply range in your local country or region is
•If the voltage supply range in your local country or region is
Chapter 2. Installing or replacing hardware 29