Remote Printer | The |
jobs will be sent to this | |
|
|
Mail Server Name | This is the name or IP Address of your Mail Server. If |
or IP Address | you are on a LAN, ask the LAN Administrator. If using |
| a |
|
|
Your Internet | The normal address that people use to send you |
| |
|
|
Retry Interval | If unable to connect to the |
(Seconds) | time period (1 to 255 seconds, 30 is usually OK). |
|
|
Reply Notification | Check to receive an |
been processed. | |
|
|
5.On completion, a new printer port will have been created.
Using the new Port
The Windows Control Panel is used to connect the correct printer to the InterNet Printing Port. In Windows 95/NT, the procedure is:
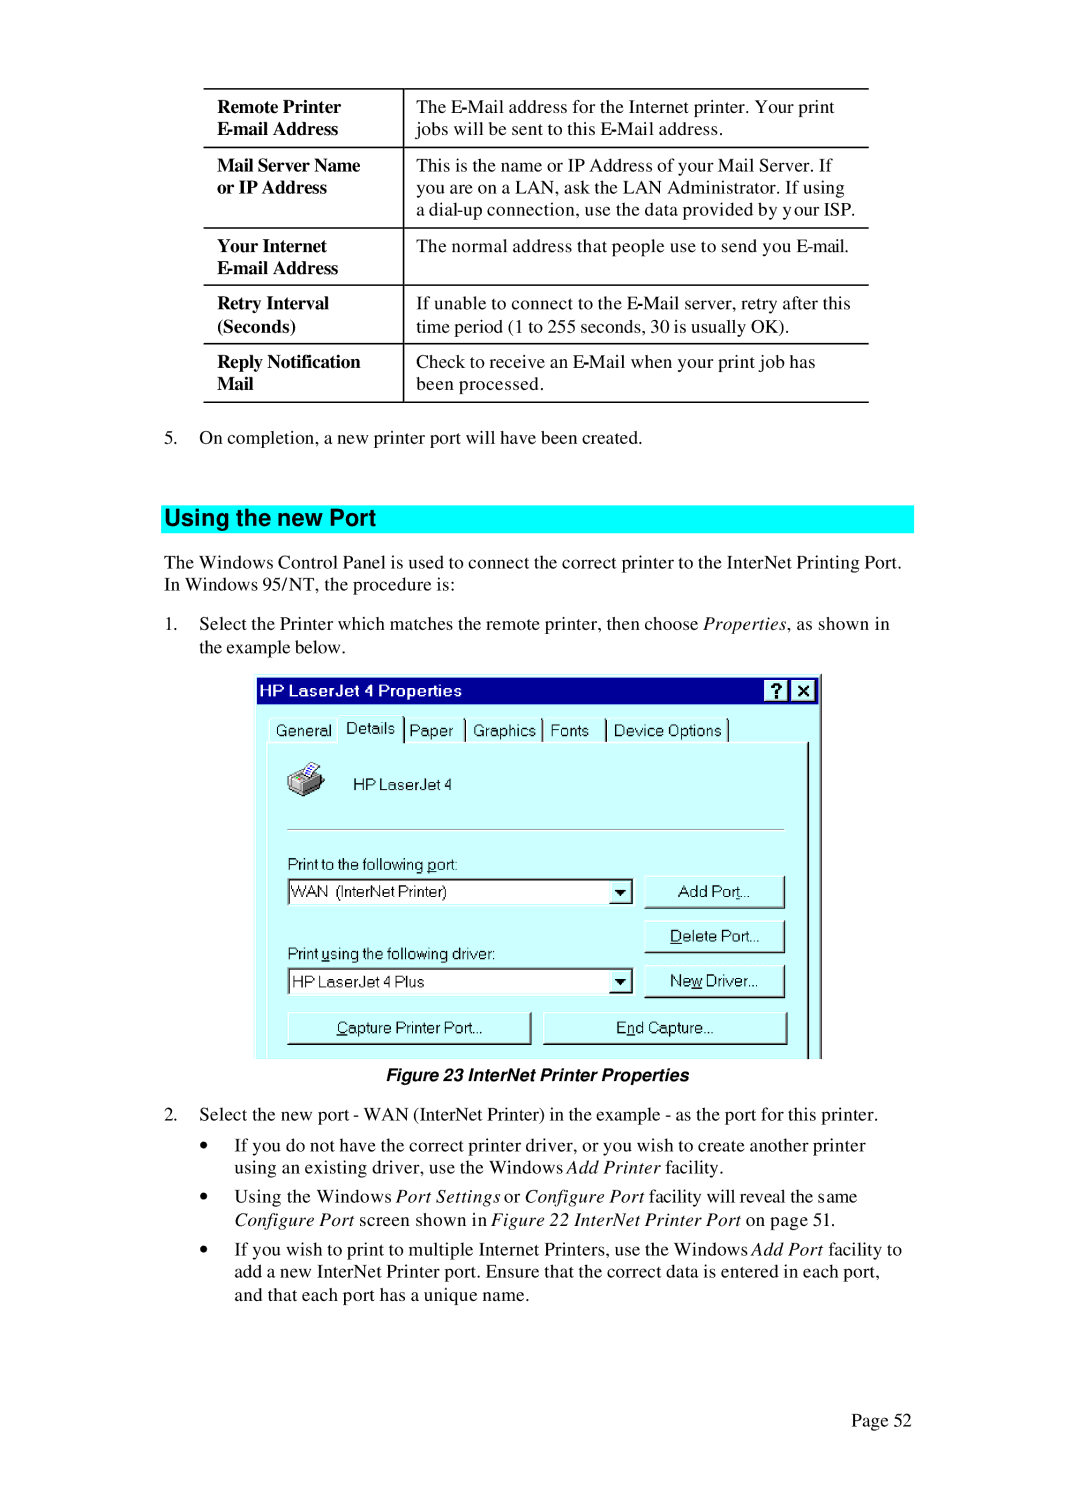
1.Select the Printer which matches the remote printer, then choose Properties, as shown in the example below.
Figure 23 InterNet Printer Properties
2.Select the new port - WAN (InterNet Printer) in the example - as the port for this printer.
∙If you do not have the correct printer driver, or you wish to create another printer using an existing driver, use the Windows Add Printer facility.
∙Using the Windows Port Settings or Configure Port facility will reveal the same Configure Port screen shown in Figure 22 InterNet Printer Port on page 51.
∙If you wish to print to multiple Internet Printers, use the Windows Add Port facility to add a new InterNet Printer port. Ensure that the correct data is entered in each port, and that each port has a unique name.
Page 52