TOC
TOC
TROUBLESHOOTING & REPAIR
OUTPUT RECTIFIER MODULES
REMOVAL AND REPLACEMENT (continued)
Return to Section
Return to Section TOC
Return to Master
Return to Master TOC
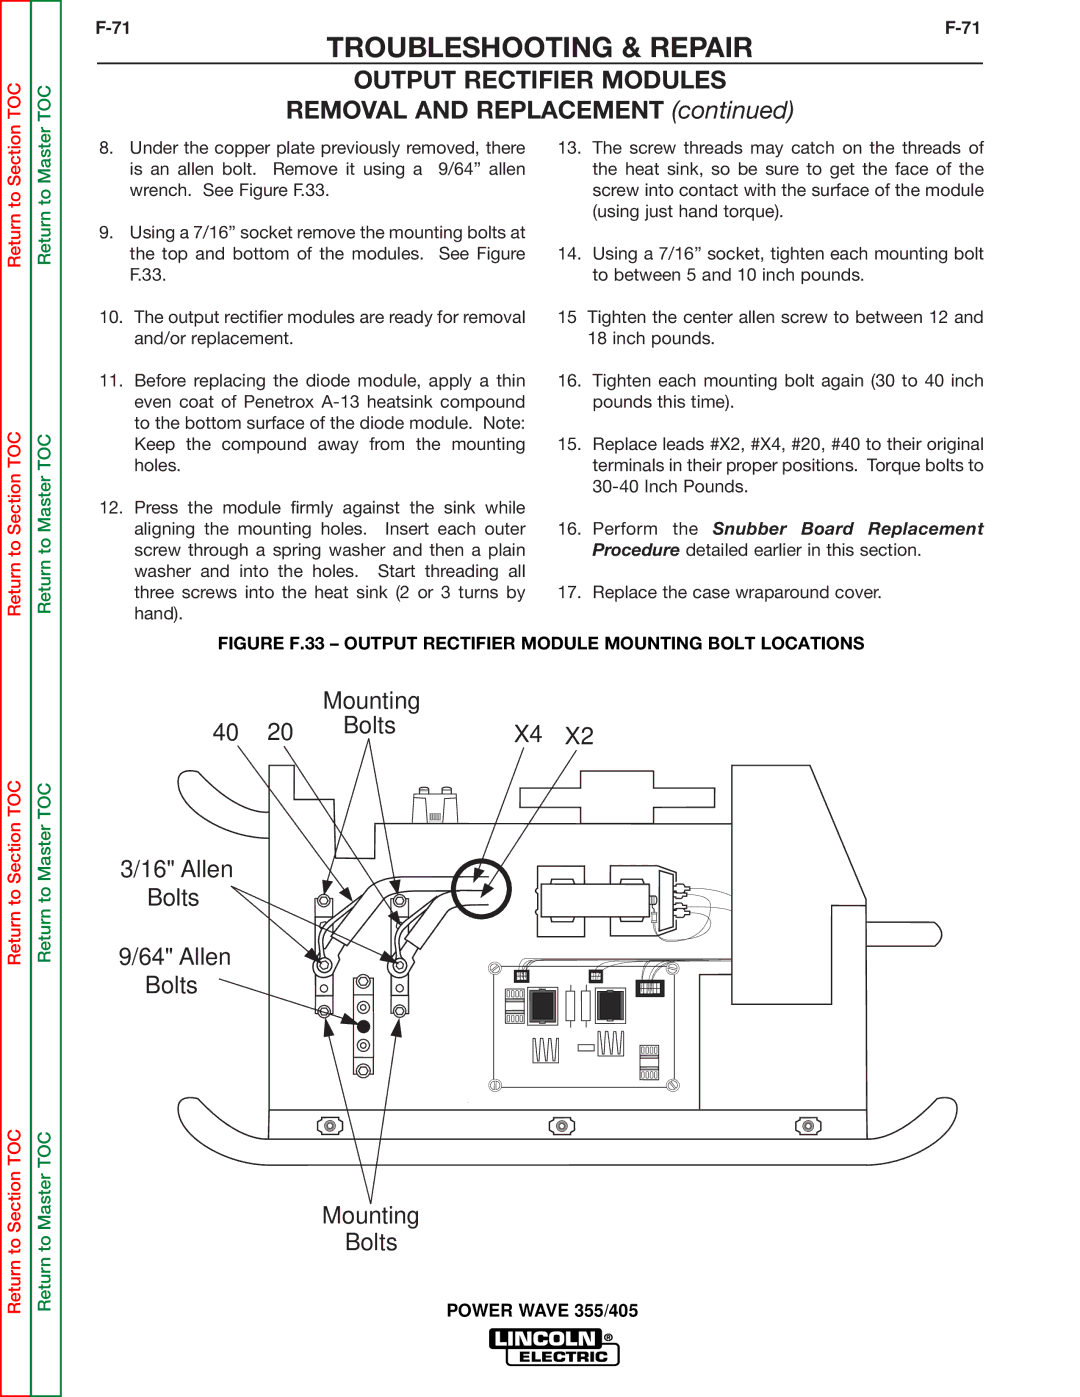
8.Under the copper plate previously removed, there is an allen bolt. Remove it using a 9/64” allen wrench. See Figure F.33.
9.Using a 7/16” socket remove the mounting bolts at the top and bottom of the modules. See Figure F.33.
10.The output rectifier modules are ready for removal and/or replacement.
11.Before replacing the diode module, apply a thin even coat of Penetrox
12.Press the module firmly against the sink while aligning the mounting holes. Insert each outer screw through a spring washer and then a plain washer and into the holes. Start threading all three screws into the heat sink (2 or 3 turns by hand).
13.The screw threads may catch on the threads of the heat sink, so be sure to get the face of the screw into contact with the surface of the module (using just hand torque).
14.Using a 7/16” socket, tighten each mounting bolt to between 5 and 10 inch pounds.
15Tighten the center allen screw to between 12 and 18 inch pounds.
16.Tighten each mounting bolt again (30 to 40 inch pounds this time).
15.Replace leads #X2, #X4, #20, #40 to their original terminals in their proper positions. Torque bolts to
16.Perform the Snubber Board Replacement Procedure detailed earlier in this section.
17.Replace the case wraparound cover.
Return to Section TOC
Return to Section TOC
Return to Master TOC
Return to Master TOC
FIGURE F.33 – OUTPUT RECTIFIER MODULE MOUNTING BOLT LOCATIONS
|
| Mounting |
|
|
40 | 20 | Bolts | X4 | X2 |
|
3/16" Allen
Bolts
9/64" Allen
Bolts
Mounting
Bolts
