Instant Broadband® Series
3.Select Internet Protocol (TCP/IP), as shown in Figure
Figure
4.Select Obtain an IP address automatically. Once the new window Select Obtain an IP address automatically in both places, as shown in Figure 5- 8, and click the OK button. Click the OK button again to complete the PC configuration.
Figure
5. Restart your computer.
Go to “Chapter 6: Configure the Router.”
EtherFast® Cable/DSL Firewall Router with
Chapter 6: Configure the Router
This chapter will show you how to configure the Router to function in your net- work and gain access to the Internet through your Internet Service Provider (ISP). Detailed description of the Router’s
The instructions from your ISP will tell you how to set up your PC for Internet access. Because you are now using the Router to share Internet access among several computers, you will use the setup information to configure the Router instead of your PC. You only need to configure the Router once using the first computer you set up.
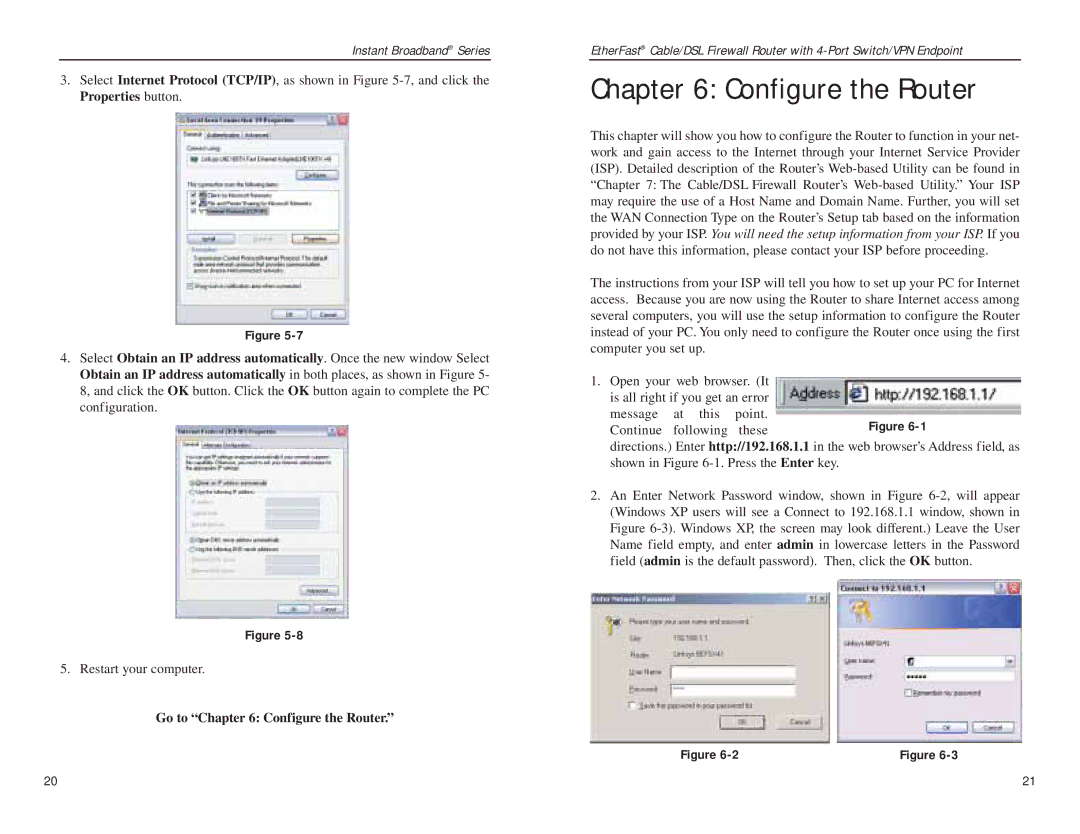
1.Open your web browser. (It is all right if you get an error message at this point.
Continue following these
directions.) Enter http://192.168.1.1 in the web browser’s Address field, as shown in Figure
2.An Enter Network Password window, shown in Figure
Figure | Figure |
20 | 21 |