Connecting Devices to the SGE2010/SGE2010P
Before You Install the Switch...
Before You Install the Switch...
When you choose a location for the switch, observe the following guidelines:
•Make sure that the switch will be accessible and that the cables can be easily connected.
•Keep cabling away from sources of electrical noise, power lines, and fluorescent lighting fixtures.
•Position the switch away from water and moisture sources.
•To ensure adequate air flow around the switch, be sure to provide a minimum clearance of two inches (50 mm).
•Connect the supplied power cord to the switch’s power port, and plug the other end into an electrical outlet.
CAUTION: Make sure you use the power cord that is supplied with the switch. Use of a different power cord could damage the switch.
Placement Options
Before connecting cables to the Ethernet switch, first you will physically install the Ethernet switch. Either set the Ethernet switch on its four rubber feet for desktop placement, mount it in a
NOTE: The four supplied mounting brackets can be used for either wall mount or rack mount installations.
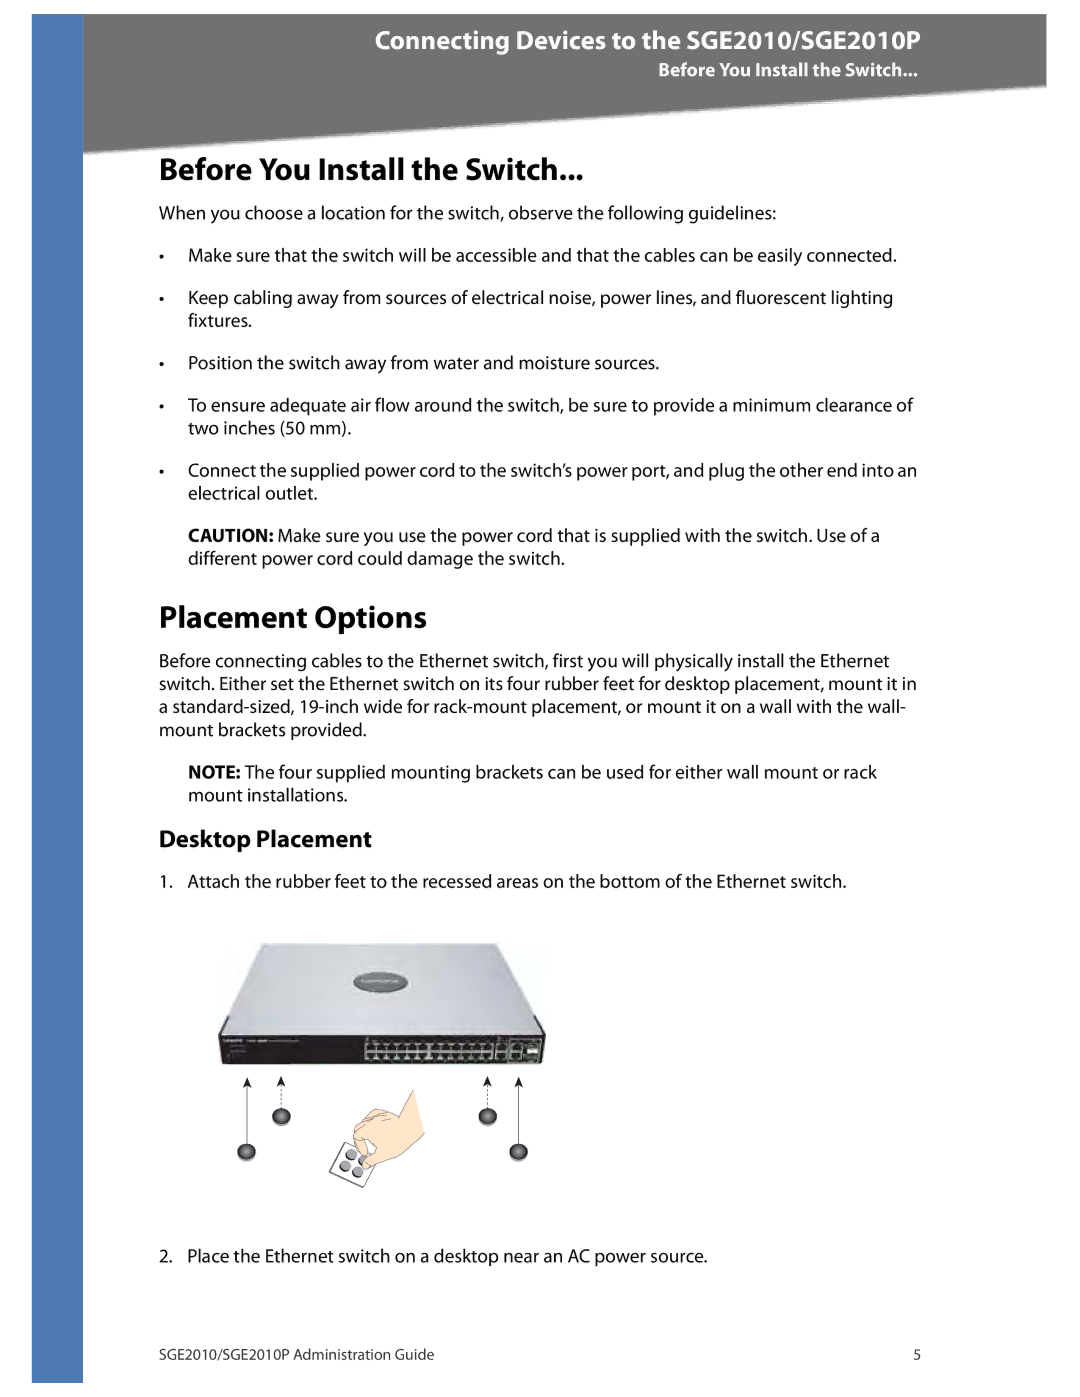
Desktop Placement
1. Attach the rubber feet to the recessed areas on the bottom of the Ethernet switch.
2. Place the Ethernet switch on a desktop near an AC power source.
SGE2010/SGE2010P Administration Guide | 5 |