1
2 ![]()
Keyboard
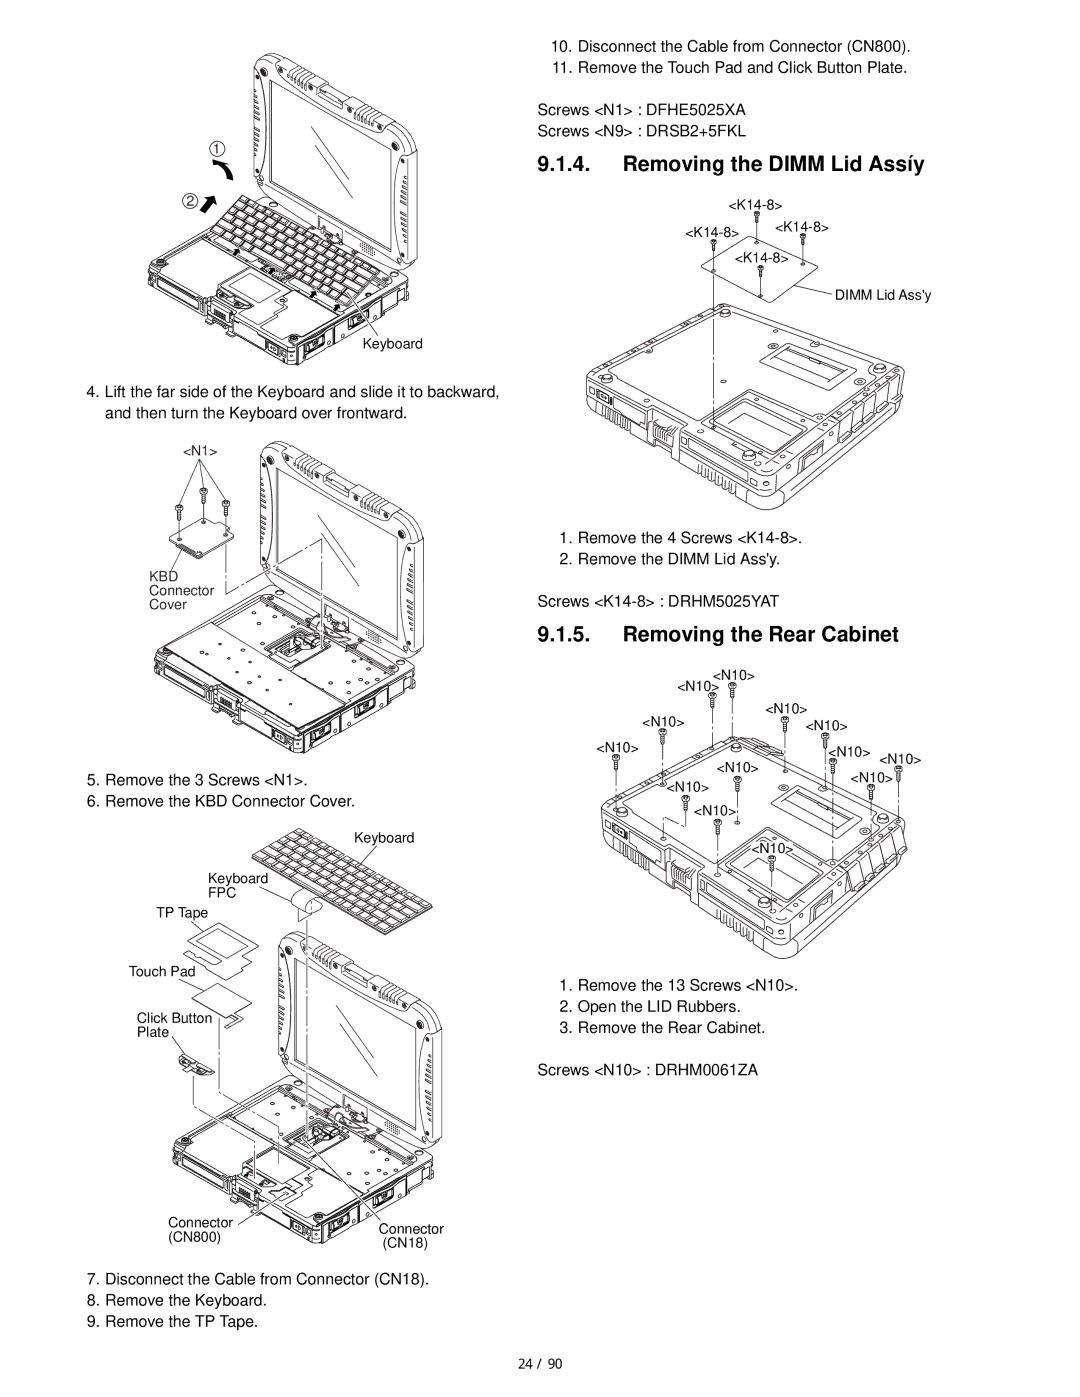
4.Lift the far side of the Keyboard and slide it to backward, and then turn the Keyboard over frontward.
<N1>
KBD
Connector
Cover
5.Remove the 3 Screws <N1>.
6.Remove the KBD Connector Cover.
Keyboard
Keyboard
FPC
TP Tape
Touch Pad
Click Button
Plate
10.Disconnect the Cable from Connector (CN800).
11.Remove the Touch Pad and Click Button Plate.
Screws <N1> : DFHE5025XA
Screws <N9> : DRSB2+5FKL
9.1.4.Removing the DIMM Lid Assíy
![]() DIMM Lid Ass'y
DIMM Lid Ass'y
1.Remove the 4 Screws
2.Remove the DIMM Lid Ass'y.
Screws
9.1.5.Removing the Rear Cabinet
<N10> |
| |
<N10> |
| |
<N10> | <N10> | |
<N10> | ||
<N10> | <N10> <N10> | |
<N10> | ||
<N10> | ||
<N10> | ||
| ||
<N10> |
| |
<N10> | ||
1.Remove the 13 Screws <N10>.
2.Open the LID Rubbers.
3.Remove the Rear Cabinet.
Screws <N10> : DRHM0061ZA
Connector | Connector | |
(CN800) | ||
(CN18) | ||
|
7.Disconnect the Cable from Connector (CN18).
8.Remove the Keyboard.
9.Remove the TP Tape.
24 / 90
