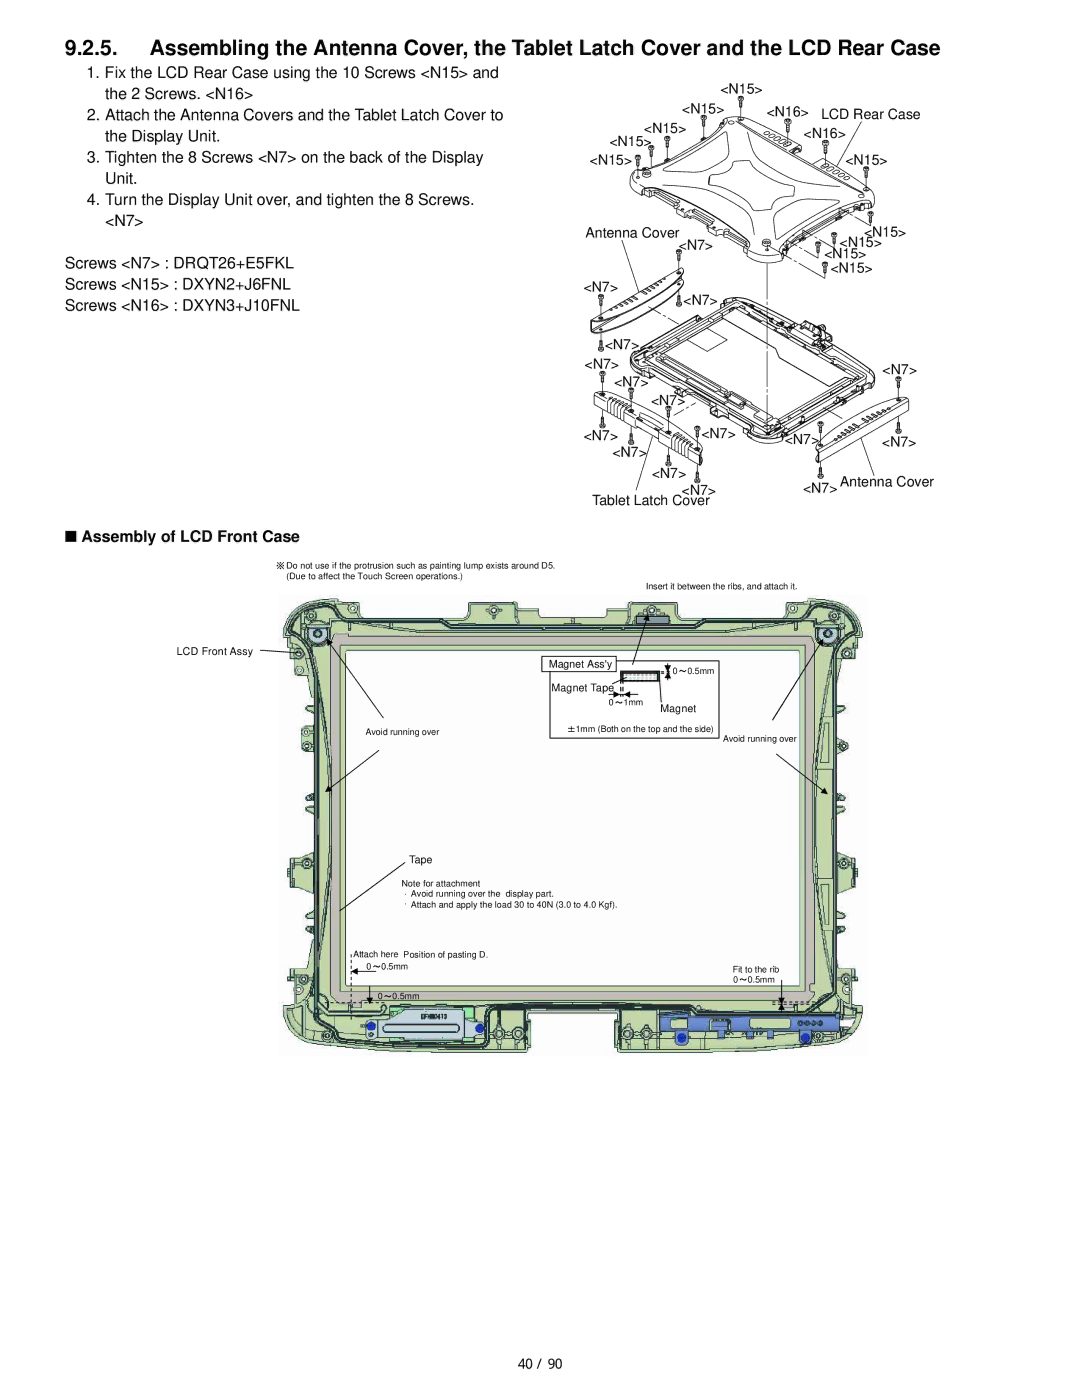
9.2.5.Assembling the Antenna Cover, the Tablet Latch Cover and the LCD Rear Case
1.Fix the LCD Rear Case using the 10 Screws <N15> and the 2 Screws. <N16>
2.Attach the Antenna Covers and the Tablet Latch Cover to the Display Unit.
3.Tighten the 8 Screws <N7> on the back of the Display Unit.
4.Turn the Display Unit over, and tighten the 8 Screws. <N7>
Screws <N7> : DRQT26+E5FKL
Screws <N15> : DXYN2+J6FNL
Screws <N16> : DXYN3+J10FNL
■Assembly of LCD Front Case
| <N15> |
|
| |
| <N15> | <N16> | LCD Rear Case | |
<N15> | <N16> | |||
<N15> | ||||
|
| |||
<N15> |
|
| <N15> | |
Antenna Cover |
| <N15> | ||
| <N7> |
| <N15> | |
|
|
| <N15> | |
|
|
| <N15> | |
<N7> | <N7> |
|
| |
|
|
| ||
<N7> |
|
|
| |
<N7> |
|
| <N7> | |
<N7> |
|
| ||
<N7> |
|
| ||
|
|
| ||
<N7> | <N7> | <N7> | <N7> | |
<N7> |
|
|
| |
| <N7> | <N7> Antenna Cover | ||
| <N7> | |||
Tablet Latch Cover |
|
| ||
![]() Do not use if the protrusion such as painting lump exists around D5. (Due to affect the Touch Screen operations.)
Do not use if the protrusion such as painting lump exists around D5. (Due to affect the Touch Screen operations.)
Insert it between the ribs, and attach it.
LCD Front Assy
Magnet Ass'y 

 0 0.5mm
Magnet Tape
0 1mm Magnet
Avoid running over | 1mm (Both on the top and the side) |
|
Tape
Avoid running over
Note for attachment
Avoid running over the display part.
Attach and apply the load 30 to 40N (3.0 to 4.0 Kgf).
Attach here Position of pasting D. 0![]() 0.5mm
0.5mm
0![]() 0.5mm
0.5mm
Fit to the rib 0![]() 0.5mm
0.5mm
40 / 90