Supported Modes
The
Mode | Host | Description | Network type |
|
|
|
Transfer | Computer or | Upload new or existing photographs to host. |
| 21 | ||
mode | ftp server |
| Wireless and |
|
|
|
PC mode | Computer | Control camera from computer. | 26 | |||
|
|
| Ethernet |
|
|
|
| Computer | Print JPEG photographs on printer connected to | 30 | |||
|
| |||||
network computer. |
| |||||
|
|
|
|
| ||
mode | Print JPEG photographs on PictBridge printer con- | Wireless | 32 | |||
| printer adapter | nected to optional | only | |||
|
|
|
| |||
The WT-3 Setup Utility CD
The supplied WT-3 Setup Utility CD contains the following:
•![]() 7, 11): Use this software to copy host profi les to the camera.
7, 11): Use this software to copy host profi les to the camera.
•D200 A and B firmware version 2.00 (![]() 6): Update to this version of the camera fi rm- ware before using the
6): Update to this version of the camera fi rm- ware before using the
•D200 firmware update manual (![]() 6): Read this manual for instructions on updating the camera fi rmware.
6): Read this manual for instructions on updating the camera fi rmware.
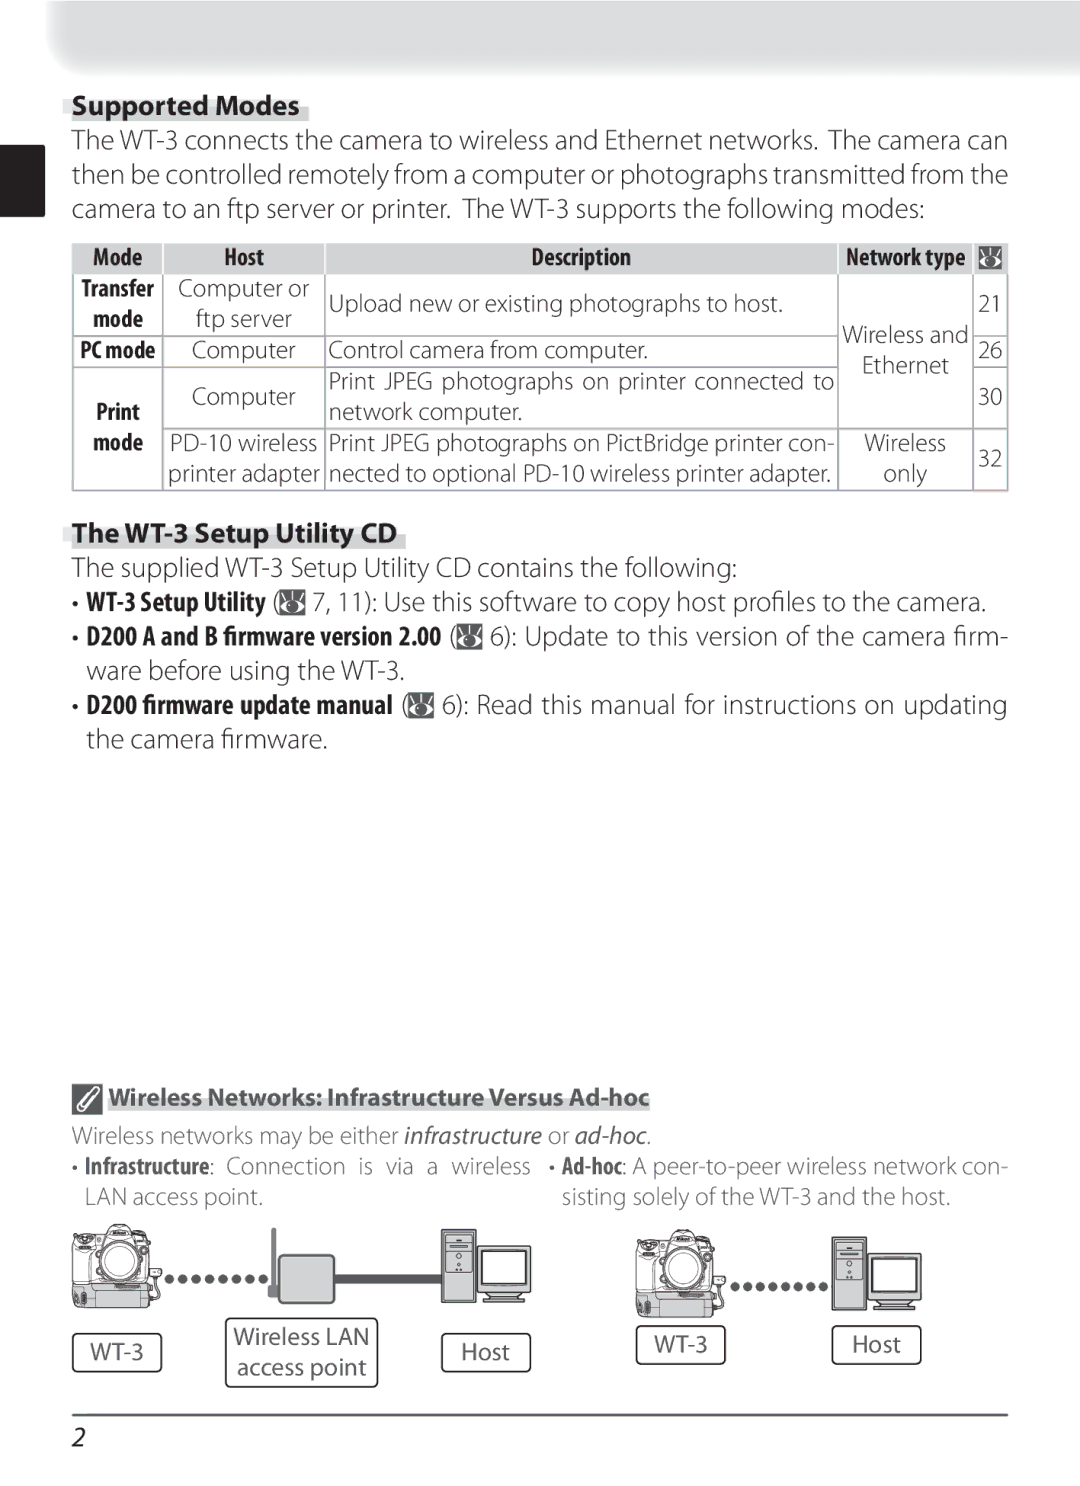
Wireless Networks: Infrastructure Versus |
|
| |||
Wireless networks may be either infrastructure or |
|
| |||
• Infrastructure: Connection is via a | wireless • | ||||
LAN access point. | sisting solely of the | ||||
Wireless LAN | Host | Host | |||
access point | |||||
|
| ||||
|
|
|
| ||
2