Mac OS X Version 10.3 or Later
1 Start the computer and log in to an account with administrator privileges.
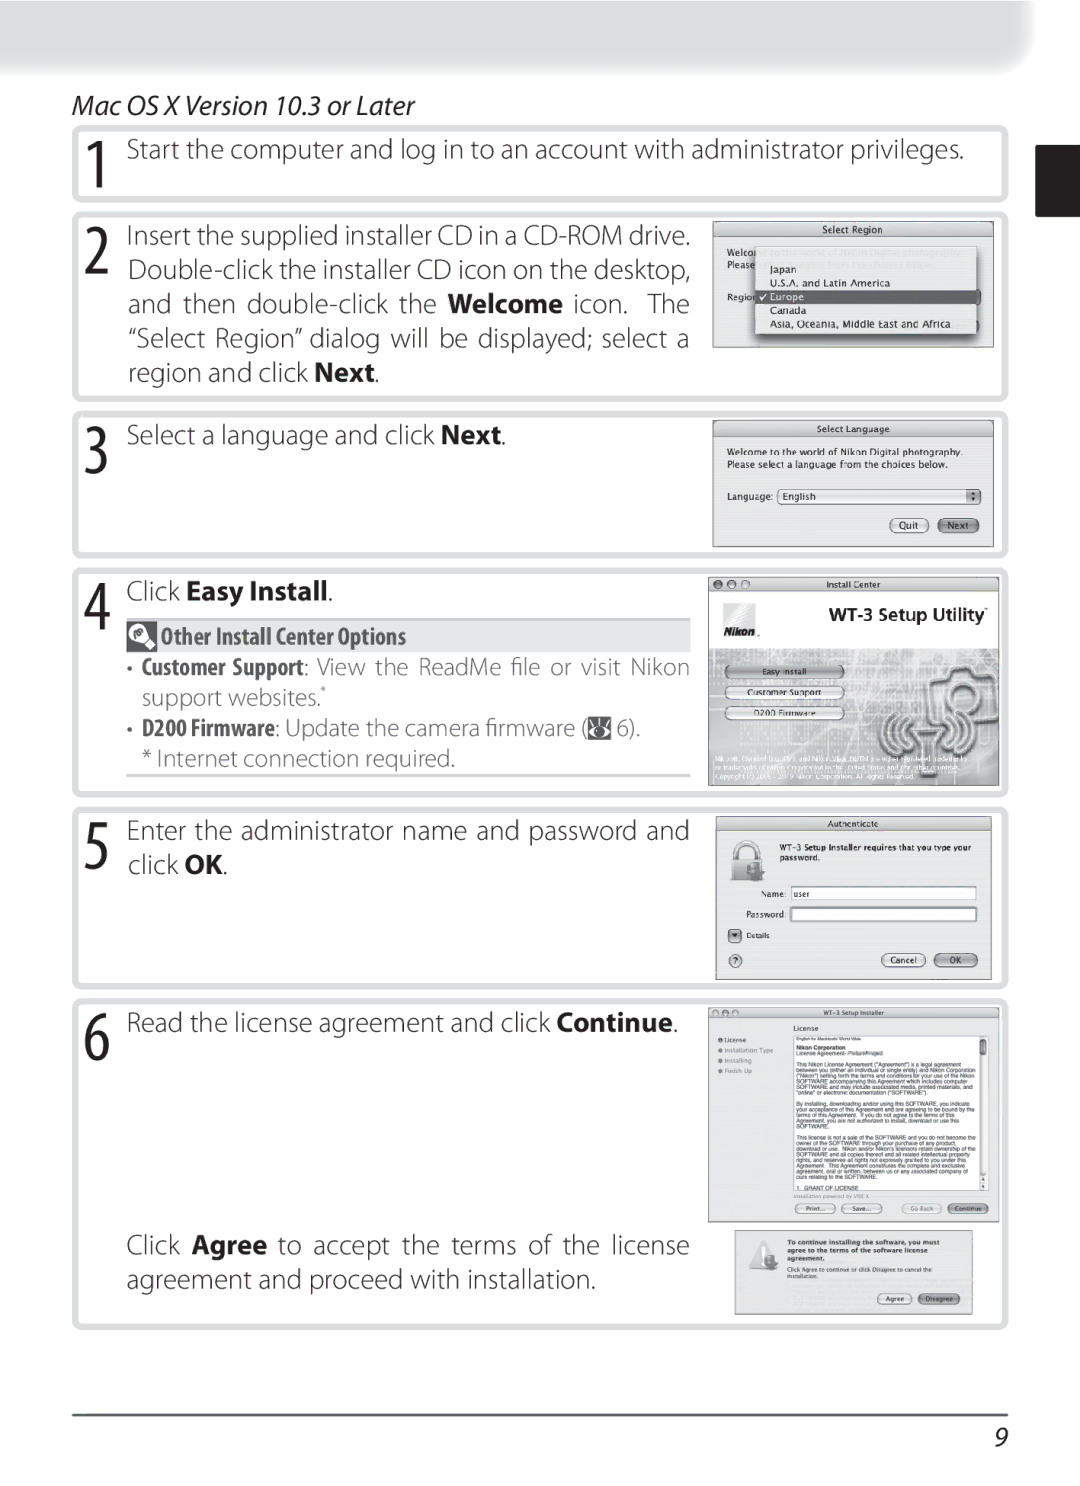
2 Insert the supplied installer CD in a
3
4
Select a language and click Next.
Click Easy Install.
 Other Install Center Options
•Customer Support: View the ReadMe fi le or visit Nikon support websites.*
•D200 Firmware: Update the camera fi rmware (![]() 6). * Internet connection required.
6). * Internet connection required.
5 Enter the administrator name and password and click OK.
6 Read the license agreement and click Continue.
Click Agree to accept the terms of the license agreement and proceed with installation.
9