Shipping Restraints
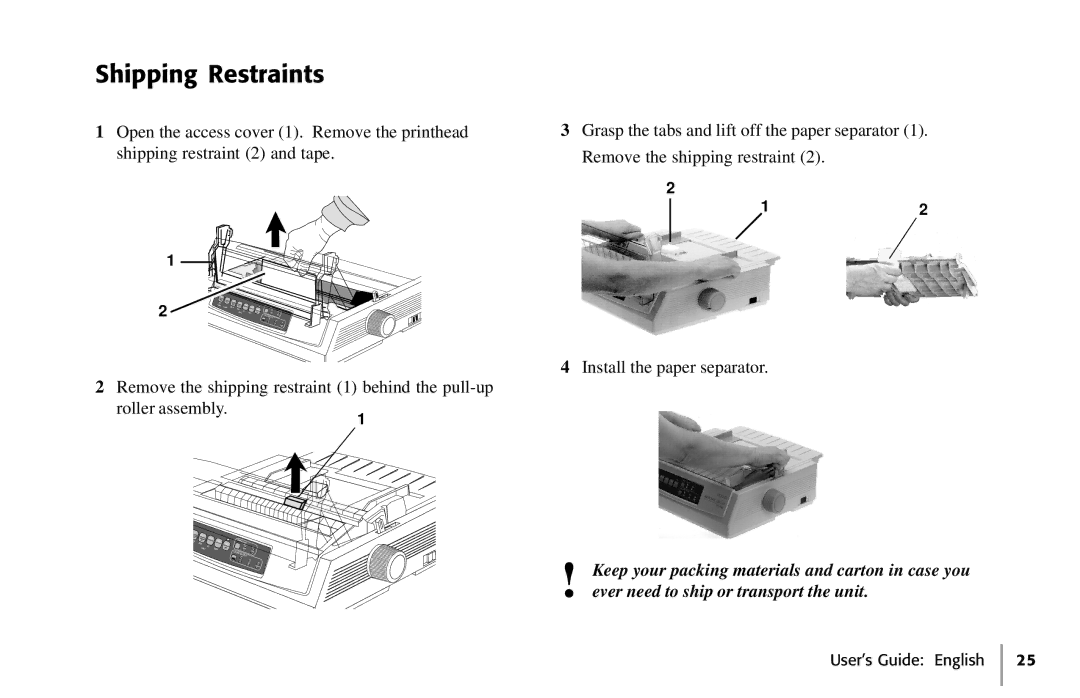
1Open the access cover (1). Remove the printhead shipping restraint (2) and tape.
1
|
| SEL |
|
|
|
|
|
|
|
| SEL |
|
|
|
|
|
|
| MENU | LF |
|
|
|
|
| |
2 | EXIT | SHIFT |
| FF/LOAD |
|
|
|
|
POWER | ALARM | GROUP |
| TEAR |
| PRINT QUALITY |
| |
|
|
| ITEM |
| QUIET | HSD |
| |
|
|
| MENU SET | TOF | NLQ | UTL | ||
|
|
|
|
| CHARACTER10PITCH | SSD | ||
|
|
|
|
|
|
| ||
1712
20 15 PROP
2Remove the shipping restraint (1) behind the
3Grasp the tabs and lift off the paper separator (1). Remove the shipping restraint (2).
2
12
4Install the paper separator.
roller assembly. |
|
|
| 1 | ||||
|
|
|
|
|
|
|
| |
LF |
|
|
|
|
|
|
|
|
cro |
|
|
|
|
|
|
|
|
ownFeed FF/LOAD |
| TEAR |
|
|
|
|
| |
UP | Micro Feed |
|
|
|
|
| ||
Up |
| PARK | QUIET | QUALITY |
|
| ||
| ITEM | SET |
|
|
|
| ||
| MENU |
| TOF |
| NLQ |
| UTL | |
|
|
|
|
| CHARACTER |
| SSD | |
|
|
|
|
|
|
| ||
|
|
|
|
| 10PITCH |
|
| |
|
|
|
|
| 17 |
| 12 | 15 |
|
|
|
|
|
|
| 20 | |
|
|
|
|
|
|
|
| PROP |
!Keep your packing materials and carton in case you ever need to ship or transport the unit.
User’s Guide: English 25
