CONNECTIONS
Before you connect the VCR, read through these sections to determine the appropriate portions and the best connections for the type of terminals on your TV and other equipment you are connecting. Keep in mind that not all sections will apply to your installation.
Notes:
•If your audio/video system does not match any of the examples provided, contact your local RadioShack store for assistance.
•You can connect many different types of audio/video systems such as a receiver/ amplifier, a satellite receiver, or a cable system. These connections might require additional accessories available from your local RadioShack store.
•Disconnect power to the VCR and TV when making connections. Do not connect the VCR’s power cord until you complete all other connections.
CONNECTING THE VCR FOR PLAYBACK ONLY
You can connect your VCR to the TV in one of these three ways so you can simply play and watch video tapes:
•To the TV’s audio/video input jacks (if it has A/V jacks)
•To the TV’s single VHF/UHF
•To the TV’s single VHF
These connections do not let you record or watch VHF/UHF programs. If you want to both record and watch VHF/UHF programs, pro- ceed directly to “Connecting the VCR for Play- back and Recording” starting on Page 11.
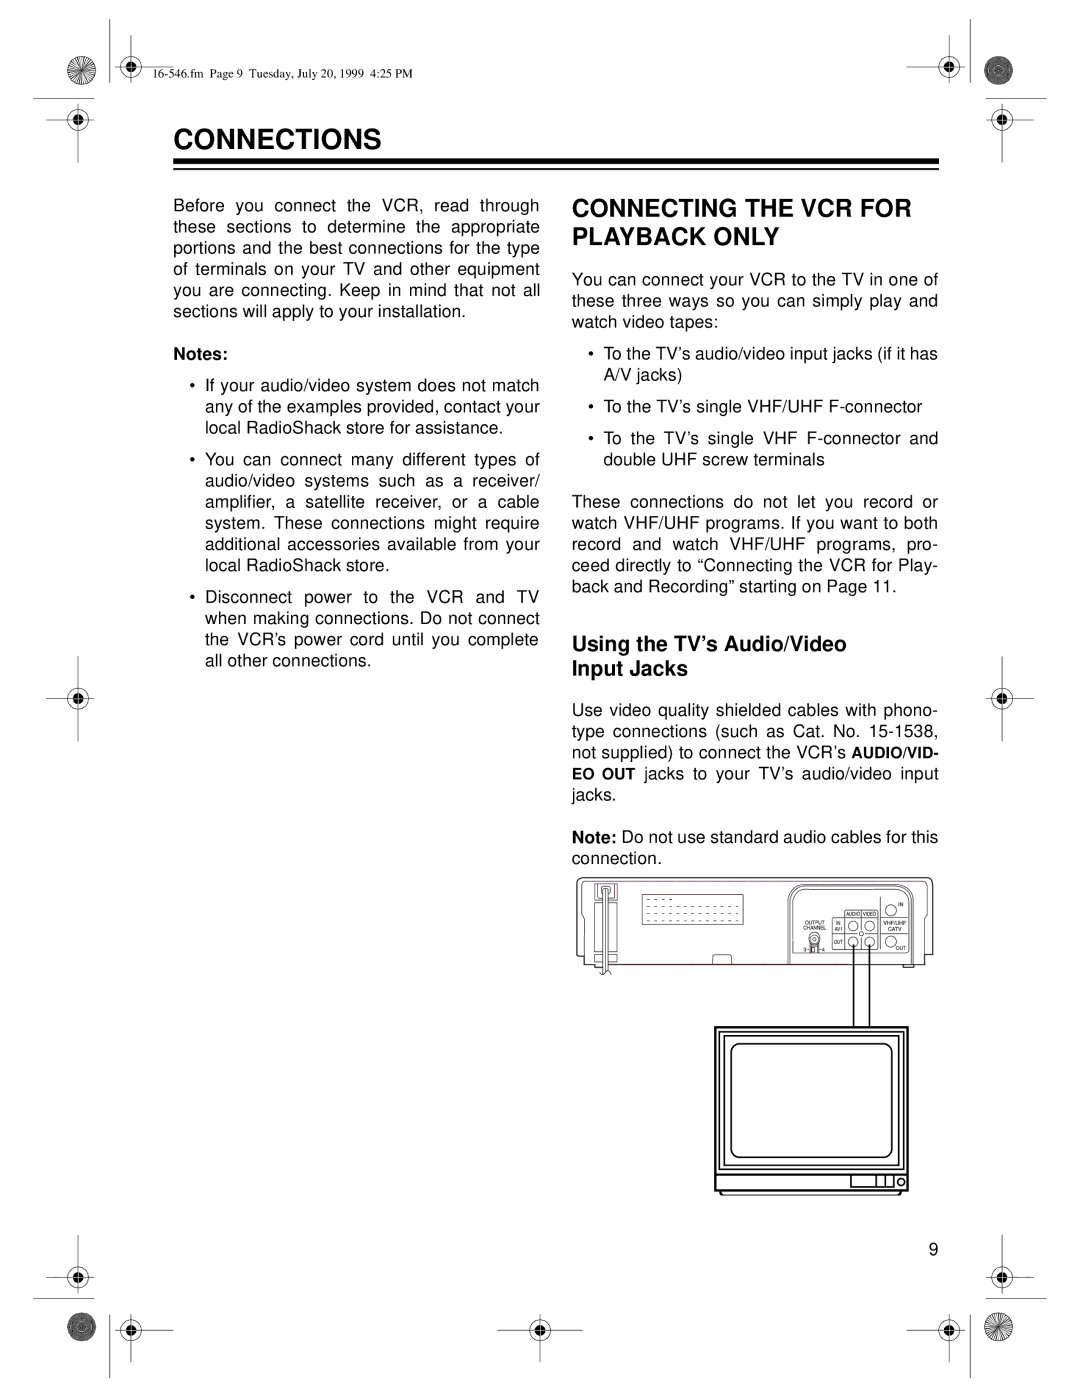
Using the TV’s Audio/Video
Input Jacks
Use video quality shielded cables with phono- type connections (such as Cat. No.
Note: Do not use standard audio cables for this connection.
9