Operation
Turning on the unit’s power
Before attempting to operate the unit, check whether the equipment has been connected properly.
Ensure that the unit is placed on a flat, level surface for operation.
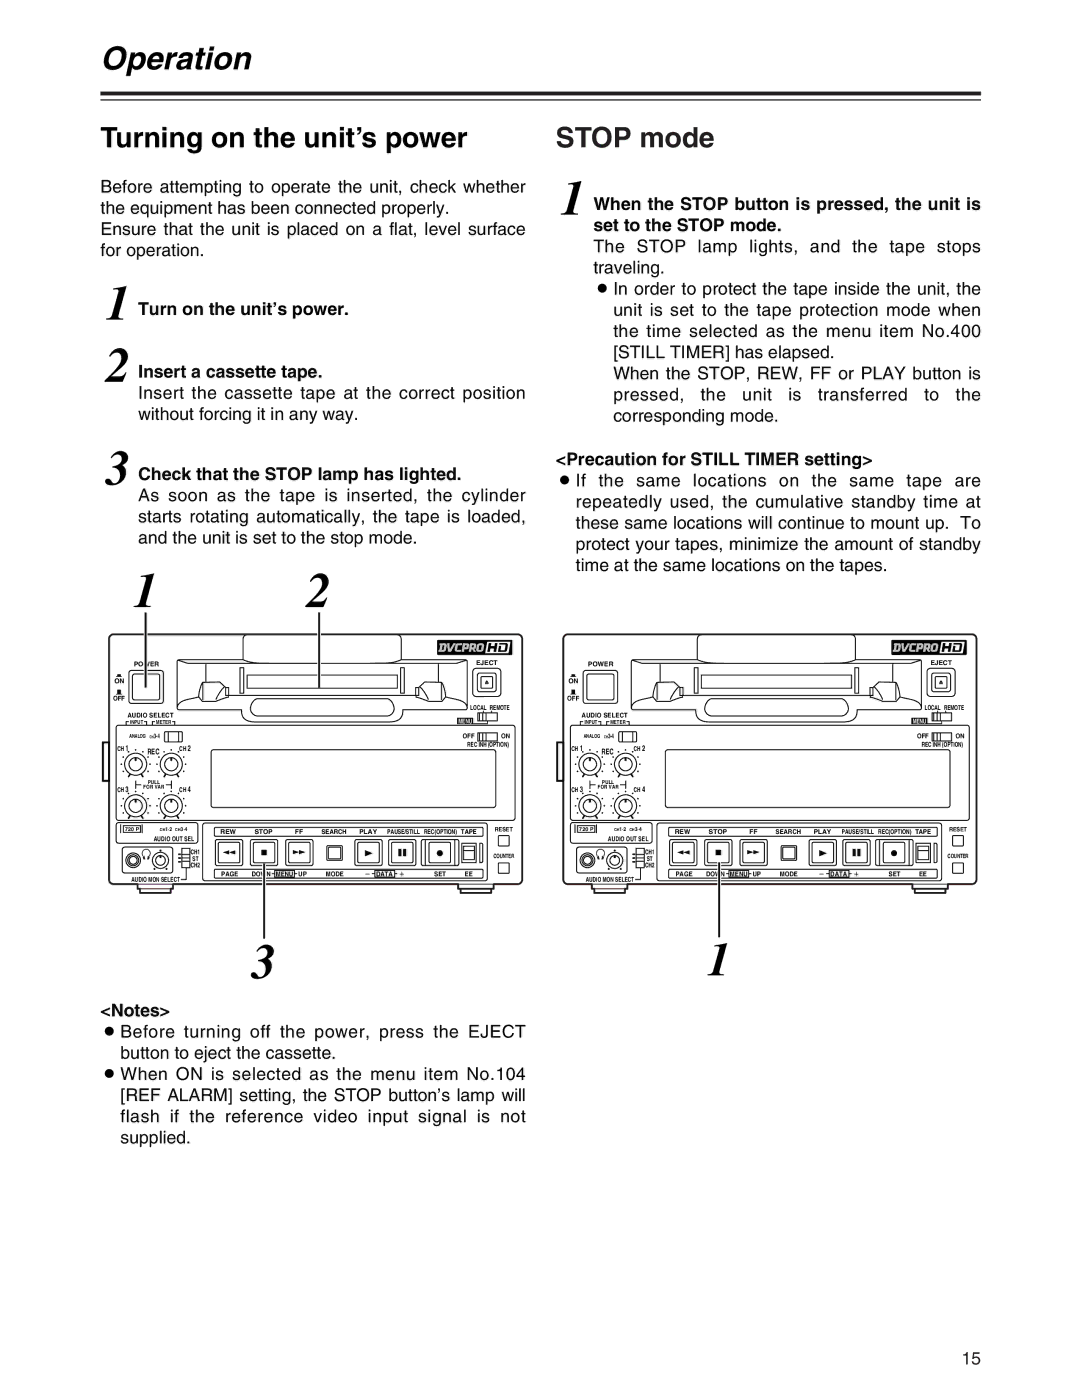
1 Turn on the unit’s power.
2 Insert a cassette tape.
Insert the cassette tape at the correct position without forcing it in any way.
3 Check that the STOP lamp has lighted.
As soon as the tape is inserted, the cylinder starts rotating automatically, the tape is loaded, and the unit is set to the stop mode.
1 2
STOP mode
1 When the STOP button is pressed, the unit is set to the STOP mode.
The STOP lamp lights, and the tape stops traveling.
O In order to protect the tape inside the unit, the unit is set to the tape protection mode when the time selected as the menu item No.400 [STILL TIMER] has elapsed.
When the STOP, REW, FF or PLAY button is pressed, the unit is transferred to the corresponding mode.
<Precaution for STILL TIMER setting>
O If the same locations on the same tape are repeatedly used, the cumulative standby time at these same locations will continue to mount up. To protect your tapes, minimize the amount of standby time at the same locations on the tapes.
| POWER |
|
|
|
|
|
|
|
| EJECT | ||
ON |
|
|
|
|
|
|
|
|
|
|
|
|
OFF |
|
|
|
|
|
|
|
|
|
|
|
|
AUDIO SELECT |
|
|
|
|
|
|
| LOCAL REMOTE | ||||
|
|
|
|
|
|
| MENU |
|
| |||
| INPUT | METER |
|
|
|
|
|
|
|
|
| |
| ANALOG |
|
|
|
|
|
|
| OFF |
| ON | |
CH 1 |
| REC | CH 2 |
|
|
|
|
| REC INH (OPTION) | |||
|
|
|
|
|
|
|
|
| ||||
|
|
|
|
|
|
|
|
|
|
|
| |
|
| PULL |
|
|
|
|
|
|
|
|
|
|
CH 3 | FOR VAR | CH | 4 |
|
|
|
|
|
|
|
| |
|
|
|
|
|
|
|
|
|
| |||
720 P | CH1·2 CH3·4 | REW | STOP | FF | SEARCH | PLAY PAUSE/STILL REC(OPTION) TAPE | RESET | |||||
|
|
|
|
| ||||||||
|
| AUDIO OUT SEL |
|
|
|
|
|
|
|
| ||
|
|
|
| CH1 |
|
|
|
|
|
|
| COUNTER |
|
|
|
| ST |
|
|
|
|
|
|
| |
|
|
|
| CH2 |
|
|
|
|
|
|
|
|
| AUDIO MON SELECT | PAGE | DOWN MENU | UP | MODE | s DATA r | SET | EE |
|
| ||
|
|
|
|
|
|
|
|
|
| |||
| POWER |
|
|
|
|
|
|
|
| EJECT | ||
ON |
|
|
|
|
|
|
|
|
|
|
|
|
OFF |
|
|
|
|
|
|
|
|
|
|
|
|
AUDIO SELECT |
|
|
|
|
|
|
| LOCAL REMOTE | ||||
|
|
|
|
|
|
| MENU |
|
| |||
| INPUT | METER |
|
|
|
|
|
|
|
|
| |
| ANALOG |
|
|
|
|
|
|
| OFF |
| ON | |
CH 1 |
| REC | CH 2 |
|
|
|
|
| REC INH (OPTION) | |||
|
|
|
|
|
|
|
|
| ||||
|
|
|
|
|
|
|
|
|
|
|
| |
|
| PULL |
|
|
|
|
|
|
|
|
|
|
CH 3 | FOR VAR | CH | 4 |
|
|
|
|
|
|
|
| |
|
|
|
|
|
|
|
|
|
| |||
720 P | CH1·2 CH3·4 | REW | STOP | FF | SEARCH | PLAY PAUSE/STILL REC(OPTION) TAPE | RESET | |||||
|
|
|
|
| ||||||||
|
| AUDIO OUT SEL |
|
|
|
|
|
|
|
| ||
|
|
|
| CH1 |
|
|
|
|
|
|
| COUNTER |
|
|
|
| ST |
|
|
|
|
|
|
| |
|
|
|
| CH2 |
|
|
|
|
|
|
|
|
| AUDIO MON SELECT | PAGE | DOWN | MENU UP | MODE | s DATA r | SET | EE |
|
| ||
|
|
|
|
|
|
|
|
|
| |||
31
<Notes>
O Before turning off the power, press the EJECT button to eject the cassette.
O When ON is selected as the menu item No.104 [REF ALARM] setting, the STOP button’s lamp will flash if the reference video input signal is not supplied.
15