■Initial Set State
(1)Display the SETUP menu by pressing the page button.
(2)Move the cursor to INIT and press the page switch. The camera is initialized and the INITIAL set menu is displayed on the monitor. Setup operation can be per- formed at the camera head or RCU (RCB).
■Initial Set Screen
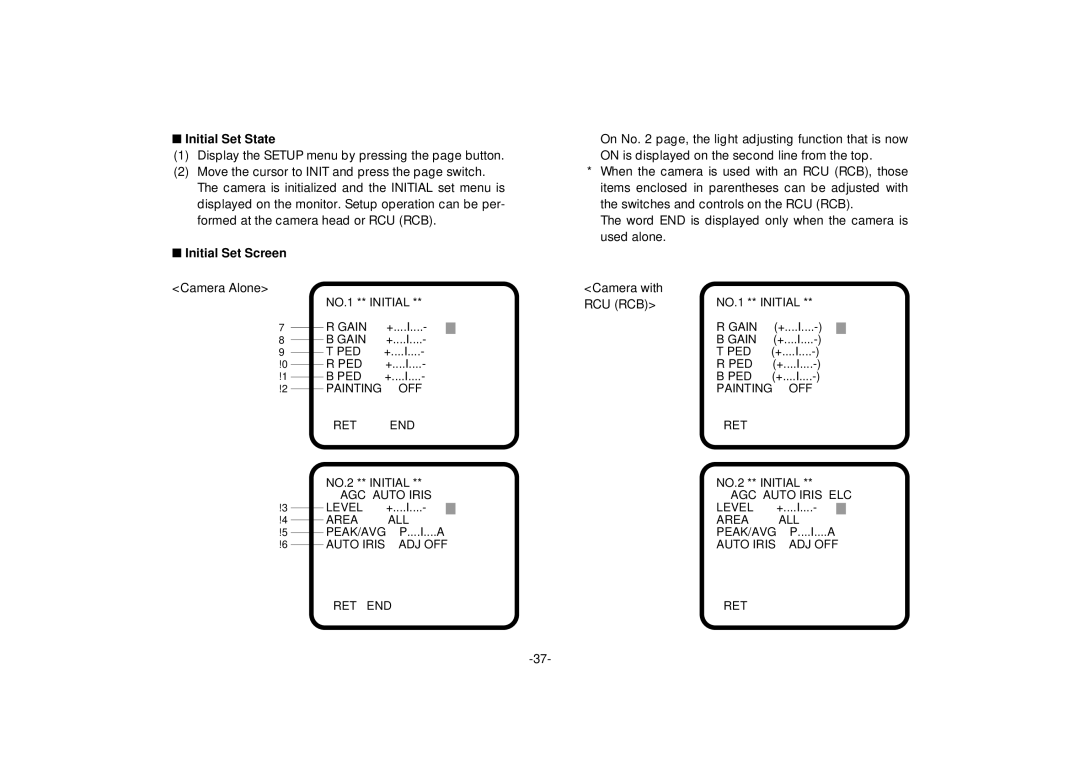
On No. 2 page, the light adjusting function that is now ON is displayed on the second line from the top.
*When the camera is used with an RCU (RCB), those items enclosed in parentheses can be adjusted with the switches and controls on the RCU (RCB).
The word END is displayed only when the camera is used alone.
<Camera Alone>
|
| NO.1 | ** INITIAL ** |
| |||
7 |
| R GAIN | + |
|
| - | |
I.... | |||||||
|
| B GAIN | + |
|
| - | |
8 |
| I | |||||
| |||||||
|
| ||||||
9 |
| T PED |
| +.... | I.... | - | |
|
| ||||||
!0 | R PED |
| +.... | I.... | - | ||
!1 | B PED |
| +.... | I.... | - | ||
!2 | PAINTING | OFF |
|
|
| ||
|
| RET |
| END |
|
|
|
|
| NO.2 | ** INITIAL ** |
| |||
|
| AGC | AUTO IRIS |
|
|
| |
!3 | LEVEL |
| ....+ | I.... | - | ||
!4 | AREA |
| ALL |
|
|
| |
|
|
|
| ||||
!5 | PEAK/AVG | P.... | I.... | A | |||
!6 | AUTO | IRIS | ADJ | OFF |
| ||
<Camera with RCU (RCB)>
NO.1 ** INITIAL **
R GAIN | (+.... | I.... | ||
B GAIN | (+ |
|
| |
I.... | ||||
T PED | (+.... | I.... | ||
R PED | (+.... | I.... | ||
B PED | (+.... | I.... | ||
PAINTING | OFF |
|
|
|
RET |
|
|
|
|
NO.2 ** INITIAL ** |
| |||
AGC AUTO IRIS | ELC |
| ||
LEVEL | ....+ | I.... | - | |
AREA | ALL |
|
|
|
PEAK/AVG | P.... | I.... | A | |
AUTO IRIS | ADJ | OFF |
| |
RET END |
RET