Projector LAN settings
After inserting the wireless card into the projector, you need to make the necessary LAN settings.
Displaying the LAN Setup screen
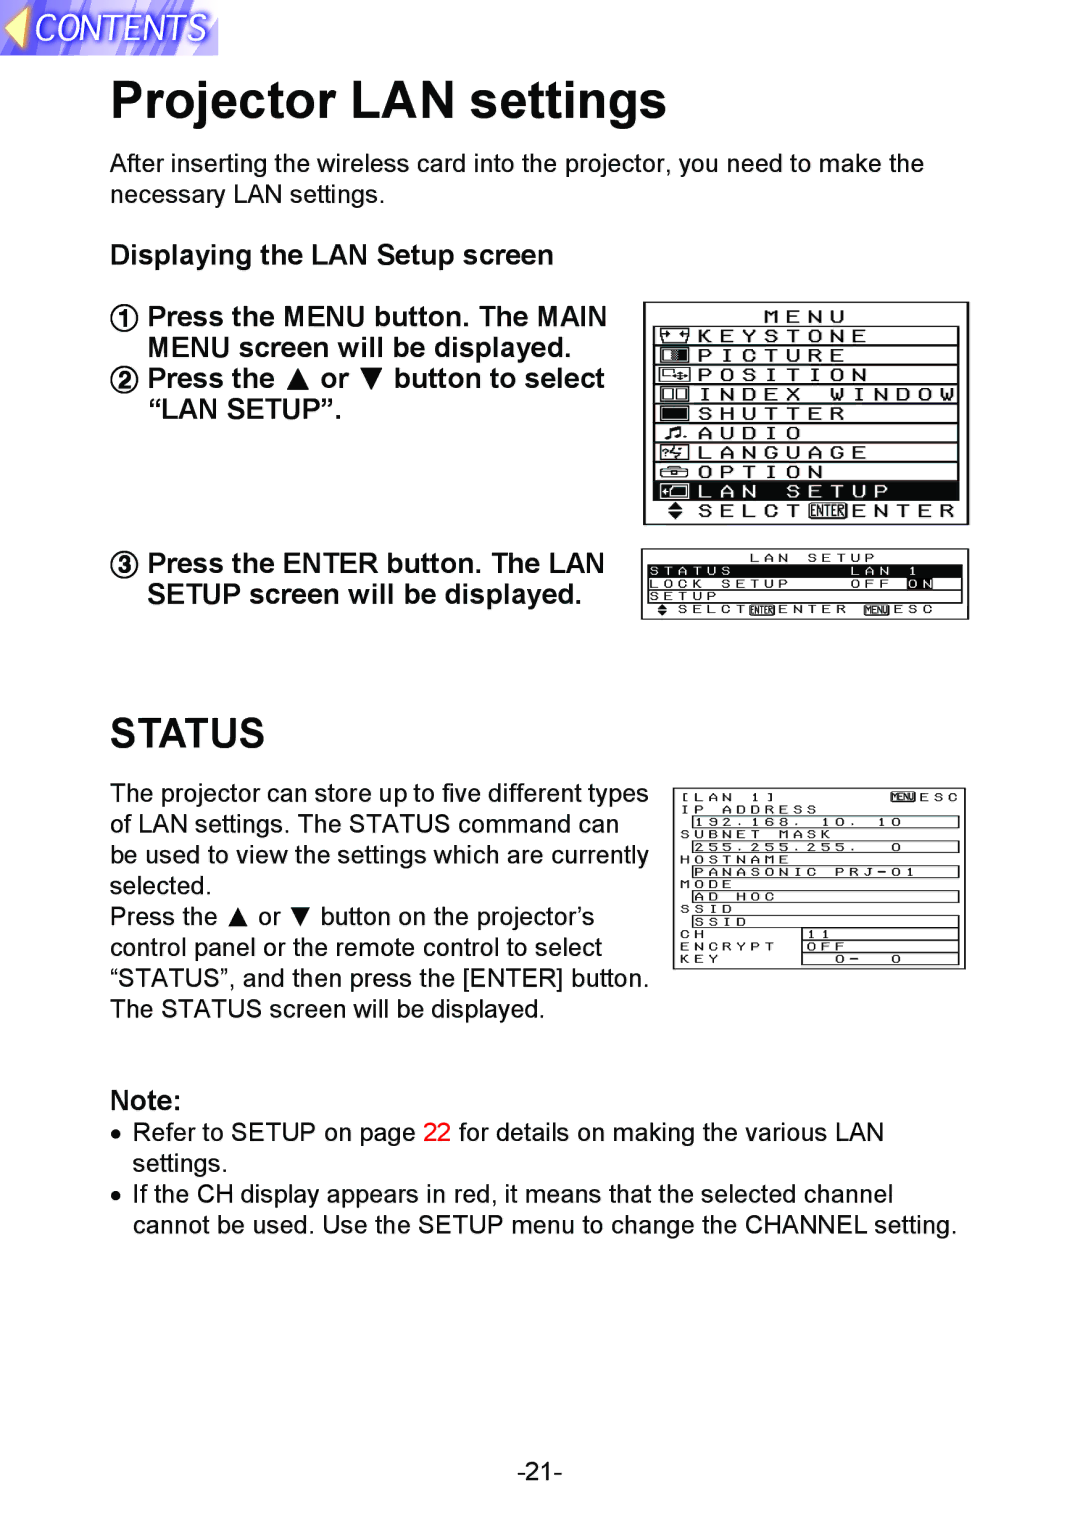
#Press the MENU button. The MAIN
MENU screen will be displayed. $ Press the F or G button to select
“LAN SETUP”.
%Press the ENTER button. The LAN SETUP screen will be displayed.
| L A N | S E T U P | |||
S T A T U S |
|
|
| L A N 1 | |
L O C K S E T U P |
| O F F | O N | ||
S E T U P |
|
|
|
|
|
S E L C T |
| E N T E R | E S C | ||
STATUS
The projector can store up to five different types of LAN settings. The STATUS command can be used to view the settings which are currently selected.
Press the F or G button on the projector’s control panel or the remote control to select “STATUS”, and then press the [ENTER] button. The STATUS screen will be displayed.
[ L A N 1 | ] | E S C | |
I P A D D R E S S |
| ||
| 1 9 2 . 1 6 8 . 1 0 . 1 0 | ||
S U B N E T | M A S K |
| |
| 2 5 5 . 2 5 5 . 2 5 5 . | 0 | |
H O S T N A M E |
| ||
P A N A S O N I C P R J - 0 1
M O D E
A D H O C S S I D
| S S I D |
|
|
|
C H | 1 1 |
|
| |
E N C R Y P T | O F F |
|
| |
K E Y | 0 | - | 0 | |
Note:
•Refer to SETUP on page 22 for details on making the various LAN settings.
•If the CH display appears in red, it means that the selected channel cannot be used. Use the SETUP menu to change the CHANNEL setting.
