Replacement procedure
NOTE:
If the lamp unit is replaced after it has been used for more than 2,000 hours, the projector will switch to standby mode after approximately 10 minutes of operation. Steps 7. to 10. on the following page should thus be completed within 10 minutes.
1.Disconnect the power cord plug from the wall outlet and check that the area around the lamp unit has cooled down.
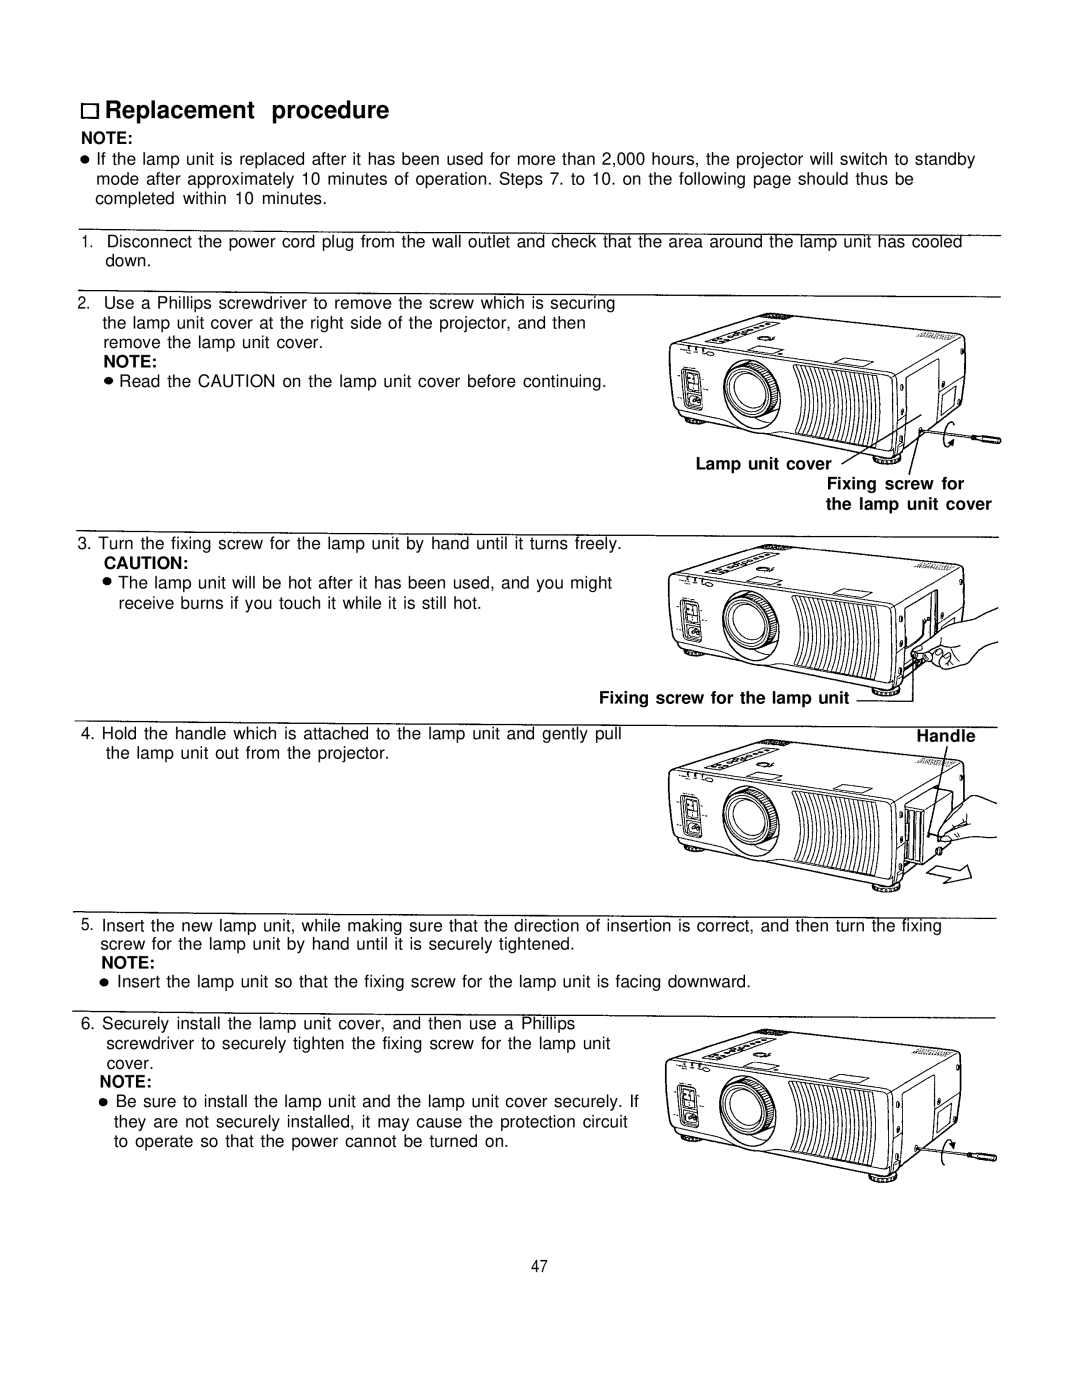
2.Use a Phillips screwdriver to remove the screw which is securing the lamp unit cover at the right side of the projector, and then remove the lamp unit cover.
NOTE:
Read the CAUTION on the lamp unit cover before continuing.
Lamp unit cover
Fixing screw for the lamp unit cover
3.Turn the fixing screw for the lamp unit by hand until it turns freely.
CAUTION:
The lamp unit will be hot after it has been used, and you might receive burns if you touch it while it is still hot.
Fixing screw for the lamp unit |
|
4. Hold the handle which is attached to the lamp unit and gently pull | Handle |
the lamp unit out from the projector. |
|
5.Insert the new lamp unit, while making sure that the direction of insertion is correct, and then turn the fixing screw for the lamp unit by hand until it is securely tightened.
NOTE:
Insert the lamp unit so that the fixing screw for the lamp unit is facing downward.
6.Securely install the lamp unit cover, and then use a Phillips
screwdriver to securely tighten the fixing screw for the lamp unit cover.
NOTE:
Be sure to install the lamp unit and the lamp unit cover securely. If they are not securely installed, it may cause the protection circuit to operate so that the power cannot be turned on.
47