Adjusting the white balance
When RGB signals from a personal computer or other signal source are being projected, the picture may become
Adjustment procedure <for white balance adjustment of the red component>
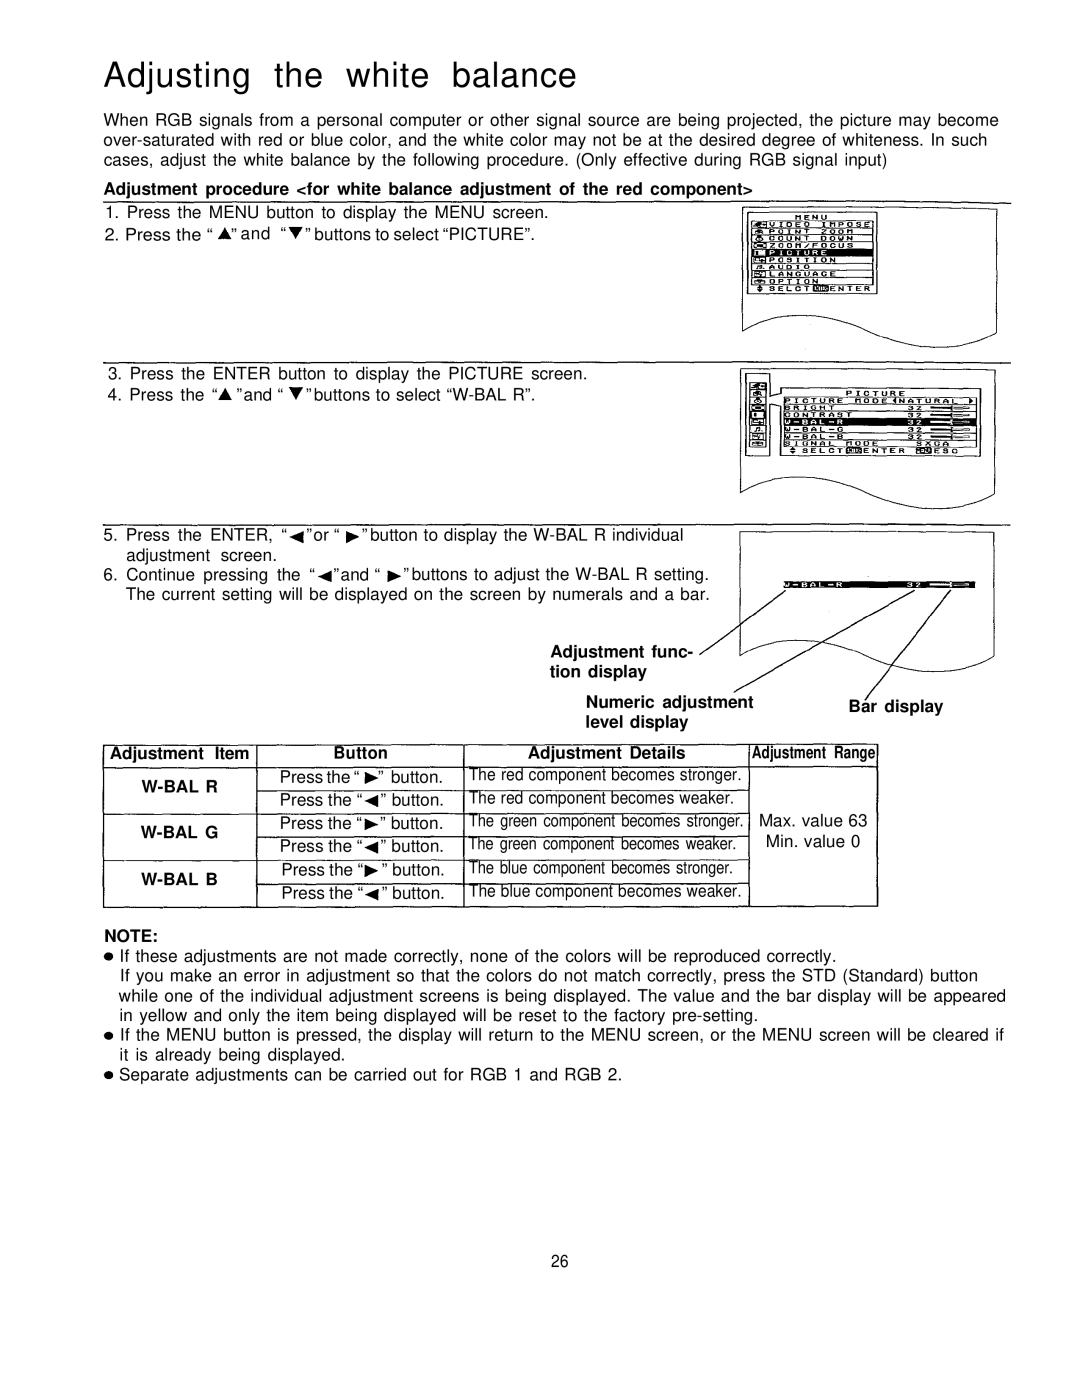
1.Press the MENU button to display the MENU screen.
2.Press the “ ” and “ ” buttons to select “PICTURE”.
3.Press the ENTER button to display the PICTURE screen.
4.Press the “ ” and “ ” buttons to select
5.Press the ENTER, “ ” or “ ” button to display the
6.Continue pressing the “ ” and “ ” buttons to adjust the
Adjustment func- tion display
Numeric adjustment | Bar display |
level display |
|
Adjustment Item
W-BAL R
W-BAL G
W-BAL B
Button
Press the “ ” button. Press the “ ” button. Press the “ ” button. Press the “ ” button. Press the “ ” button. Press the “ ” button.
Adjustment Details
The red component becomes stronger. The red component becomes weaker. The green component becomes stronger. The green component becomes weaker. The blue component becomes stronger. The blue component becomes weaker.
Adjustment Range
Max. value 63
Min. value 0
NOTE:
If these adjustments are not made correctly, none of the colors will be reproduced correctly.
If you make an error in adjustment so that the colors do not match correctly, press the STD (Standard) button while one of the individual adjustment screens is being displayed. The value and the bar display will be appeared in yellow and only the item being displayed will be reset to the factory
If the MENU button is pressed, the display will return to the MENU screen, or the MENU screen will be cleared if it is already being displayed.
Separate adjustments can be carried out for RGB 1 and RGB 2.
26
