|
|
|
|
|
|
|
|
|
|
|
|
|
|
|
|
| Transferring | Your | Images | (Macintosh) |
|
|
|
|
|
| |
|
|
|
|
|
|
|
|
| |||||
|
|
|
|
|
|
|
|
| |||||
|
|
| ransferring | o r | Images | Macintos |
|
|
|
|
|
|
|
|
|
|
|
|
| * Data transfer using USB cable is applicable |
|
|
|
| |||
|
|
|
|
|
| only for Microsoft | ® Windows | ® 98 | or | ||||
|
|
|
|
|
| Windows | ® 2000 preinstalled PC with USB |
|
|
|
| ||
|
|
|
|
|
| port, iMac | ®, iBook | ®, Power | Macintosh | ® G3 | |||
|
|
|
|
|
| with USB port or Power Mac | TM G4 and Mac | ||||||
|
|
|
|
|
| OS version 8.6, 9.0, 9.0.4. |
|
|
|
|
| ||
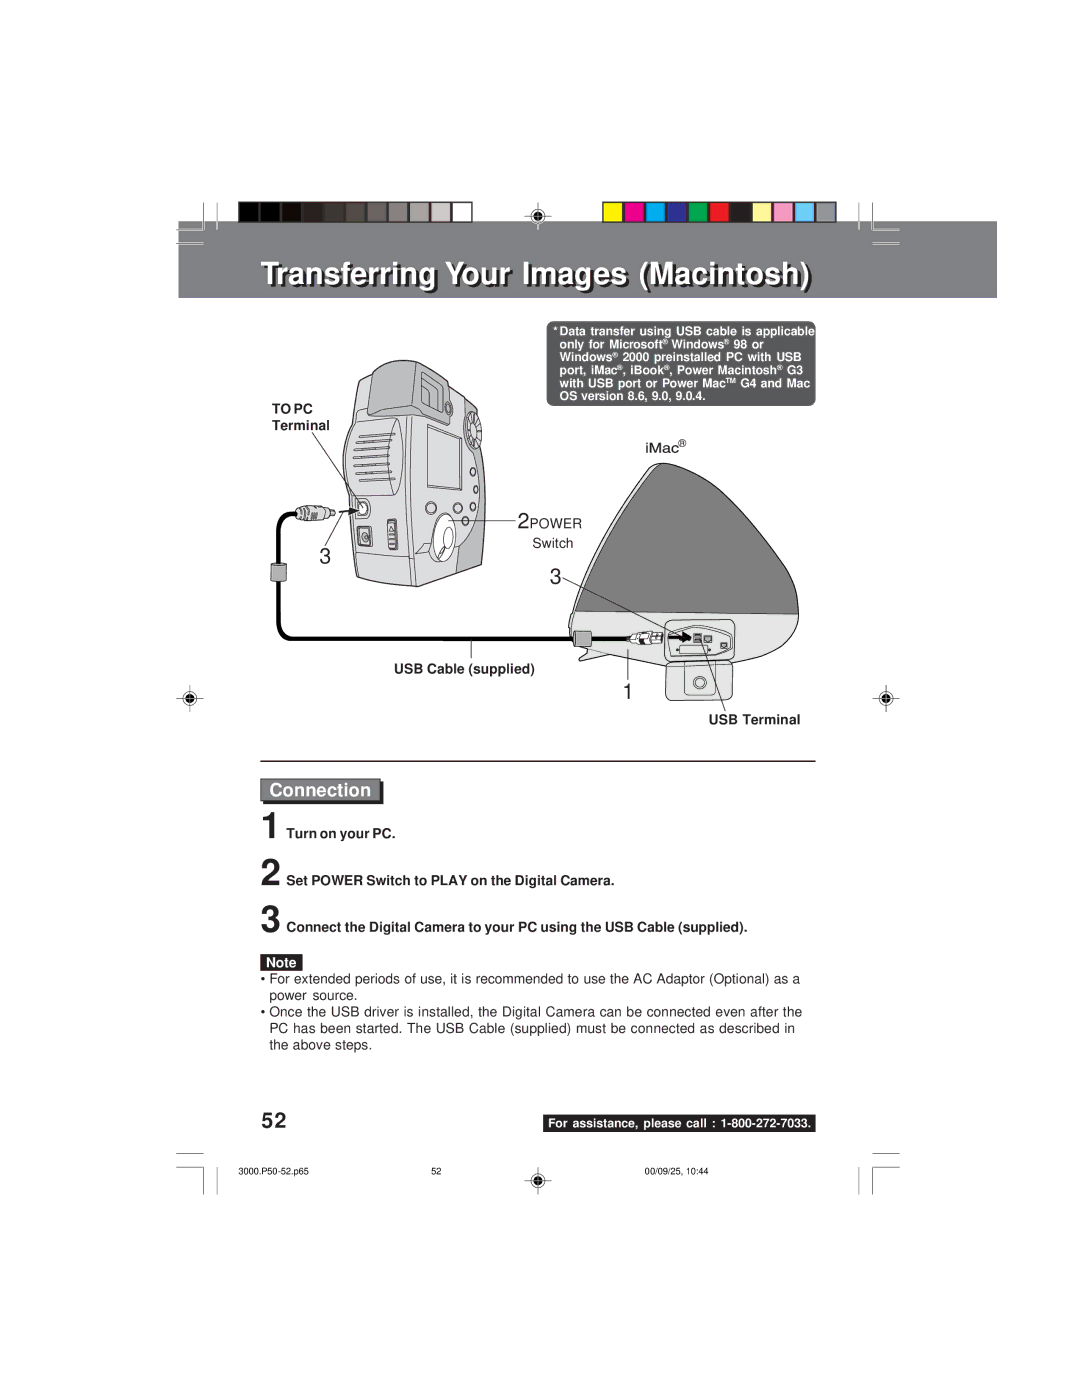
TO PC
Terminal
2 POWER
Switch
3
3
USB Cable (supplied)
1
USB Terminal
Connection
1 | Turn on your PC. |
|
2 | Set POWER Switch to PLAY on the Digital Camera. |
|
3 | Connect the Digital Camera to your PC | using the USB Cable (supplied). |
Note
•For extended periods of use, it is recommended to use the AC Adaptor (Optional) as a power source.
•Once the USB driver is installed, the Digital Camera can be connected even after the PC has been started. The USB Cable (supplied) must be connected as described in the above steps.
52 |
|
For assistance, please call : |
52 | 00/09/25, 10:44 |
