SETTING PROCEDURES
The following setting procedures are described on the assumption that this model is used in combination with the
■Menu Display
●Setup Menu Display
WV-CU550B
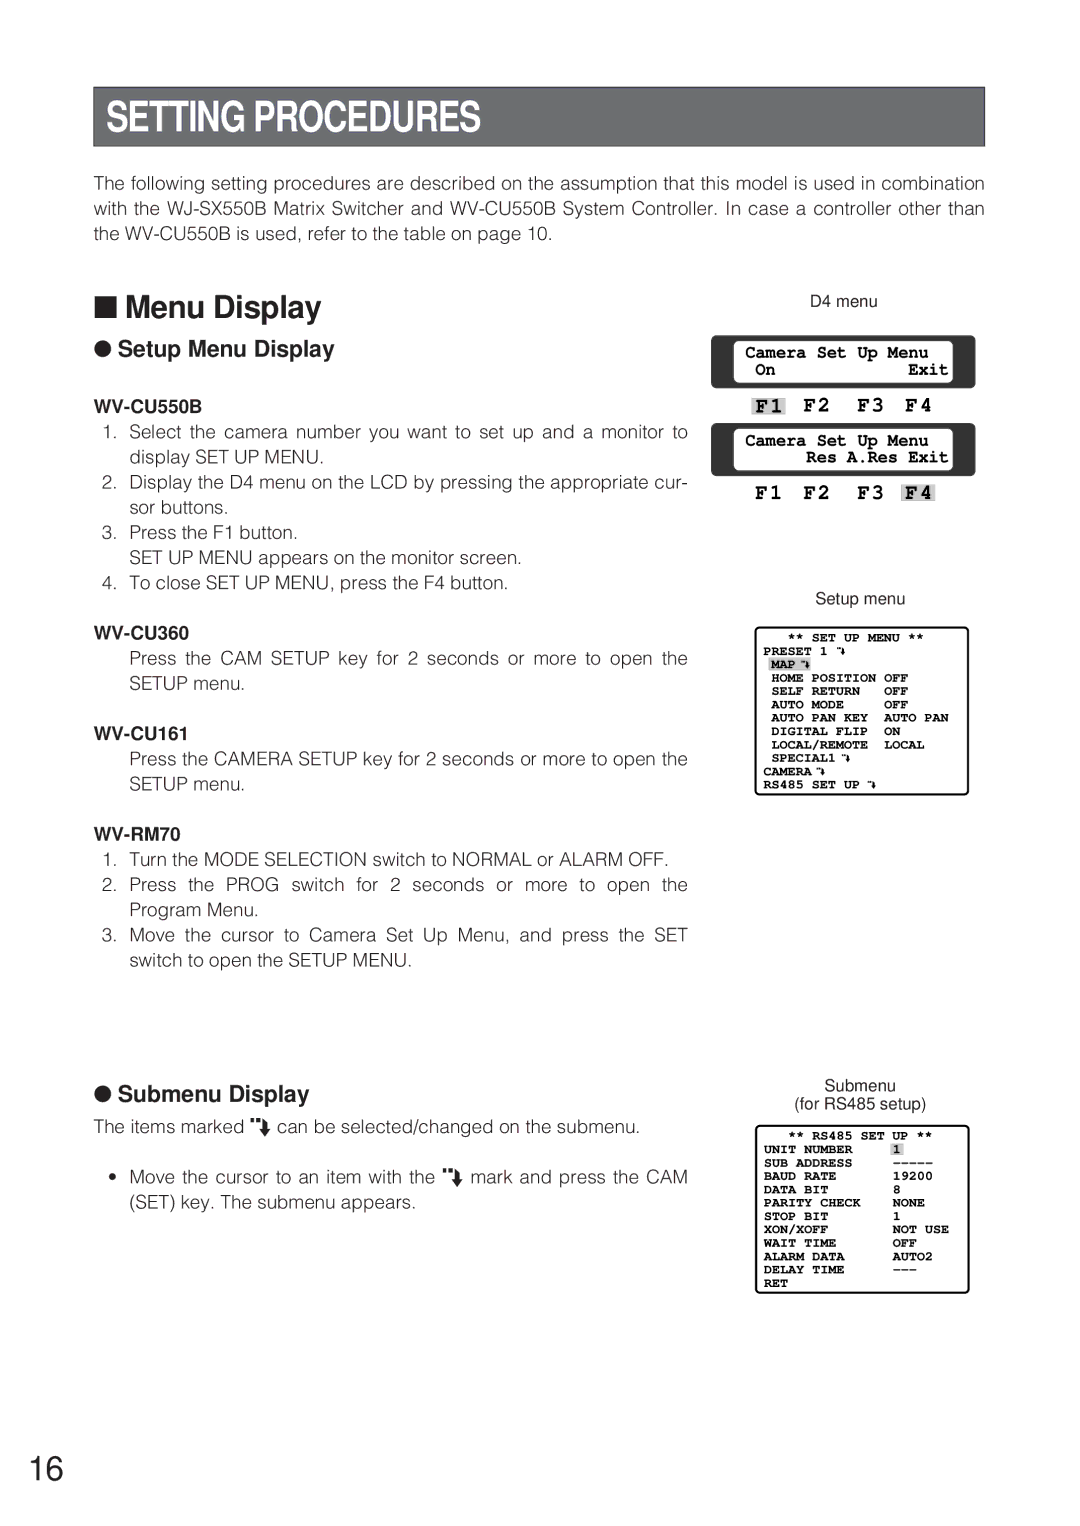
1.Select the camera number you want to set up and a monitor to display SET UP MENU.
2.Display the D4 menu on the LCD by pressing the appropriate cur- sor buttons.
3.Press the F1 button.
SET UP MENU appears on the monitor screen.
4.To close SET UP MENU, press the F4 button.
Press the CAM SETUP key for 2 seconds or more to open the SETUP menu.
Press the CAMERA SETUP key for 2 seconds or more to open the SETUP menu.
WV-RM70
1.Turn the MODE SELECTION switch to NORMAL or ALARM OFF.
2.Press the PROG switch for 2 seconds or more to open the Program Menu.
3.Move the cursor to Camera Set Up Menu, and press the SET switch to open the SETUP MENU.
●Submenu Display
The items marked O can be selected/changed on the submenu.
•Move the cursor to an item with the O mark and press the CAM (SET) key. The submenu appears.
D4 menu
Camera Set Up Menu
OnExit
F1 F2 F3 F4
Camera Set Up Menu Res A.Res Exit
F1 F2 F3 F4
Setup menu
** SET UP MENU **
PRESET 1 MAP ![]()
HOME POSITION OFF
SELF RETURN OFF
AUTO MODE OFF AUTO PAN KEY AUTO PAN DIGITAL FLIP ON LOCAL/REMOTE LOCAL SPECIAL1 ![]()
CAMERA ![]() RS485 SET UP
RS485 SET UP
Submenu
(for RS485 setup)
** RS485 SET UP **
UNIT NUMBER | 1 |
|
SUB ADDRESS | ||
BAUD RATE | 19200 | |
DATA BIT | 8 |
|
PARITY CHECK | NONE | |
STOP BIT | 1 |
|
XON/XOFF | NOT USE | |
WAIT TIME | OFF | |
ALARM DATA | AUTO2 | |
DELAY TIME | ||
RET |
|
|
16
