•The CAMERA ID moves faster when the joystick is kept at the right or left for one second or more.
•Move the cursor to RET to return to the SET UP menu, and press the CAM (SET) key.
CAMERA ID 0123456789 ABCDEFGHIJKLM NOPQRSTUVWXYZ ().,'":;&#!?=
SPACE
POSI RET RESET
CAM1............
CAMERA ID 0123456789 ABCDEFGHIJKLM NOPQRSTUVWXYZ ().,'":;&#!?=
SPACE
POSI RET RESET
CAM1............
●Light Control Setting (ALC/MANUAL)
1.Display SET UP MENU on the monitor screen by referring to page 16.
2.Move the cursor to ALC/MANUAL and select ALC or MANUAL by using the joystick.
The factory default setting is ALC.
When you select ALC, set backlight compensation.
Note: The backlight compensation submenu associated with this menu is described separately and should be set up after installing the camera at the site and observing the actual site picture.
3.When MANUAL is selected, quit the setup menu by pressing the MON (ESC) key. Press the OPEN or CLOSE key on the controller for iris adjustment.
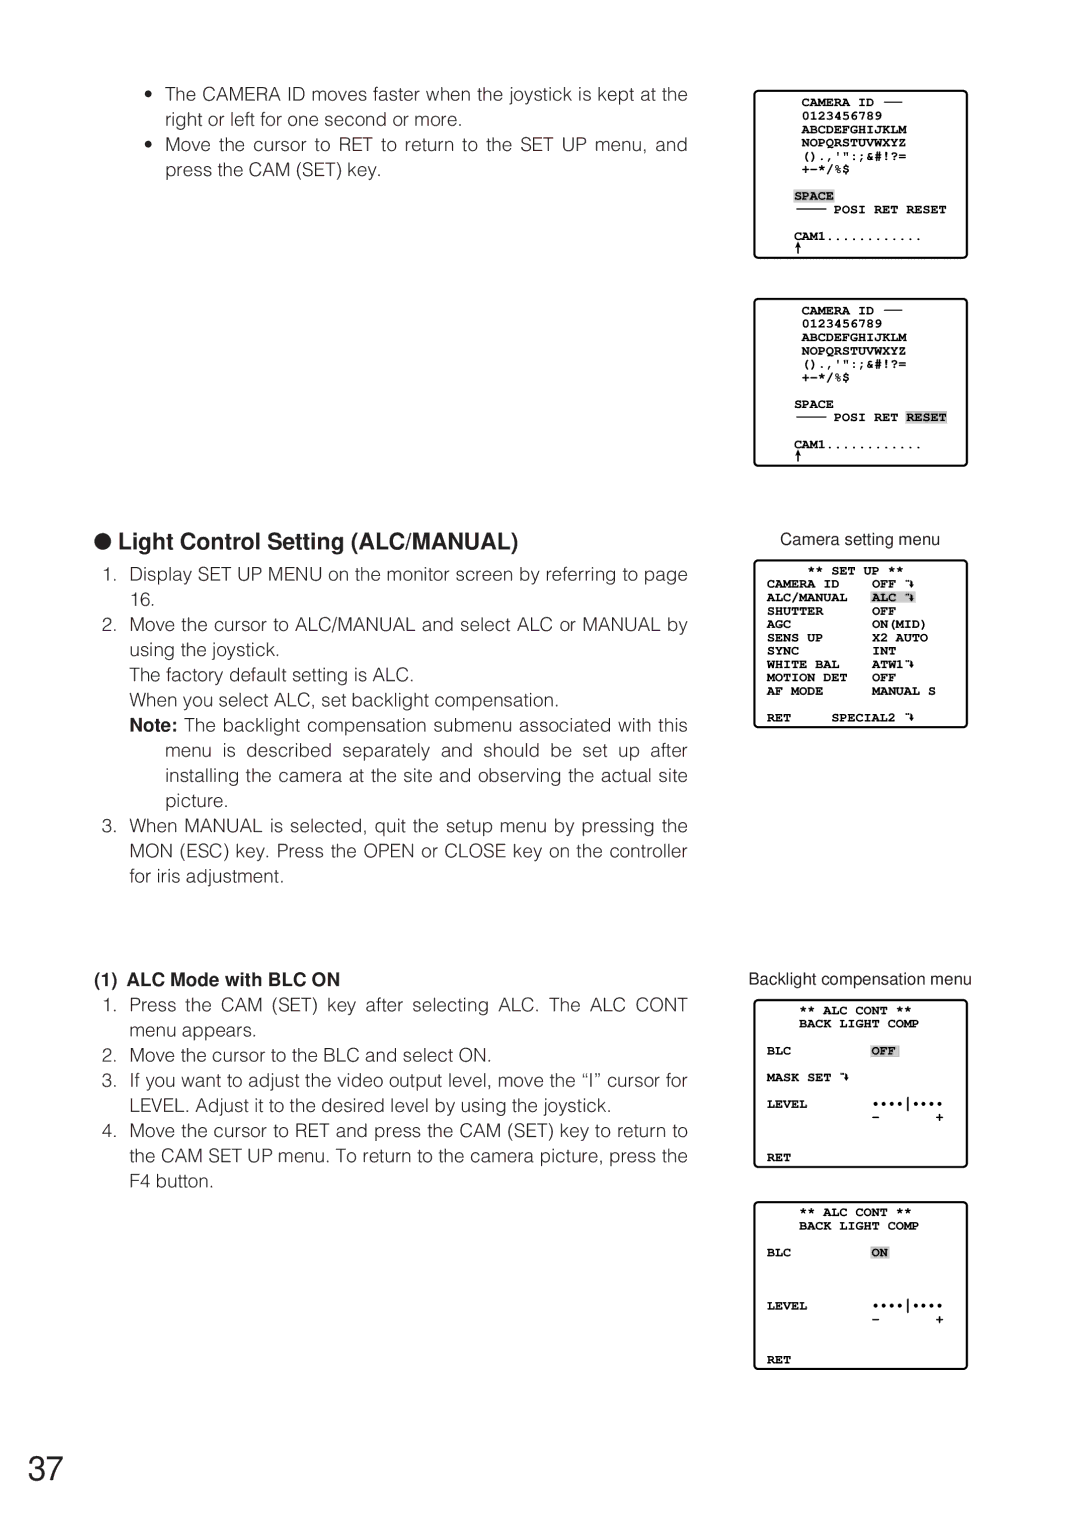
Camera setting menu
** SET UP **
CAMERA ID | OFF | ||
ALC/MANUAL | ALC |
| |
SHUTTER |
| OFF | |
AGC |
| ON(MID) | |
SENS UP |
| X2 AUTO | |
SYNC |
| INT | |
WHITE BAL | ATW1 | ||
MOTION DET | OFF | ||
AF MODE |
| MANUAL S | |
RET | SPECIAL2 | ||
(1) ALC Mode with BLC ON
1.Press the CAM (SET) key after selecting ALC. The ALC CONT menu appears.
2.Move the cursor to the BLC and select ON.
3.If you want to adjust the video output level, move the “I” cursor for LEVEL. Adjust it to the desired level by using the joystick.
4.Move the cursor to RET and press the CAM (SET) key to return to the CAM SET UP menu. To return to the camera picture, press the F4 button.
Backlight compensation menu
** ALC CONT **
BACK LIGHT COMP
BLC | OFF |
|
| |
MASK SET |
|
|
|
|
LEVEL | •••••••• | |||
| - |
|
| + |
RET |
|
|
|
|
** ALC CONT ** |
| |||
BACK LIGHT COMP |
| |||
BLC |
|
|
|
|
ON |
| |||
LEVEL | •••••••• | |||
| - |
|
| + |
RET
37