●Special 2 Menu (SPECIAL2)
This menu lets you adjust and set up the picture quality to meet your requirements.
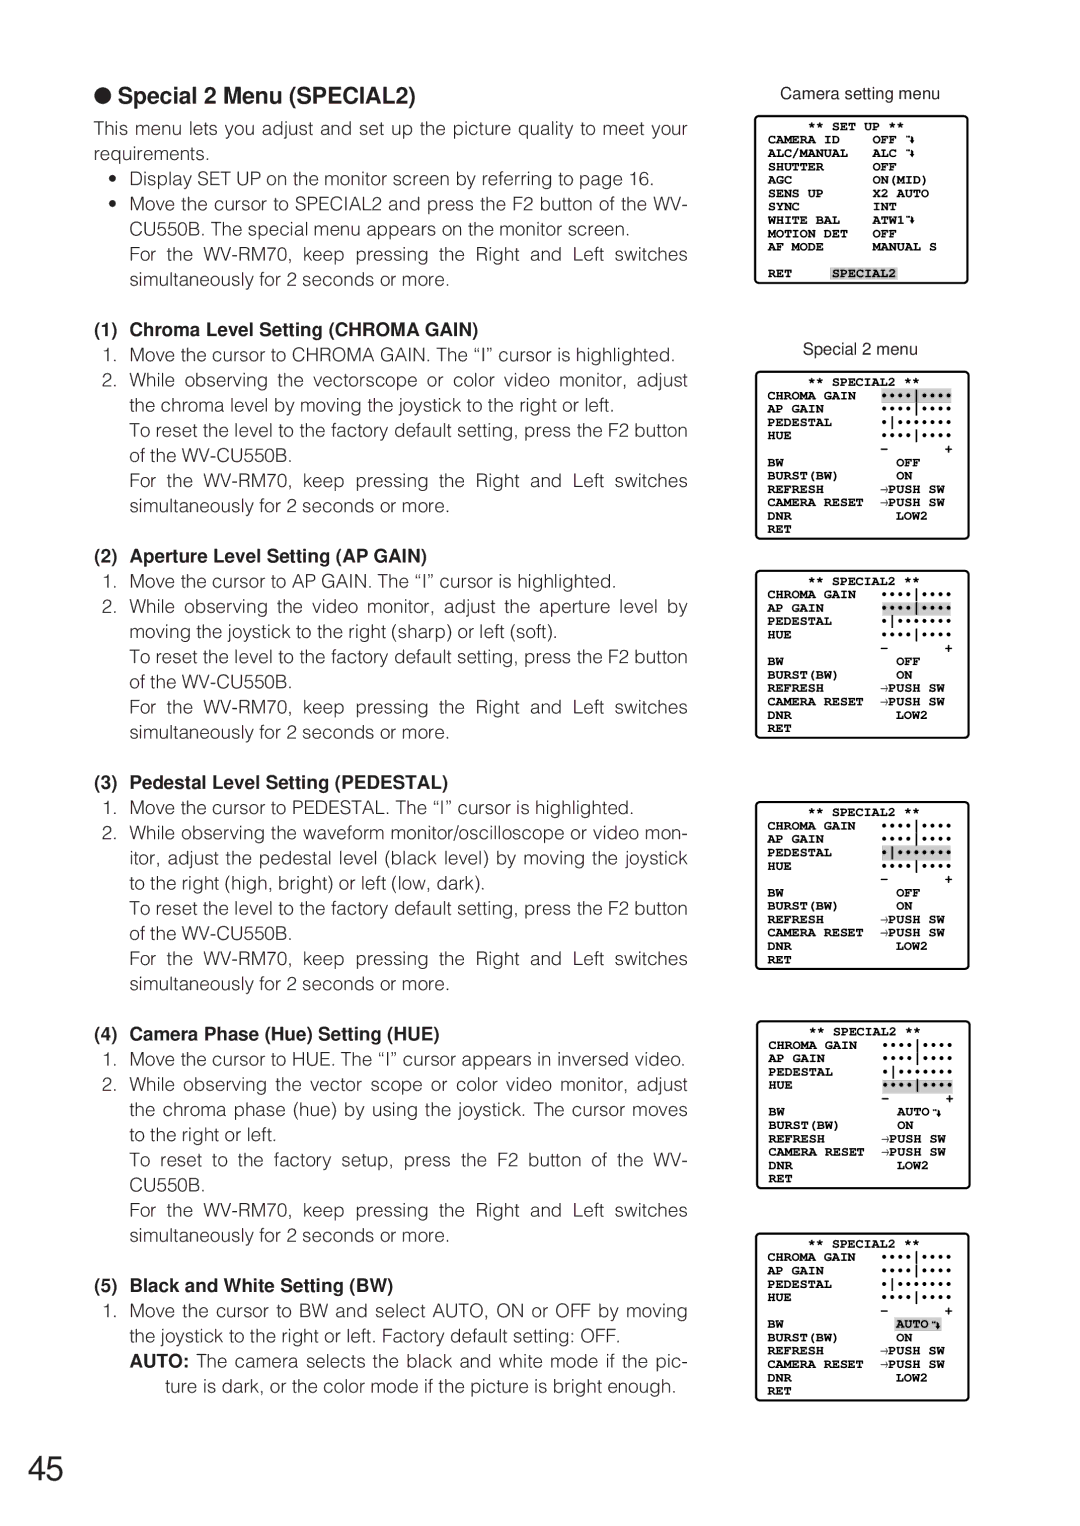
•Display SET UP on the monitor screen by referring to page 16.
•Move the cursor to SPECIAL2 and press the F2 button of the WV- CU550B. The special menu appears on the monitor screen.
For the
(1) Chroma Level Setting (CHROMA GAIN)
1.Move the cursor to CHROMA GAIN. The “I” cursor is highlighted.
2.While observing the vectorscope or color video monitor, adjust the chroma level by moving the joystick to the right or left.
To reset the level to the factory default setting, press the F2 button of the
For the
(2) Aperture Level Setting (AP GAIN)
1.Move the cursor to AP GAIN. The “I” cursor is highlighted.
2.While observing the video monitor, adjust the aperture level by moving the joystick to the right (sharp) or left (soft).
To reset the level to the factory default setting, press the F2 button of the
For the
(3) Pedestal Level Setting (PEDESTAL)
1.Move the cursor to PEDESTAL. The “I” cursor is highlighted.
2.While observing the waveform monitor/oscilloscope or video mon- itor, adjust the pedestal level (black level) by moving the joystick to the right (high, bright) or left (low, dark).
To reset the level to the factory default setting, press the F2 button of the
For the
(4) Camera Phase (Hue) Setting (HUE)
1.Move the cursor to HUE. The “I” cursor appears in inversed video.
2.While observing the vector scope or color video monitor, adjust the chroma phase (hue) by using the joystick. The cursor moves to the right or left.
To reset to the factory setup, press the F2 button of the WV- CU550B.
For the
(5) Black and White Setting (BW)
1.Move the cursor to BW and select AUTO, ON or OFF by moving the joystick to the right or left. Factory default setting: OFF. AUTO: The camera selects the black and white mode if the pic-
ture is dark, or the color mode if the picture is bright enough.
Camera setting menu
** SET UP **
CAMERA ID | OFF | ||
ALC/MANUAL | ALC | ||
SHUTTER |
| OFF | |
AGC |
| ON(MID) | |
SENS UP |
| X2 AUTO | |
SYNC |
| INT | |
WHITE BAL | ATW1 | ||
MOTION DET | OFF | ||
AF MODE |
| MANUAL S | |
RET |
|
| |
SPECIAL2 | |||
Special 2 menu
** SPECIAL2 ** |
|
| ||||||
CHROMA GAIN |
| •••••••• |
| |||||
AP GAIN |
| •••••••• |
| |||||
PEDESTAL | •••••••• | |||||||
HUE | •••••••• | |||||||
BW | - |
| OFF | + |
| |||
|
|
|
|
|
| |||
BURST(BW) | → |
| ON |
|
| |||
REFRESH | PUSH SW |
|
| |||||
CAMERA RESET | → | PUSH SW |
|
| ||||
DNR |
|
|
|
| LOW2 |
|
| |
RET |
|
|
|
|
|
|
|
|
** SPECIAL2 ** |
|
| ||||||
CHROMA GAIN | •••••••• | |||||||
AP GAIN |
| •••••••• |
| |||||
PEDESTAL | •••••••• |
| ||||||
HUE | •••••••• | |||||||
BW | - |
| OFF | + |
| |||
|
|
|
|
|
| |||
BURST(BW) | → |
| ON |
|
| |||
REFRESH | PUSH SW |
|
| |||||
CAMERA RESET | → | PUSH SW |
|
| ||||
DNR |
|
|
|
| LOW2 |
|
| |
RET |
|
|
|
|
|
|
|
|
** SPECIAL2 ** |
|
| ||||||
CHROMA GAIN | •••••••• | |||||||
AP GAIN | •••••••• | |||||||
PEDESTAL |
| •••••••• |
| |||||
HUE |
| •••••••• |
| |||||
BW | - |
| OFF | + |
| |||
|
|
|
|
|
| |||
BURST(BW) | → |
| ON |
|
| |||
REFRESH | PUSH SW |
|
| |||||
CAMERA RESET | → | PUSH SW |
|
| ||||
DNR |
|
|
|
| LOW2 |
|
| |
RET |
|
|
|
|
|
|
|
|
** SPECIAL2 ** |
|
| ||||||
CHROMA GAIN |
| •••••••• | ||||||
AP GAIN |
| •••••••• | ||||||
PEDESTAL |
| •••••••• | ||||||
HUE |
|
| •••••••• |
| ||||
BW |
| - | AUTO | + |
| |||
|
|
|
|
|
| |||
BURST(BW) |
| → |
| ON |
|
| ||
REFRESH |
| PUSH SW | ||||||
CAMERA RESET |
| → | PUSH SW | |||||
DNR |
|
|
|
| LOW2 |
|
| |
RET |
|
|
|
|
|
|
|
|
** SPECIAL2 ** |
|
| ||||||
CHROMA GAIN | •••••••• | |||||||
AP GAIN | •••••••• | |||||||
PEDESTAL | •••••••• | |||||||
HUE | •••••••• | |||||||
BW | - |
|
|
| + |
| ||
|
|
|
| AUTO |
|
|
| |
BURST(BW) | → |
| ON |
|
|
| ||
REFRESH | PUSH SW |
|
| |||||
CAMERA RESET | → | PUSH SW |
|
| ||||
DNR |
|
|
|
| LOW2 |
|
| |
RET |
|
|
|
|
|
|
|
|
45