1.Preparations
(1)Procure a ceiling mount bracket.
(2)Installation Surface
CAUTION: Consult an expert on the load bearing capacity of the installa- tion surface and structure. If the sur- face is not strong enough, the cam- era may fall down. Refer to the prod- uct specifications for weights.
Prepare appropriate hardware (e.g. wall nuts, anchor bolts, etc.) for fixing on the installation surface.
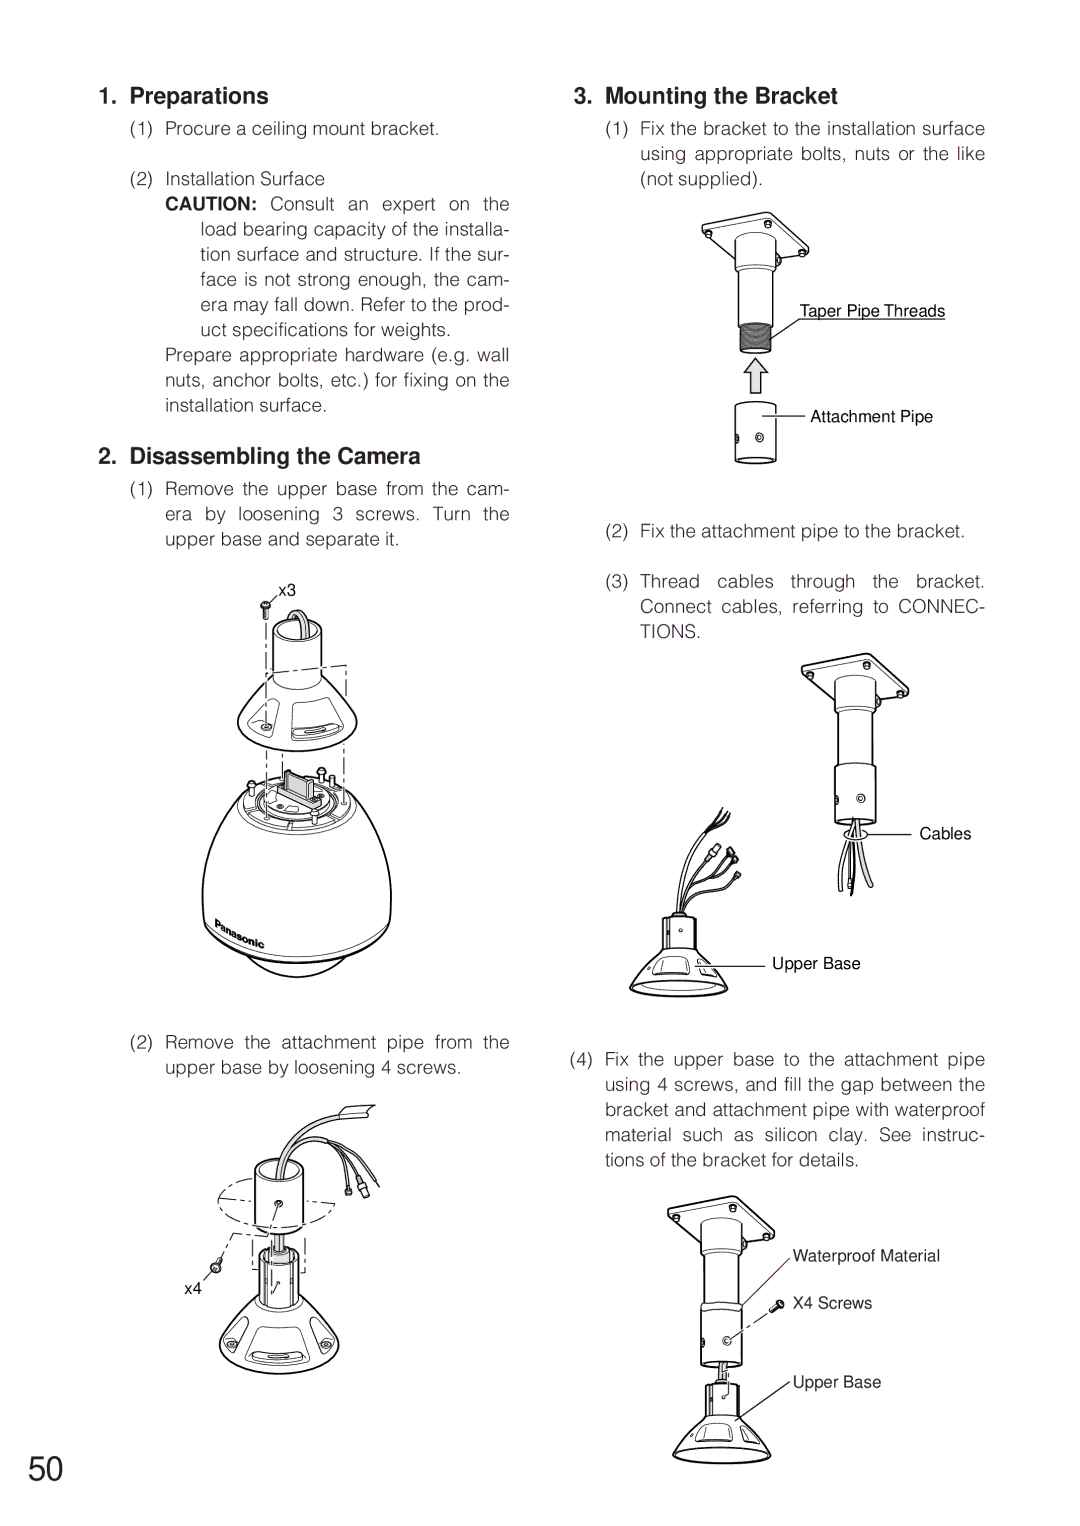
2.Disassembling the Camera
(1)Remove the upper base from the cam- era by loosening 3 screws. Turn the upper base and separate it.
x3
(2)Remove the attachment pipe from the upper base by loosening 4 screws.
x4
3.Mounting the Bracket
(1)Fix the bracket to the installation surface using appropriate bolts, nuts or the like (not supplied).
Taper Pipe Threads
![]() Attachment Pipe
Attachment Pipe
(2)Fix the attachment pipe to the bracket.
(3)Thread cables through the bracket. Connect cables, referring to CONNEC-
TIONS.
![]() Cables
Cables
![]()
![]() Upper Base
Upper Base
(4)Fix the upper base to the attachment pipe using 4 screws, and fill the gap between the bracket and attachment pipe with waterproof material such as silicon clay. See instruc- tions of the bracket for details.
Waterproof Material
 X4 Screws

 Upper Base
50